
Introduction
Photography is not just about taking pictures but capturing memories and moments that last a lifetime. However, it can be frustrating when the photos captured aren’t up to your expectations. The key to mastering your camera and taking better photos is to understand the basics of photography – camera settings, composition, accessories, lighting, and techniques.

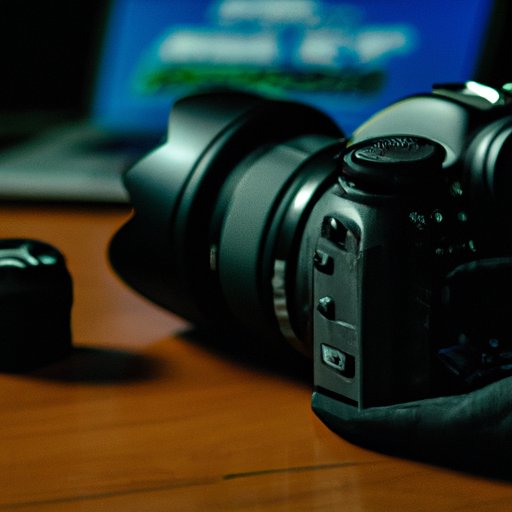
6 Simple Yet Effective Tips for Mastering Your Camera Settings
The camera settings control three important aspects of photography – aperture, shutter speed, and ISO. Understanding these settings and how they interact with each other is essential for taking great photos.
Aperture
Aperture refers to the opening size through which light enters the camera. It is represented by an f-number, such as f/4 or f/11. The lower the f-number, the larger the aperture size, allowing more light to enter the camera. A larger aperture creates a shallow depth of field, which is useful for blurring the background and drawing attention to the subject. A smaller aperture creates a greater depth of field, making everything in the photo appear sharper.
Shutter Speed
Shutter speed refers to how long the camera’s shutter remains open. A fast shutter speed freezes action and is good for sports or wildlife photography. A slower shutter speed creates a sense of motion blur, great for capturing movement in a photo. However, slow shutter speeds also increase the likelihood of camera shake, so use a tripod to stabilize your camera when working with slow shutter speeds.
ISO
ISO refers to the camera’s sensitivity to light. A high ISO, such as 1600 or 3200, is useful for low-light situations. However, higher ISO also introduces digital noise into the photo, which can make it appear grainy. A lower ISO produces less noise and is useful when sufficient light is available.
Tips for Adjusting Settings
The following tips can help you adjust camera settings effectively:
– Use the camera’s aperture priority mode when you want complete control over depth of field.
– For fast-moving subjects, use shutter priority mode to get sharp images.
– In low-light situations, increase ISO to allow more light into the camera.
– Place the camera on a tripod for slow shutter speeds.
– Experiment with different aperture and shutter speed settings to create unique effects.
– Don’t be afraid of manual mode – it provides complete control over settings and allows you to create any photo you imagine.
Capture Your Best Photos Yet: A Beginner’s Guide to Composition
Composition is the arrangement of visual elements in a photo. It can transform an ordinary photo into a masterpiece. Here are some tips to improve your photo’s composition:
Rule of Thirds
The rule of thirds is the most basic composition rule. It divides the photo into a grid of nine equal parts and places the subject at one of the intersecting points. This creates a dynamic and balanced photo and prevents the subject from appearing centered and static.
Leading Lines
Leading lines are an excellent compositional tool to create depth and draw the viewer’s eyes into the photo. They can be anything from roads, pathways, or even shadows. Leading lines can also be used to lead the eyes to the subject.
Foreground, Middle Ground, and Background
Foreground, middle ground, and background create depth in photos. It provides a sense of scale and separates the subject from the surroundings. Use leading lines or natural elements like plants or rocks to create a visual hierarchy and emphasize the subject.
10 Must-Have Accessories for Every Photographer
Photography accessories can make a big difference, and some accessories are must-haves for every photographer.
1. Tripod
A tripod is essential for stabilizing your camera during slow shutter speeds, self-portraits, or group photos. It’s also useful for taking long exposures and time-lapse photos.
2. Filters
Filters are useful for controlling light and creating unique effects in your photos. Polarizing filters cut out reflections and glare, while neutral density filters reduce the light entering the camera, allowing for slower shutter speeds.
3. Remote or Cable Release
A remote or cable release allows you to trigger the camera shutter without touching the camera, reducing the chances of camera shake in slow shutter speed situations.
4. Lens Cleaner
Dust and dirt can accumulate on camera lenses and affect photo quality. Use a lens cleaner to keep your lenses clean and sparkling.
5. Extra Memory Cards and Batteries
Memory cards and batteries are crucial for any photographer. Keep extra memory cards and batteries in your camera bag to avoid missing any great shots.
6. Light Meter
A light meter measures the amount of light falling on the subject and provides a reading for correct exposure. Use a light meter when using film cameras or when you need precise exposure calculations.
7. Flash
A flash is useful when shooting indoors or in low-light environments. It can fill in shadows and provide additional lighting when needed.
8. Camera Bag
A good quality camera bag is an investment. It protects your camera and accessories and is essential for carrying everything conveniently.
9. Lens Hood
A lens hood deflects unwanted light and glare from the lens, reducing lens flares and improving image contrast.
10. Cleaning Kit
A cleaning kit includes all the cleaning essentials for your camera’s lens, sensor, and body. Keeping your camera clean helps to maintain its longevity.
The Power of Lighting: How to Use Light to Enhance Your Photos
Lighting is one of the essential aspects of photography. Light can create a mood, emphasize texture, and add depth to a photo.
1. Golden Hour
The golden hour is the time of day when the sun is low on the horizon, creating a warm, beautiful glow. It occurs twice a day, just after sunrise and just before sunset. Use this time to create stunning landscape and portrait photos.
2. Flash or Artificial Lighting
Flash or artificial lighting can be used to light up dark areas or subjects with no light. However, avoid using flash directly because it can create harsh shadows. Instead, use it as fill light to give a more natural look.
3. Side Lighting
Side lighting is an excellent method to create texture and depth in photographs. It highlights the texture of the subject by casting long shadows.
4. Backlighting
Backlighting involves positioning the light source behind the subject, creating a halo effect around it. It creates a sense of depth and contrast, and the subject appears to be glowing.

From Blurry to Sharp: Tips for Capturing Crisp Photos
The most common problem in photography is blurry photos. Here are some tips to ensure sharpness:
1. Use a Tripod
A tripod is the best tool for stable shots. Use one to prevent camera shake and to capture crisp photos.
2. Hold the Camera Steady
Hold the camera firmly with both hands for stability. Secure your elbows against your body and use your chest to breathe smoothly to stabilize your shot.
3. Fast Shutter Speeds
Use higher shutter speeds to freeze action and minimize camera shake. When shooting handheld, use a shutter speed that’s at least the reciprocal of the focal length of the lens.

Create Stunning Photos with Your Phone: Tips for Mobile Photography
Mobile phones are now equipped with high-quality camera lenses that can produce stunning photos.
1. Clean the Lens
Keep your phone camera clean and wipe it regularly to avoid dust and smudges that can affect the image quality.
2. Use the Grid
Use the gridlines on your phone to improve composition.
3. Tap to Focus
Tapping the screen on the subject activates the focus on the phone. It helps to ensure that the subject is in focus.
4. Edit the Photos
Many photo editing apps are available on smartphones. Use some of them to adjust brightness, contrast, and saturation to edit your photos to perfection.
Conclusion
To become a great photographer, you need to understand your camera and the basics of photography, such as composition, lighting, and techniques. Mastering these skills takes time and practice, but following these tips can provide the tools to create compelling photos. So, grab your camera, try these tips, and have fun capturing your memories.