
I. Introduction
Have you been wondering how to take apart your Samsung dryer? You’re not alone. Many people struggle with dismantling their appliances and end up calling for repair services that cost a lot of money.
The purpose of this article is to provide you with a comprehensive guide to disassembling a Samsung dryer. From safety precautions to step-by-step instructions, you’ll learn everything you need to know about how to take apart your dryer in a safe and efficient manner.
II. Step-by-Step Guide
A. Preparation before you start: gather tools and equipment
Before you begin, make sure you have all the necessary tools and equipment. Some of the essentials include a screwdriver, pliers, wire cutters, and a putty knife. You’ll also need safety gear, such as gloves and goggles, to protect yourself from any hazards that may arise.
B. Safety precautions to take
Safety should always be a top priority when disassembling a Samsung dryer. Make sure the appliance is unplugged and that you’re working in a well-lit area. Avoid wearing loose clothing or jewelry that could get caught in the dryer’s machinery.
C. Step-by-step instructions on how to disassemble a Samsung dryer
1. Remove the lint trap and unscrew the two screws beneath it.
2. Use a putty knife to release the two clips on either side of the control panel.
3. Gently lift the control panel and disconnect the wires that connect it to the dryer.
4. Remove the screws that secure the front panel, then remove the panel and disconnect the door switch wires.
5. Use pliers to release the retaining clip on the blower wheel.
6. Disconnect the wires that lead to the motor and remove the motor.
7. Remove the screws that secure the idler pulley assembly and remove the assembly.
8. Take off the belt and drum, and the dryer is now completely disassembled.
D. Tips and tricks for removing difficult parts
Some parts may be more difficult to remove than others. If you’re having trouble, try using a lubricant to loosen the parts. Be sure to consult the owner’s manual or a professional if you’re unsure about how to remove a specific part.
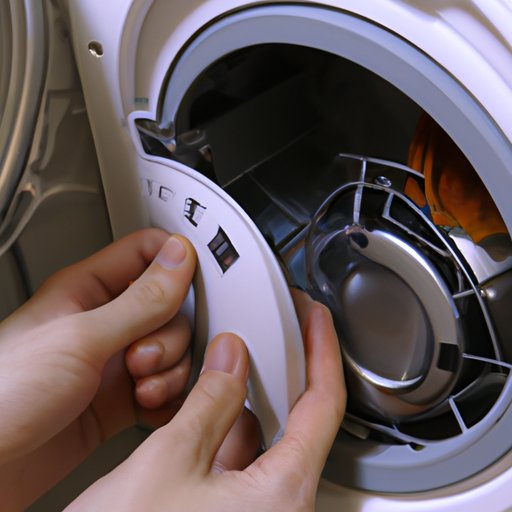
E. Image gallery to accompany the steps
For a visual reference of each step, check out our image gallery that accompanies the guide.
III. Video Tutorial
A. Introduction to the video tutorial
If you’re a visual learner, our video tutorial is the perfect way to learn how to disassemble your Samsung dryer. In this tutorial, we’ll guide you through each step, highlighting important safety precautions and providing tips and tricks along the way.
B. Step-by-step instructions on how to disassemble a Samsung dryer
Our video tutorial covers the same steps as our written guide. You’ll learn how to remove the control panel, front panel, blower wheel, motor, idler pulley assembly, belt, and drum.
C. Transcript or bullet points to provide written instructions
If you prefer to read along with the video, we provide a transcript and bullet points that summarize each step. This way, you have the option to learn through both video and written instruction.
D. Tips and tricks for removing difficult parts
Just like our written guide, our video tutorial offers tips and tricks for removing difficult parts. We demonstrate how to use lubricants to loosen parts and provide other techniques to make the process go smoothly.
E. Troubleshooting techniques
Our video tutorial also covers troubleshooting techniques in case you encounter any issues while disassembling your Samsung dryer. We’ll walk you through common issues and how to resolve them.
IV. Troubleshooting Guide
A. Explanation of the importance of troubleshooting techniques
Even with the most careful disassembly, issues may arise during the process. That’s why we’ve put together a troubleshooting guide to help you identify and fix any problems that may occur.
B. Common problems that might occur with Samsung dryers
Some common issues that may arise include overheating, noisy operation, or broken belts. Our guide will help you determine the root cause of the issue and provide steps to fix it.
C. Step-by-step guidance for troubleshooting and disassembling the dryer
Our troubleshooting guide includes step-by-step guidance for disassembling your dryer and identifying potential issues. We’ll guide you through each step to make sure you understand what you’re doing.
D. Tips and tricks for fixing problems
Our guide also includes tips and tricks for fixing common problems that may arise. We’ll provide advice on how to replace common parts like belts, motors, or bearings.
E. Cautionary tips and safety guidelines
Of course, safety is always a top priority. Our guide includes cautionary tips and safety guidelines to help you stay safe while working on your dryer.
V. Maintenance Guide
A. Explanation of the importance of regular maintenance
Proper maintenance is key to extending the life of your Samsung dryer. That’s why we’ve included a detailed maintenance guide to help you keep your dryer in top shape.
B. Overview of components that require maintenance
Our maintenance guide provides an overview of components that require routine maintenance, including filters, belts, and bearings.
C. Step-by-step instructions for disassembling and reassembling the parts
We’ll guide you through each step of the maintenance process, including disassembling and reassembling each component.
D. Maintenance tips and tricks
Our guide also includes maintenance tips and tricks to help you keep your dryer running smoothly. From how often to clean the lint trap to when to replace the belt, our guide provides all the information you need to maintain your dryer effectively.
E. Common mistakes to avoid when maintaining a dryer
Lastly, we’ll provide common mistakes to avoid when maintaining your Samsung dryer. By avoiding these mistakes, you can extend the life of your dryer and ensure it operates safely and efficiently.
VI. Frequently Asked Questions
A. Introduction to the FAQs section
In our FAQ section, we’ve compiled a list of commonly asked questions about disassembling and maintaining Samsung dryers.
B. Detailed information on what tools are required
One common question is about the tools required to disassemble your dryer. Our FAQ section provides detailed information about the tools you’ll need to complete the job.
C. Safety considerations to keep in mind
Another popular question is about safety considerations when disassembling your dryer. Our FAQ section provides guidelines for staying safe while working on your appliance.
D. Troubleshooting guide if something goes wrong
If something goes wrong during the disassembly process, our FAQ section provides a troubleshooting guide to help identify and fix the issue.
E. Commonly asked questions and answers
Lastly, our FAQ section covers commonly asked questions and provides answers to each question. Whether you’re a beginner or an experienced DIYer, our FAQ section has something for everyone.
VII. Conclusion
A. Recap of the article topics
In conclusion, we hope our guide has been helpful in answering all your questions about disassembling and maintaining Samsung dryers. We covered everything from preparation and safety precautions to troubleshooting techniques and maintenance tips.
B. Final thoughts and recommendations
If you’re still unsure about how to disassemble your dryer, we recommend consulting the owner’s manual or seeking professional help. Always prioritize safety and avoid taking risks when working on appliances.
C. Call-to-action for readers to comment or ask questions
Lastly, we invite you to leave a comment or ask any questions you may have about disassembling and maintaining a Samsung dryer. We love hearing from our readers and are always happy to help.