
Introduction
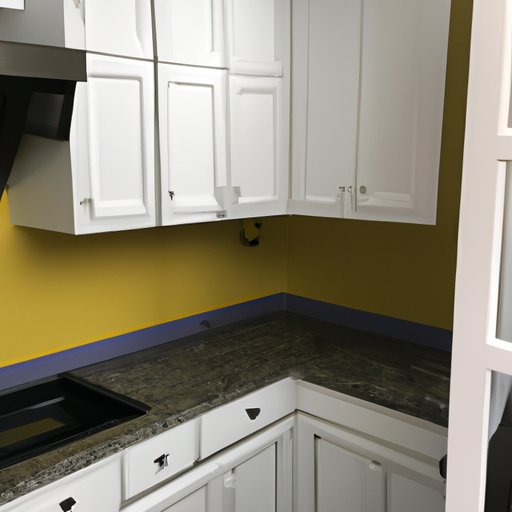
Are you looking for a way to give your kitchen a facelift without breaking the bank? Updating your kitchen cabinets is one of the most effective ways to achieve a fresh, new look in your space. But what if you don’t want to replace them entirely? Fortunately, there are plenty of options for updating kitchen cabinets without replacing them.
This article will provide an overview of the different ways you can update your kitchen cabinets without replacing them. We’ll cover everything from refinishing with paint or stain, to adding new hardware and installing cabinet doors. Read on to learn more about how to update your kitchen cabinets without replacing them!

Refinishing the Cabinets with Paint or Stain
One of the simplest ways to update your kitchen cabinets without replacing them is to refinish them with paint or stain. This method is cost-effective and can make a dramatic impact on the overall look of your kitchen. Here’s what you need to know about refinishing your cabinets with paint or stain.
Preparing the Cabinets
The first step in refinishing your cabinets is to prepare them for painting or staining. This includes removing any existing finishes, cleaning the cabinets, and sanding them down to create a smooth surface. Once the cabinets have been prepped, you’re ready to choose the right paint or stain.
Choosing the Right Paint/Stain
When it comes to choosing the right paint or stain for your cabinets, there are a few things to consider. First, think about the look you’re trying to achieve. Do you want a glossy finish or a matte finish? Second, consider the type of paint or stain you’ll be using. Oil-based paints and stains tend to be more durable and easier to clean, while water-based paints and stains are more environmentally friendly.
Applying the Paint/Stain
Once you’ve chosen the right paint or stain, it’s time to apply it to the cabinets. Start by applying a primer to ensure that the paint or stain adheres properly. Then, use a brush or roller to apply the paint or stain in even coats. Allow each coat to dry before applying the next.
Finishing Touches
Once the paint or stain has been applied, you can add some finishing touches to complete the look. Consider adding decorative hardware such as knobs or pulls for a unique touch. You can also add trim around the edges of the cabinets for a finished look.

Adding New Hardware for a Fresh Look
Another way to update your kitchen cabinets without replacing them is to add new hardware. Adding new hardware is an easy and inexpensive way to give your cabinets a fresh look. Here’s what you need to know about adding new hardware to your kitchen cabinets.
Types of Hardware
When it comes to choosing the right hardware for your cabinets, the possibilities are endless. There are many different types of hardware available, including knobs, pulls, hinges, latches, and more. Take some time to browse through the different options to find the perfect hardware for your cabinets.
Selecting the Right Hardware
When selecting the right hardware for your cabinets, consider both style and function. Think about the overall look you’re trying to achieve, as well as how the hardware will be used. For example, if you’re looking for a more modern look, opt for sleek, contemporary hardware. If you need something that’s easy to use, choose hardware with larger handles.
Installing the Hardware
Once you’ve chosen the right hardware for your cabinets, it’s time to install it. Start by measuring the distance between the holes in the cabinet doors and drawers. Then, mark the spots where you’ll be drilling the holes for the hardware. Finally, use a drill to install the hardware, making sure to use the correct screws.

Changing Out Cabinet Doors for a Customized Look
If you’re looking for a more drastic change, you can always change out the cabinet doors for a more customized look. This is a great option if you want to add a unique design element to your kitchen. Here’s what you need to know about changing out cabinet doors.
Types of Cabinet Doors
When it comes to choosing the right cabinet doors for your kitchen, there are many different options available. You can choose from traditional raised panel doors, flat panel doors, glass doors, and more. Take some time to browse through the different styles to find the ones that best suit your needs.
Choosing the Right Doors
When selecting the right doors for your cabinets, consider both style and function. Think about the overall look you’re trying to achieve, as well as how the doors will be used. For example, if you’re looking for a more modern look, opt for flat panel doors. If you need extra storage space, choose doors with shelves or drawers.
Installing the New Doors
Once you’ve chosen the right doors for your cabinets, it’s time to install them. Start by removing the old doors and measuring the openings to make sure the new doors will fit. Then, attach the hinges to the new doors and install them on the cabinets. Finally, use a drill to screw the doors into place.
Installing Peel-and-Stick Backsplash for a Quick Refresh
If you’re looking for a quick way to update your kitchen cabinets without replacing them, consider installing a peel-and-stick backsplash. Peel-and-stick backsplashes are easy to install and are a great way to add color and texture to your kitchen without breaking the bank.
Selecting the Right Backsplash
When it comes to selecting the right backsplash for your kitchen, there are many different options available. Consider the overall look you’re trying to achieve, as well as the color scheme of your kitchen. You can also choose from a variety of materials, such as ceramic tile, glass, and stainless steel.
Prepping the Area
Before installing the backsplash, you’ll need to prep the area. Start by wiping down the walls to remove any dirt or debris. Then, use a level to make sure the surface is even. Finally, measure the area to make sure you have enough material to cover it.
Installing the Backsplash
Once you’ve prepped the area, it’s time to install the backsplash. Start by peeling off the backing from the first piece of backsplash and pressing it firmly onto the wall. Continue until the entire area is covered. Once the backsplash is installed, use a damp cloth to remove any excess adhesive.
Creating Open Shelving to Increase Storage Space
If you’re looking for a way to increase storage space in your kitchen, consider creating open shelving. Open shelving is an easy and inexpensive way to add extra storage without taking up too much space. Here’s what you need to know about creating open shelving.
Measuring and Marking the Wall
The first step in creating open shelving is to measure and mark the wall. Start by measuring the area where you want the shelves to go. Then, use a level to make sure the surface is even. Finally, mark the wall with a pencil to indicate where the shelves will go.
Building the Shelves
Once you’ve marked the wall, it’s time to build the shelves. Start by cutting the boards to the desired size. Next, use wood glue and nails to assemble the shelves. Finally, use sandpaper to smooth out any rough edges.
Installing the Shelves
Once the shelves have been built, it’s time to install them. Start by pre-drilling holes into the wall. Then, use screws to attach the shelves to the wall. Finally, use a level to make sure the shelves are even.
Using Contact Paper to Update Look of Cabinets
If you’re looking for a quick and easy way to update the look of your cabinets, consider using contact paper. Contact paper is an inexpensive and versatile material that can be used to give cabinets a fresh new look. Here’s what you need to know about using contact paper to update your cabinets.
Selecting the Right Contact Paper
When it comes to selecting the right contact paper for your cabinets, there are many different options available. Consider the overall look you’re trying to achieve, as well as the color scheme of your kitchen. You can also choose from a variety of textures, such as wood grain, marble, and more.
Cleaning the Cabinets
Before applying the contact paper, it’s important to clean the cabinets. Start by wiping down the cabinets with a damp cloth to remove any dust or debris. Then, use a mild detergent and warm water to thoroughly clean the cabinets.
Applying the Contact Paper
Once the cabinets have been cleaned, it’s time to apply the contact paper. Start by measuring the area to make sure you have enough material to cover it. Then, peel off the backing from the contact paper and press it firmly onto the cabinets. Use a ruler or credit card to smooth out any air bubbles.
Conclusion
Updating your kitchen cabinets without replacing them is a great way to give your kitchen a facelift without breaking the bank. From refinishing with paint or stain, to adding new hardware and installing cabinet doors, there are many different ways to update your kitchen cabinets without replacing them. We hope this article has provided you with the information you need to get started on your kitchen cabinet update project!
In summary, the steps for updating kitchen cabinets without replacing them include: preparing the cabinets; choosing the right paint or stain; applying the paint or stain; adding new hardware; changing out cabinet doors; installing peel-and-stick backsplash; creating open shelving; and using contact paper. By following these steps, you can give your kitchen a fresh, new look without having to replace the cabinets.
The benefits of updating kitchen cabinets without replacing them include cost savings, increased storage space, and the ability to customize the look of your cabinets.