
Introduction
Mold candles are a great way to add an extra touch of beauty and style to any room or occasion. They are easy to make and require very few materials. By using different molds and creative techniques, you can create unique candles that will be sure to impress your friends and family.
Making mold candles is not only fun, but it also has many benefits. You can customize the size, shape, and color of your candles to suit any setting. And since you’re in charge of the entire process, you can ensure that your candles are made with safe ingredients and high-quality materials.
Step-by-Step Guide to Making Mold Candles
Making mold candles is easier than you might think. Here’s a step-by-step guide to help you get started.
What materials are needed
To make mold candles, you’ll need the following materials: wax, wick, mold, thermometer, double boiler, stirring rod, and decorations (optional).
How to properly prepare the mold
Before you start melting the wax, make sure to thoroughly clean and dry the mold. This will help ensure that your candles come out looking their best.
Instructions for melting the wax
Once the mold is prepared, it’s time to melt the wax. Place the wax in a double boiler and heat it until it reaches a temperature of 175°F (79°C). Stir the wax occasionally to prevent it from burning.
Tips for pouring the wax into the mold
When the wax is melted, it’s time to pour it into the mold. Make sure to do this slowly and carefully, and avoid splashing the wax onto the sides of the mold. Once the wax is poured, insert the wick into the center of the mold.
Cooling and releasing the candle from the mold
Once the wax has cooled and hardened, remove the candle from the mold. Carefully peel away the sides of the mold to release the candle. If necessary, use a sharp knife to cut away any excess wax.
Crafting Creative Candles with Molds
Now that you know the basics of making mold candles, it’s time to get creative. Here are some ideas for incorporating decorations into your candle.
Ideas for incorporating decorations into your candle
You can add a unique touch to your candles with decorations such as beads, glitter, dried flowers, shells, and more. You can even use food coloring to tint the wax for a colorful effect.
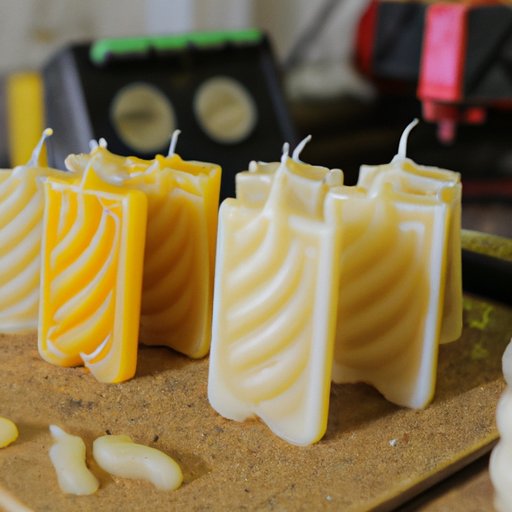
Techniques for creating unique shapes and designs
If you want to create candles with interesting shapes and designs, try using multiple molds or combining different types of waxes. You can even create layered candles by pouring different colors of wax into the mold one at a time.

DIY Candle Making Using Molds
When it comes to making candles using molds, there are many different options available. Here’s a look at some of the most popular types of molds.
Different types of molds available
The most common type of mold used for making candles is a plastic container. However, there are also other types of molds available, such as silicone molds, metal molds, and glass molds. Each type of mold has its own advantages and disadvantages, so it’s important to choose the right type for your project.
Choosing the right type of mold for your project
When selecting a mold for your candle-making project, consider the size and shape of the mold, as well as the type of wax you plan to use. Different types of waxes may require different types of molds.

How to Make Beautiful Mold Candles at Home
Making beautiful mold candles at home is easier than you might think. Here are some tips for preparing your work area and achieving a professional finish.
Preparing the work area
Before you begin making your candles, make sure that your work area is clean and free of clutter. It’s also important to make sure that the wax is at the proper temperature before pouring it into the mold.
Techniques for achieving a professional finish
Once you have poured the wax into the mold, let it cool completely before attempting to remove it. If you find that the edges of the candle are uneven, you can use a file or sandpaper to smooth them out. Finally, make sure to trim the wick to the desired length before lighting the candle.

Tips and Tricks for Crafting Mold Candles
Making mold candles can be tricky at times. Here are some tips and tricks to help you avoid common mistakes and troubleshoot when things don’t go as planned.
How to avoid common mistakes
One of the most common mistakes when making mold candles is not allowing the wax to cool completely before removing it from the mold. This can cause the candle to lose its shape and crack. Other mistakes include not measuring the temperature of the wax correctly, not stirring the wax often enough, and not using the right type of mold for the wax.
Troubleshooting when things don’t go as planned
If your candles don’t turn out as expected, don’t give up! Try re-melting the wax and adjusting the temperature or stirring more frequently. If necessary, you can also try using a different type of mold or adding decorations to hide any imperfections.
Unique Ideas for Making Mold Candles
When making mold candles, you can get creative and incorporate unique elements into your design. Here are some ideas for making your candles stand out.
Incorporating scents into your candles
Adding essential oils or fragrance oils to your wax can give your candles a pleasant scent. Be sure to use only a few drops of oil, as too much can cause the wax to become brittle.
Creating interesting color combinations
Using several different colors of wax can create interesting and unique effects. Try layering different colors of wax or combining different shades of the same color to create a gradient effect.
Conclusion
Making mold candles is a fun and rewarding experience. With the right materials and techniques, you can create beautiful and unique candles that will last for years. To get started, make sure to properly prepare the mold, measure the temperature of the wax, and stir the wax often while melting. Additionally, you can get creative by incorporating scents and decorations into your candles, or experimenting with different colors and shapes. With a little practice, you’ll be crafting beautiful mold candles in no time!