
Introduction
A kitchen faucet leak is an annoying and potentially costly problem that can cause water damage in your home. It is important to identify the source of the leak and take steps to fix it as soon as possible. In this article, we will explore the causes of kitchen faucet leaks and provide a comprehensive guide on how to fix them.

Definition of a Kitchen Faucet Leak
A kitchen faucet leak occurs when water seeps out of the faucet or through its connecting parts. This can be caused by worn out or damaged components such as washers, O-rings, seals, valves, or the handle. Common signs of a leaking kitchen faucet include dripping water, wet spots on the countertop, or water pooling on the floor.

Reasons Why a Kitchen Faucet Might Leak
There are many potential causes of a leaking kitchen faucet. Wear and tear over time can cause components to become worn or damaged, resulting in water leakage. Other common causes of a kitchen faucet leak include improper installation, loose connections, clogged aerators, or faulty valves.
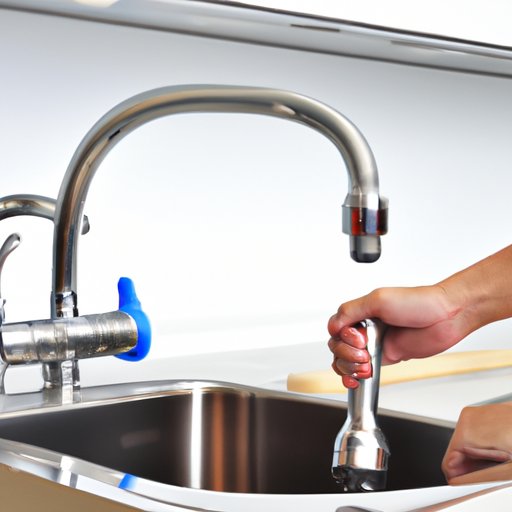
Step-by-Step Guide to Repairing a Leaky Kitchen Faucet
Repairing a leaking kitchen faucet may seem like a daunting task, but with the right tools and knowledge, it can be done quickly and easily. Here is a step-by-step guide on how to fix a kitchen faucet leak.
Step 1: Shut off the Water Supply
The first step in repairing a leaking kitchen faucet is to shut off the water supply. This can usually be done by turning off the main water valve or the shut-off valve under the sink. Make sure to turn off both hot and cold water supplies.
Step 2: Determine the Type of Faucet
Once the water supply has been shut off, you’ll need to determine the type of faucet you have. This will help you determine which parts you’ll need to replace or repair. You can usually identify the type of faucet by looking at the manufacturer’s name or logo on the handle or spout.
Step 3: Remove the Handle and Valve Assembly
Next, you’ll need to remove the handle and valve assembly. This may require a screwdriver and a wrench. Be sure to keep track of all the parts as you disassemble them. This will make it easier to put everything back together later.
Step 4: Inspect the Parts and Replace Any Damaged Components
Once the handle and valve assembly have been removed, inspect all the parts for damage. If any of the components are worn or damaged, they should be replaced. Common parts that may need to be replaced include the O-rings, washers, and seals.
Step 5: Reassemble the Handle and Valve Assembly
Now that all the parts have been inspected and replaced, it’s time to reassemble the handle and valve assembly. Make sure to follow the manufacturer’s instructions when putting the pieces back together.
Step 6: Turn On the Water Supply and Test for Leaks
Once the handle and valve assembly have been reassembled, turn on the water supply and test for leaks. If there are no leaks, then the repair is complete. If there are still leaks, then you may need to troubleshoot further.
Troubleshooting and Fixing a Dripping Kitchen Faucet
If your kitchen faucet is still leaking after following the above steps, then you will need to troubleshoot further. Here are some tips for troubleshooting and fixing a dripping kitchen faucet.
Identifying the Cause of the Leak
The first step in troubleshooting a leaking kitchen faucet is to identify the cause of the leak. This can be done by inspecting the parts and checking for signs of damage or wear. Once the cause of the leak has been identified, it can be addressed accordingly.
Replacing O-Rings, Washers and Seals
If the cause of the leak is worn or damaged O-rings, washers, or seals, then these components should be replaced. Be sure to use the correct size and type of component for best results.
Cleaning and Lubricating Moving Parts
If the cause of the leak is due to dirt or corrosion, then the parts should be cleaned and lubricated. Use a non-abrasive cleaner to clean the parts, and then lubricate them with a silicone-based lubricant.

DIY Fix for a Leaking Kitchen Faucet
If you’re looking for a quick and easy fix for a leaking kitchen faucet, then a DIY repair might be the way to go. Here are some tools and tips you’ll need for a successful DIY repair.
Tools Needed
Before beginning a DIY repair, you will need to gather the necessary tools. These include a screwdriver, a wrench, plumber’s grease, Teflon tape, and a replacement O-ring, washer, or seal (if needed).
Tips for Repairing a Kitchen Faucet
When performing a DIY repair, it is important to follow safety precautions and work carefully. Be sure to read the manufacturer’s instructions before beginning the repair. Also, if you are not confident in your ability to perform the repair, it is best to seek professional assistance.
How to Quickly and Easily Stop a Leaky Kitchen Faucet
If you need to quickly and easily stop a leaking kitchen faucet, there are a few simple steps you can take. Here are some tips for stopping a leaky kitchen faucet.
Checking the Faucet for Obvious Signs of Damage
The first step is to check the faucet for obvious signs of damage such as cracks or rust. If any of these are present, then the faucet should be replaced. If not, then the next steps can be taken.
Using Plumber’s Grease or Teflon Tape
If the faucet is not obviously damaged, then you can try using plumber’s grease or Teflon tape to stop the leak. Apply the grease or tape to any joints or connections that may be causing the leak.
Applying a Temporary Fix
If neither of the above methods works, then you can try applying a temporary fix. Place a rag or cloth over the leaking area to absorb the water. This will buy you some time until you can properly repair the faucet.
How to Fix a Kitchen Faucet Leak: A Comprehensive Guide
Fixing a kitchen faucet leak requires patience and attention to detail. Here is a comprehensive guide on how to fix a kitchen faucet leak.
Assessing the Problem
The first step in repairing a kitchen faucet leak is to assess the problem. Identify the type of faucet you have and inspect the parts for signs of damage or wear. This will help you determine the cause of the leak and what needs to be done to fix it.
Disassembling the Faucet
Once the cause of the leak has been determined, it’s time to disassemble the faucet. This may require a screwdriver and a wrench. Be sure to keep track of all the parts as you disassemble them.
Replacing Parts as Necessary
If any of the parts are worn or damaged, they should be replaced. Common parts that may need to be replaced include the O-rings, washers, and seals.
Testing for Leaks
Once the parts have been replaced, it’s time to test for leaks. Turn on the water supply and check for any signs of leakage. If all is well, then the repair is complete.
Conclusion
Fixing a kitchen faucet leak doesn’t have to be a stressful or time-consuming task. With the right tools and knowledge, you can quickly and easily repair your kitchen faucet leak. This article provided a comprehensive guide on how to fix a kitchen faucet leak, from identifying the cause of the leak to testing for leaks. For more information and resources on kitchen faucet repair, visit our website.