
Introduction
Closing a gift bag properly is an important part of the gifting process. It’s not only necessary to ensure that the gift remains secure and intact, but it can also add a unique, personal touch. Whether you’re wrapping gifts for a special occasion or just want to make someone feel extra special, knowing how to close a gift bag correctly can be a valuable skill. Here, we provide a step-by-step guide to help you create beautiful, professional-looking gift bags with ease.
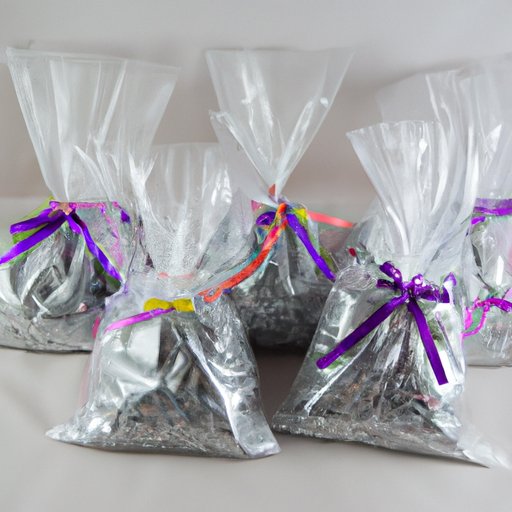
Step-by-Step Guide to Closing Gift Bags with Ribbon
Using ribbon to close a gift bag is a simple yet elegant solution. With the right supplies and techniques, you can create a secure and stylish closure in no time. Here’s what you need to know:
Supplies Needed
To close a gift bag with ribbon, you will need:
- Ribbon
- Scissors
- Double-sided tape
Step-by-Step Instructions
- Cut the ribbon to the desired length. For a standard-sized bag, measure out a piece of ribbon about two feet long.
- Secure one end of the ribbon to the top of the bag using double-sided tape.
- Tie the other end of the ribbon into a bow.
- Secure the bow to the bag using double-sided tape.
Tips and Tricks
- Choose a ribbon color that complements the gift bag.
- Experiment with different types of ribbon for a unique look.
- For added security, use a piece of string or twine to tie the ribbon into a knot instead of a bow.
How to Create a Secure and Stylish Bow on Gift Bags
Creating a bow is a great way to add a finishing touch to your gift bag. Here’s how to do it:
Supplies Needed
You will need:
- Ribbon
- Scissors
- Double-sided tape
Step-by-Step Instructions
- Cut the ribbon to the desired length. For a standard-sized bag, you’ll need a piece of ribbon that’s at least three feet long.
- Fold the ribbon in half to form a loop.
- Twist the ends of the ribbon together to form a “figure 8” shape.
- Pull the folded end of the ribbon through the center of the “figure 8” to form a bow.
- Secure the bow to the bag using double-sided tape.
Tips and Tricks
- Choose a ribbon color that complements the gift bag.
- For added security, use a piece of string or twine to tie the ribbon into a knot instead of a bow.
- Experiment with different types of ribbon for a unique look.

Tips for Sealing Gift Bags with Ease
When it comes to sealing gift bags, there are several options available. The type of closure you choose will depend on the size and contents of the bag, as well as the look you’re trying to achieve. Here are some tips for sealing gift bags with ease:
Different Types of Closures
The most common types of closures for gift bags include:
- Tape: A simple strip of tape across the top of the bag is an easy and affordable way to seal it.
- Stickers: Stickers are a fun and creative way to seal a gift bag. There are many designs and colors to choose from.
- Ribbon: Using ribbon to tie the top of the bag closed is a classic and elegant solution.
Best Practices for Sealing
No matter which type of closure you choose, here are some best practices for sealing gift bags:
- Make sure the closure is secure and won’t come undone easily.
- Choose a closure that complements the color and design of the bag.
- If possible, avoid using tape directly on the gift itself.
A Beginner’s Guide to Closing Gift Bags with Tissue Paper
Tissue paper is a great way to give your gift bags a unique look. Here’s how to do it:
Supplies Needed
You will need:
- Tissue paper
- Scissors
- Double-sided tape
Step-by-Step Instructions
- Cut the tissue paper to the desired size. For a standard-sized bag, you’ll need a piece of tissue paper that’s at least 12 inches wide by 20 inches long.
- Fold the tissue paper in half lengthwise.
- Fold the tissue paper in half again lengthwise.
- Secure the tissue paper to the top of the bag using double-sided tape.
Tips and Tricks
- Choose a tissue paper color that complements the gift bag.
- Experiment with different types of tissue paper for a unique look.
- For added security, use a piece of string or twine to tie the tissue paper into a knot.

Quick and Easy Ways to Close Gift Bags with Decorative Tape
Decorative tape is a great way to add a special touch to your gift bags. Here’s how to do it:
Supplies Needed
You will need:
- Decorative tape
- Scissors
Step-by-Step Instructions
- Cut the decorative tape to the desired length. For a standard-sized bag, you’ll need a piece of tape that’s at least two feet long.
- Secure one end of the tape to the top of the bag.
- Wrap the tape around the bag and secure the other end to the top of the bag.
Tips and Tricks
- Choose a tape color that complements the gift bag.
- Experiment with different types of tape for a unique look.
- For added security, use a piece of string or twine to tie the tape into a knot.
Conclusion
Closing a gift bag properly can add a tasteful and personal touch to any gift. Whether you’re using ribbon, tissue paper, or decorative tape, following the steps outlined above will help you create beautiful, professional-looking gift bags with ease. With a little practice, you’ll soon be able to make perfect gift bags every time!
Summary of Key Points
In this article, we discussed how to close gift bags with ribbon, bows, tissue paper, and decorative tape. We outlined the supplies needed for each method and provided step-by-step instructions, as well as tips and tricks for creating secure and stylish gift bags with ease.
Benefits of Closing Gift Bags Properly
Closing gift bags properly offers many benefits, including:
- Ensuring that the gift remains secure and intact.
- Adding a unique, personal touch to the gift.
- Creating beautiful, professional-looking gift bags with ease.