
Introduction
Changing out an old kitchen sink for a new one can be a daunting task. However, with the right supplies and a little know-how, it is possible to do it yourself. This article provides a step-by-step guide on how to change a kitchen sink.
Before getting started, it is important to have the necessary supplies. These include a basin wrench, adjustable wrench, adjustable pliers, a bucket, a rag, and a pair of gloves. Additionally, you will need a new sink, along with any necessary hardware such as mounting clips.
Shutting Off the Water Supply
The first step in changing a kitchen sink is to shut off the water supply. This can be done by locating the water shutoff valves under the sink. These valves control the flow of water to the faucet, so they must be turned off before any work can begin.
Once the valves are located, turn them off by turning the handle clockwise until it stops. This will stop the flow of water to the faucet and prevent any accidental flooding.
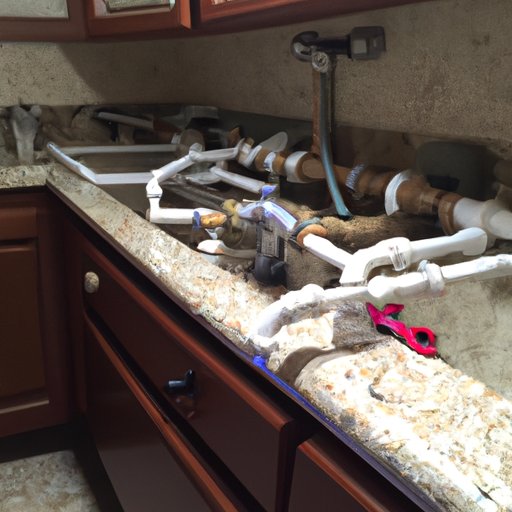
Disconnecting the Plumbing
The next step is to disconnect the plumbing. Start by removing the drain pipe from the sink. This can be done by using an adjustable wrench or basin wrench to loosen the nut that holds the pipe in place. Once the nut is loose, the pipe should be able to be pulled out.
Next, disconnect the water lines from the faucet. Again, use an adjustable wrench or basin wrench to loosen the nuts that hold the lines in place. Once the nuts are loose, the lines should be able to be pulled out.
Removing the Old Sink
The third step is to remove the old sink. Start by unscrewing the mounting clips that hold the sink in place. These clips are usually located around the edges of the sink. Once the clips are removed, the sink should be able to be lifted away from the countertop.
Installing the New Sink
The fourth step is to install the new sink. Start by placing the new sink in position. Make sure that the sink is level and secure before proceeding. Next, secure the sink with the mounting clips. Be sure to tighten the clips securely to ensure that the sink does not move.
Connecting the Plumbing
The fifth step is to connect the plumbing. Begin by connecting the water lines to the faucet. Use an adjustable wrench or basin wrench to tighten the nuts that hold the lines in place. Once the nuts are tight, the lines should be secure.
Next, connect the drain pipe to the sink. Again, use an adjustable wrench or basin wrench to tighten the nut that holds the pipe in place. Once the nut is tight, the pipe should be secure.
Testing the New Sink
The final step is to test the new sink. To do this, turn on the water supply at the shutoff valves. Check for any leaks around the sink, drain pipe, and water lines. If there are no leaks, the installation is complete.
Conclusion
In summary, replacing a kitchen sink is a relatively simple process. All that is required is the right supplies, a little know-how, and the willingness to get your hands dirty. By following these steps, you will be able to successfully change out your old kitchen sink for a new one.