
Introduction
Outdoor kitchens are becoming increasingly popular as homeowners look for more ways to enjoy their outdoor space. Building an outdoor kitchen with a wood frame is a great way to create an attractive and functional space for entertaining guests or cooking meals outdoors. This guide will provide an overview of the process for building an outdoor kitchen with a wood frame, as well as a step-by-step guide, tips on design and construction, and suggestions on how to maintain and care for your new outdoor kitchen.
Overview of Building an Outdoor Kitchen with a Wood Frame
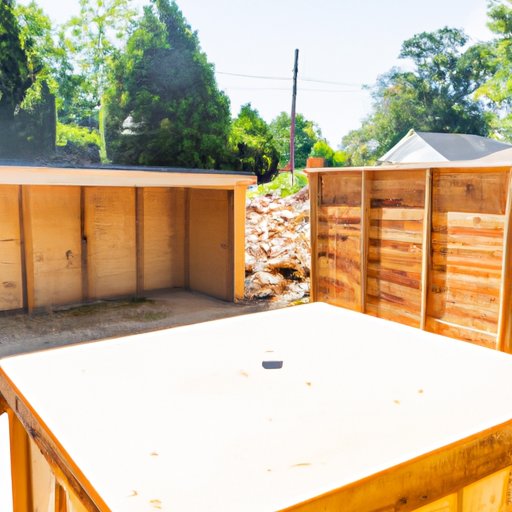
Building an outdoor kitchen with a wood frame is a relatively simple process, but it requires some planning and preparation. You’ll need to choose the right type of wood for the frame, select the best layout for your space, construct the frame, secure it to the ground, prepare the area for installation, install the appliances and counters, and add the final touches. With careful planning and attention to detail, you can create a beautiful outdoor kitchen that is both functional and aesthetically pleasing.
Benefits of Building an Outdoor Kitchen with a Wood Frame
There are many benefits to building an outdoor kitchen with a wood frame. Wood is an affordable and versatile material that can be easily cut and shaped to fit any space. It is also strong and durable, so it can withstand the elements. Additionally, wood is a natural material that adds warmth and beauty to any outdoor space.
Step-by-Step Guide to Building an Outdoor Kitchen with a Wood Frame
If you’re ready to start building your outdoor kitchen with a wood frame, follow this step-by-step guide to get started.
Choosing the Right Wood for the Frame
The first step in building an outdoor kitchen with a wood frame is to choose the right type of wood. The most common types of wood used for outdoor kitchens are cedar, redwood, and pressure-treated pine. Cedar is naturally resistant to rot and insects, making it a great choice for outdoor use. Redwood is also a good choice for outdoor kitchens because it is naturally resistant to moisture. Pressure-treated pine is a more economical option, but it should be treated with a sealant to protect it from the elements.
Selecting the Best Layout for Your Outdoor Kitchen
Once you have chosen the right type of wood, it’s time to select the best layout for your outdoor kitchen. Consider the size and shape of your space when deciding on a layout. You’ll also want to think about how many people you plan to entertain and what type of appliances you’ll need to accommodate them. Make sure to measure the area carefully before making any decisions.
Constructing the Frame
Once you have chosen the layout, it’s time to start constructing the frame. Begin by cutting the wood pieces to the desired sizes and shapes. Then, assemble the frame using screws and nails. Make sure to check each piece for level and stability as you go. Once the frame is assembled, you can begin attaching the appliances and counters.
Securing the Frame to the Ground
Once the frame is constructed, it’s important to secure it to the ground. This can be done by digging holes and filling them with concrete or by using anchors. Anchors are a quick and easy way to secure the frame, but they should be checked regularly to make sure they are still secure.

How to Create an Outdoor Kitchen Using a Wooden Frame
Now that the frame is secure, it’s time to start creating the outdoor kitchen. Here are the steps for doing so:
Preparing the Area for Installation
Before beginning the installation process, it’s important to prep the area. Clear away any debris or obstructions, and make sure the area is level and even. If the ground is uneven, you may need to use sand or gravel to level it out.
Installing the Appliances and Counters
Once the area is prepped, you can begin installing the appliances and counters. Start by placing the appliances in the designated areas. Then, install the counters and secure them to the frame with screws or nails. Finally, attach the backsplash and any other decorative elements.
Finishing Touches
Once the appliances and counters are installed, it’s time to add the finishing touches. Install lighting, hang curtains or shades, and add any other accessories you’d like. You can also add furniture and plants to create a cozy atmosphere.

DIY: Constructing an Outdoor Kitchen with a Wooden Structure
If you’re feeling up to the challenge, you can construct your own outdoor kitchen with a wooden structure. Here’s what you’ll need to do:
Gather the Necessary Tools and Materials
Before getting started, make sure you have all the necessary tools and materials. You’ll need a saw, drill, hammer, screws, nails, and other hardware, as well as the wood and other materials needed to construct the frame.
Measure and Cut the Wood
Once you have all the tools and materials, it’s time to measure and cut the wood. Be sure to measure twice and cut once to ensure accuracy. If you’re not confident in your measuring skills, you can purchase pre-cut wood at most home improvement stores.
Assemble the Frame
Once the wood is cut, it’s time to assemble the frame. Use the screws and nails to attach the pieces together. Make sure to check each piece for level and stability as you go.
Place the Appliances and Counters
Once the frame is assembled, you can begin placing the appliances and counters. Secure each piece to the frame with screws or nails. Make sure all the pieces are level and stable before moving on to the next step.

Design and Build Your Own Outdoor Kitchen with a Wooden Frame
If you’re looking for something a bit more unique, you can design and build your own outdoor kitchen with a wooden frame. Here’s how to do it:
Choosing the Right Design for Your Space
When designing your outdoor kitchen, it’s important to choose a design that complements the existing architecture of your home and fits the size and shape of your space. Consider the placement of the appliances, the type of cabinets and countertops you’d like, and any other features you’d like to include.
Installing the Cabinets, Countertops, and Flooring
Once you have chosen the design, it’s time to install the cabinets, countertops, and flooring. This is a good time to add any decorative touches, such as tile or stone accents. Make sure to measure and cut the pieces accurately to ensure a perfect fit.
Adding the Final Touches
Once the cabinets, countertops, and flooring are installed, it’s time to add the final touches. Install lighting, hang curtains or shades, and add any other accessories you’d like. You can also add furniture and plants to create a cozy atmosphere.
Utilizing Wood for an Outdoor Kitchen: A Comprehensive Guide
Wood is a great material for outdoor kitchens, but there are some things to consider before using it. Here are some pros and cons of utilizing wood for an outdoor kitchen, as well as some tips for choosing the right type of wood and taking care of it:
Pros and Cons of Utilizing Wood for an Outdoor Kitchen
The main benefit of using wood for an outdoor kitchen is that it is an affordable and versatile material that can be easily cut and shaped to fit any space. Additionally, wood is a natural material that adds warmth and beauty to any outdoor space. However, wood can be prone to rot and insect damage, so it must be properly sealed and maintained to ensure its longevity.
Tips on Choosing the Right Type of Wood
When choosing the right type of wood for your outdoor kitchen, consider the climate and weather conditions in your area. Cedar and redwood are both naturally resistant to moisture and insects, making them good choices for outdoor use. Pressure-treated pine is a more economical option, but it should be treated with a sealant to protect it from the elements.
Maintenance and Care Tips for Wooden Outdoor Kitchens
To ensure the longevity of your outdoor kitchen, it’s important to take proper care of the wood. Regularly inspect the wood for signs of rot or insect damage and treat accordingly. Additionally, seal the wood with a waterproof sealant every few years to protect it from the elements.
Conclusion
Building an outdoor kitchen with a wood frame is a great way to create an attractive and functional space for entertaining guests or cooking meals outdoors. This guide provided an overview of the process for building an outdoor kitchen with a wood frame, as well as a step-by-step guide, tips on design and construction, and suggestions on how to maintain and care for your new outdoor kitchen. With careful planning and attention to detail, you can create a beautiful outdoor kitchen that is both functional and aesthetically pleasing.