
Introduction
Using a washer with a screw is an important part of many construction projects. But do you know where the washer should go on a screw? This article will provide a comprehensive guide on how to properly install a washer on a screw and why it’s important to do so.

Definition of Washers and Screws
A washer is a thin disc or plate that is used as a spacer, spring, or sealant between two surfaces. It is usually made of metal, plastic, or rubber. Washers can also be used to distribute the load of a threaded fastener, such as a bolt or nut.
A screw is a type of fastener consisting of a helical or spiral-shaped ridge on its exterior surface. It is designed to be inserted into a pre-drilled hole in order to hold two objects together. The head of the screw provides a bearing surface, while the threads help to create friction and increase the holding power of the screw.
Overview of the Problem
When attaching a washer to a screw, it is important to understand where the washer should be placed. If the washer is placed incorrectly, it may not provide the necessary support or load distribution, resulting in a weak connection that could fail under pressure. Additionally, if the washer is not properly aligned, it may cause the screw to become loose over time.
How to Install a Washer on a Screw: Step-by-Step Guide
Installing a washer on a screw is relatively simple. Here is a step-by-step guide to ensure that your washer is securely fastened to the screw.
Gather Materials Needed
Before beginning, make sure that you have all of the materials needed for the job. You will need the following: a screw, a washer, and a tool for installing the washer (such as a screwdriver or drill).
Check the Washer for a Proper Fit
Once you have gathered the necessary materials, check the washer to make sure it fits properly on the screw. Make sure that the washer is the correct size and shape for the screw, and that the holes in the washer line up with the threads on the screw.
Secure the Washer to the Screw
Once you have checked the fit, use the appropriate tool to secure the washer to the screw. Be sure to tighten the washer firmly, but not too tightly. If the washer is too tight, it may damage the screw or washer.
A Beginner’s Guide to Attaching a Washer to a Screw
If you are new to working with screws and washers, there are several things to consider when attaching a washer to a screw. Here is a beginner’s guide to help you get started.
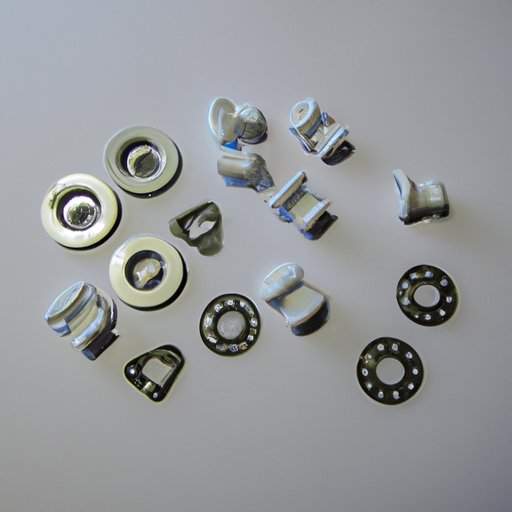
Types of Washers
There are several different types of washers available, each designed for a specific purpose. Common types of washers include flat washers, lock washers, and split washers. Understanding the differences between these types of washers can help you choose the right one for your application.
Different Uses for Washers
Washers can be used for a variety of purposes, including providing a bearing surface, distributing the load of a threaded fastener, and preventing damage to the screw or other components. Understanding the different uses for washers can help you choose the right one for your project.
Common Mistakes to Avoid
When installing a washer on a screw, it is important to avoid common mistakes. For example, using the wrong size or type of washer can result in a weak connection or even damage to the screw or washer. Additionally, using too much force when tightening the washer can strip the threads or damage the washer.

Understanding the Proper Way to Secure a Washer on a Screw
In order to ensure that your washer is securely fastened to the screw, there are a few factors to consider. Here is a closer look at the tools and techniques necessary for proper installation.
Factors to Consider When Securing a Washer
When securing a washer to a screw, it is important to consider several factors. First, make sure that the washer is the correct size and shape for the screw. Additionally, ensure that the holes in the washer line up with the threads on the screw. Finally, make sure that the washer is tightened firmly, but not too tightly.
Tools Needed for Installation
The type of tool used to install a washer on a screw will depend on the type of screw and washer being used. Generally speaking, a screwdriver or drill is sufficient for most applications. However, depending on the size and shape of the screw and washer, other specialized tools may be necessary.
Techniques for Ensuring Proper Fastening
When installing a washer on a screw, it is important to use the right technique to ensure a secure connection. Make sure to apply even pressure when tightening the washer, and avoid overtightening the washer. Additionally, use the appropriate tool for the job and check the washer periodically to ensure that it is still securely fastened.
Different Types of Washers and Their Use on Screws
As mentioned earlier, there are several different types of washers available. Here is a closer look at some of the most common types of washers and their uses on screws.
Flat Washers
Flat washers are the most common type of washer. They are used to provide a bearing surface and to distribute the load of the screw evenly. Flat washers are typically used with machine screws and bolts.
Lock Washers
Lock washers are used to prevent screws from loosening due to vibration. These washers have a serrated edge that digs into the material being fastened, creating a more secure connection. Lock washers are typically used with machine screws and bolts.
Split Washers
Split washers are designed to provide a sealant between two surfaces. They are often used to prevent leakage in plumbing or electrical connections. Split washers are typically used with wood screws.

Tips for Making Sure Your Washer is Securely Fastened to a Screw
Here are a few tips to keep in mind when securing a washer to a screw.
Check the Washer Size
Before installing a washer on a screw, make sure that the washer is the correct size and shape for the screw. Using a washer that is too large or too small can lead to a weak connection and potential failure.
Use the Right Tool for the Job
Make sure to use the appropriate tool for the job. Using the wrong tool can result in a weak connection and potential damage to the screw or washer.
Tighten Firmly
When tightening the washer, make sure to apply even pressure and avoid overtightening. Overtightening can strip the threads or damage the washer.
Conclusion
Attaching a washer to a screw is an important part of many construction projects. Knowing where the washer should go on a screw and how to install it correctly can help ensure that your project is successful. Understanding the different types of washers and their uses on screws, as well as following the tips outlined in this article, can help you achieve the best results.
By understanding the importance of properly installing a washer on a screw, you can ensure that your projects are strong and secure.