
Introduction
Installing a 3-prong dryer outlet is an important task that requires understanding of electrical systems, safety protocols, and basic construction skills. This article will provide a step-by-step guide on how to wire a 3-prong dryer outlet, as well as discuss the basics of installing a 3-prong outlet, offer DIY tips, and provide troubleshooting advice. In addition, this article will also include some expert advice to ensure that your 3-prong dryer outlet is installed correctly and safely.
Step-by-Step Guide to Wiring a 3-Prong Dryer Outlet
Before you begin, make sure that you have all of the necessary materials and tools for the job. You will need a 3-prong dryer outlet, Romex cable, wire connectors, a screwdriver, pliers, and a voltage tester. Once you have everything you need, the next step is to turn off the power at the breaker box.
The ground wire is typically green or bare copper. Connect the ground wire to the green ground screw on the outlet. Next, connect the neutral wire, which is usually white, to the silver neutral terminal. Finally, connect the hot wire, which is usually black, to the brass colored hot terminal. Make sure that you wrap the connection in electrical tape to ensure a secure connection.
Once you have made all of the connections, it is important to test the circuit. Make sure that there are no loose connections and that the voltage tester reads correctly. If everything checks out, you can move on to the next step.
Understanding the Basics of Installing a 3-Prong Dryer Outlet
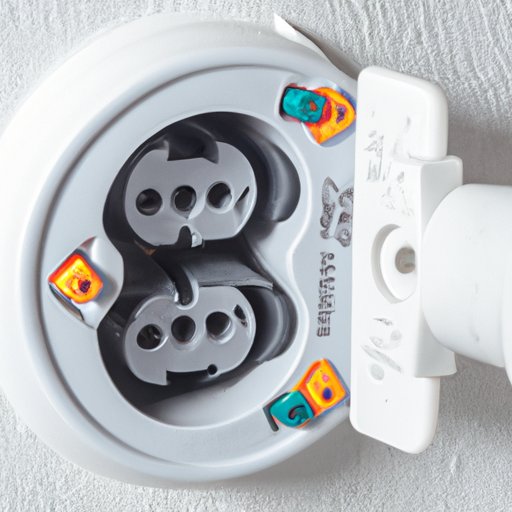
There are several different types of outlets available for dryers, but the most common type is the 3-prong outlet. This outlet has three slots – one for the ground wire, one for the neutral wire, and one for the hot wire. Depending on the type of outlet, the wiring configurations may vary. It is important to understand these configurations before attempting to install a 3-prong dryer outlet.
When working with electrical wiring, it is essential to take certain safety precautions. Wear protective gear such as gloves and safety glasses. Make sure that all wires are connected securely and not overloaded. Finally, always turn off the power at the breaker box before beginning any work with electrical wiring.
A Comprehensive Overview of How to Wire a 3-Prong Dryer Outlet
The first step in wiring a 3-prong dryer outlet is to prepare the outlet. Make sure all of the wires are routed through the back of the outlet and that the screws are tight. Next, connect the wires to the appropriate terminals. The ground wire should be connected to the green ground screw, the neutral wire should be connected to the silver neutral terminal, and the hot wire should be connected to the brass colored hot terminal.
Once the wires are connected, it is important to secure the outlet. Use the mounting screws to attach the outlet to the wall and make sure all of the connections are tight. If the outlet is not secured properly, it could cause a fire or other electrical problems.
DIY Tips for Wiring a 3-Prong Dryer Outlet
When wiring a 3-prong dryer outlet, it is important to use the right materials. Make sure that the Romex cable is rated for the correct amperage and that the wire connectors are rated for the size and type of wire being used. Also, take extra care when making connections and make sure that all wires are connected securely.
Finally, make sure that everything is secure before testing the circuit. Check the connections to make sure that they are tight and that the outlet is mounted securely to the wall. If any of the connections are loose, it could cause a fire or other electrical problems.
Troubleshooting Common Problems When Wiring a 3-Prong Dryer Outlet
If you encounter any problems while wiring a 3-prong dryer outlet, the most likely cause is a loose connection. Make sure that all of the connections are tight and that the Romex cable is routed properly. Another common problem is incorrect wiring. Make sure that the wires are connected to the correct terminals and that the terminals are labeled correctly.
Finally, make sure that the outlet is properly grounded. Poorly grounded outlets can cause electrical shocks or even fires. If you are unsure about the grounding of the outlet, it is best to hire a professional to check it.
Safety Tips for Working with Electrical Wiring and a 3-Prong Dryer Outlet
When working with electrical wiring and a 3-prong dryer outlet, it is important to take certain safety precautions. Always wear protective gear such as gloves and safety glasses. Never overload circuits and make sure that all wires are connected securely. Finally, always turn off the power at the breaker box before beginning any work with electrical wiring.
Expert Advice on Wiring a 3-Prong Dryer Outlet
If you are not comfortable wiring a 3-prong dryer outlet yourself, it is best to hire a professional. Make sure to follow the manufacturer’s instructions when installing the outlet and check local building codes to ensure that you are following all applicable regulations. Finally, if you are unsure about any part of the installation process, it is best to contact an electrician for further advice.
Conclusion
Installing a 3-prong dryer outlet is an important task that requires knowledge of electrical systems, safety protocols, and basic construction skills. This article provided a step-by-step guide on how to wire a 3-prong dryer outlet, as well as discussed the basics of installing a 3-prong outlet, offered DIY tips, and provided troubleshooting advice. In addition, this article also included some expert advice to ensure that your 3-prong dryer outlet is installed correctly and safely.