
Introduction
Installing a ceiling fan light can be a great way to add a decorative touch to any room in your home. But before you get started, it’s important to understand what a ceiling fan light is and why you should wire it.
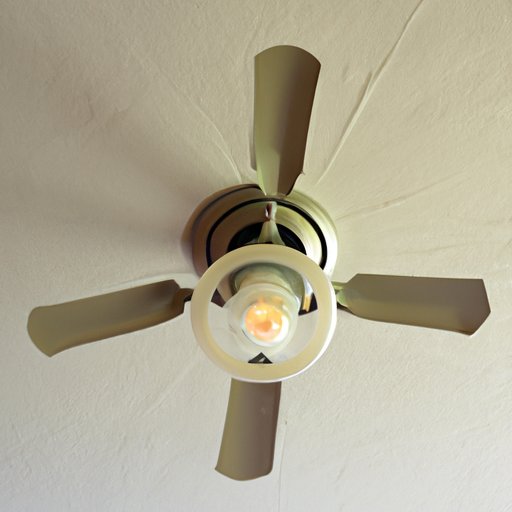
What is a Ceiling Fan Light?
A ceiling fan light is an electric fixture that is installed on the ceiling of a room. It is typically used to provide additional lighting in a space, as well as to enhance the look of the room. Ceiling fan lights come in a variety of styles and sizes, making them a versatile and cost-effective way to update the look of any room.
Why Should You Wire a Ceiling Fan Light?
Wiring a ceiling fan light is a relatively simple process that can be completed by most homeowners in just a few easy steps. Not only will wiring a ceiling fan light help you save money on energy bills, but it will also give your room a whole new look, without having to do a major renovation.
Step-by-Step Guide to Wiring a Ceiling Fan Light
If you’re ready to tackle the task of wiring a ceiling fan light yourself, here’s a step-by-step guide to help you get started:
Gather the Necessary Tools and Materials
Before you begin the installation process, make sure you have all the tools and materials you need. You’ll need a screwdriver, wire cutters, pliers, electrical tape, and a voltage tester. Additionally, you’ll need the necessary wiring, such as 14/2 or 12/2 NM cable, a ceiling fan light kit, and a junction box.
Turn off the Power
Before you start working, make sure you turn off the power to the area where you’ll be working. This is an important step to ensure your safety and avoid any potential accidents.
Remove the Existing Light Fixture
Once the power is shut off, you can start removing the existing light fixture. Carefully unscrew the screws holding the light fixture in place, then remove the fixture from the ceiling. If the fixture has any wires attached to it, make sure to detach and label them so you know which wire goes where during the installation process.
Connect the Wires
Now it’s time to connect the wires. Start by connecting the black (hot) wire from the ceiling to the black wire from the fan light kit. Then, connect the white (neutral) wire from the ceiling to the white wire from the fan light kit. Finally, if applicable, connect the ground wire from the ceiling to the ground wire from the fan light kit.
Install the New Light Fixture
Once the wires are connected, you can install the new light fixture. Make sure you secure the fixture tightly to the ceiling using the screws provided.
Test the Light
When the installation is complete, turn the power back on and test the light. Make sure the light turns on and off properly, and that there are no flickering or buzzing noises coming from the fixture. If everything looks good, you’re done!
How to Install a Ceiling Fan Light: A Beginner’s Guide
Installing a ceiling fan light can seem like a daunting task, especially if you’ve never done it before. But with the right preparation and a step-by-step guide, you can easily complete the job. Here’s a beginner’s guide to installing a ceiling fan light:
Determine the Location for Your Ceiling Fan Light
The first step to installing a ceiling fan light is to determine where you want to install it. Consider factors such as the size of the room, the amount of available light, and the type of ceiling fan you’re installing.
Mount the Ceiling Fan Light
Next, you’ll need to mount the ceiling fan light to the ceiling. Use a drill to carefully attach the mounting bracket to the ceiling, then attach the light fixture to the bracket.
Wire the Ceiling Fan Light
Once the ceiling fan light is mounted, you’ll need to wire it. Connect the black (hot) wire to the black wire from the fan light kit, the white (neutral) wire to the white wire from the fan light kit, and the ground wire to the ground wire from the fan light kit. When the wiring is complete, turn the power back on and test the light.

DIY Guide to Wiring a Ceiling Fan Light
If you’re looking for a DIY project that doesn’t require a lot of time or effort, wiring a ceiling fan light is a great option. With a few simple steps, you can quickly and easily wire a ceiling fan light, giving your room a new look in no time. Here’s how to do it:
Preparing for Installation
Before you begin the installation process, gather all the necessary tools and materials. You’ll need a screwdriver, wire cutters, pliers, electrical tape, and a voltage tester. Additionally, you’ll need the necessary wiring, such as 14/2 or 12/2 NM cable, a ceiling fan light kit, and a junction box.
Connecting the Wires
Once you have all the necessary materials, turn off the power to the area where you’ll be working. Then, connect the black (hot) wire from the ceiling to the black wire from the fan light kit, the white (neutral) wire from the ceiling to the white wire from the fan light kit, and the ground wire to the ground wire from the fan light kit.
Installing the Ceiling Fan Light
Finally, you can install the ceiling fan light. Secure the fixture tightly to the ceiling using the screws provided, then turn the power back on and test the light. Make sure the light turns on and off properly, and that there are no flickering or buzzing noises coming from the fixture.
How to Wire a Ceiling Fan Light in 7 Easy Steps
Ready to get started on wiring your ceiling fan light? Follow these seven easy steps for a successful installation:
Shut off the Power
Before you start working, make sure you turn off the power to the area where you’ll be working. This is an important step to ensure your safety and avoid any potential accidents.
Remove the Old Light Fixture
Once the power is shut off, you can start removing the existing light fixture. Carefully unscrew the screws holding the light fixture in place, then remove the fixture from the ceiling. If the fixture has any wires attached to it, make sure to detach and label them so you know which wire goes where during the installation process.
Install the Ceiling Fan Brace
Now it’s time to install the ceiling fan brace. This piece of hardware helps to support the weight of the ceiling fan and light fixture, so it’s important to make sure it’s securely attached to the ceiling.
Connect the Wiring
When the brace is secure, you can start connecting the wiring. Connect the black (hot) wire from the ceiling to the black wire from the fan light kit, the white (neutral) wire from the ceiling to the white wire from the fan light kit, and the ground wire from the ceiling to the ground wire from the fan light kit.
Attach the Light Fixture
Once the wiring is complete, you can attach the light fixture to the ceiling fan brace. Make sure you secure the fixture tightly to the brace using the screws provided.
Secure the Light Fixture
Before you turn the power back on, make sure the light fixture is securely attached to the ceiling fan brace. This ensures that the fixture won’t come loose or fall while the ceiling fan is running.
Turn on the Power
When the installation is complete, turn the power back on and test the light. Make sure the light turns on and off properly, and that there are no flickering or buzzing noises coming from the fixture. If everything looks good, you’re done!

Safety Tips for Wiring a Ceiling Fan Light
Before you start wiring your ceiling fan light, it’s important to keep safety in mind. Here are some helpful safety tips to follow when wiring a ceiling fan light:
Wear Protective Gear
Always wear protective gear, such as goggles and gloves, when wiring a ceiling fan light. This will help protect your eyes and hands from any debris or sharp objects.
Read the Instructions Carefully
Make sure you read the instructions for your ceiling fan light carefully before you start working. This will help ensure that you’re following the correct procedure and avoiding any potential mistakes.
Double-Check the Wiring
Before you turn the power back on, double-check the wiring to make sure everything is connected correctly. This will help prevent any potential electrical issues.
Unplug the Electricity Before Working
It’s always a good idea to unplug the electricity before you start working. This will help ensure your safety and avoid any potential accidents.
Call an Electrician if Necessary
If you’re not comfortable wiring a ceiling fan light yourself, don’t hesitate to call a professional electrician for help. They’ll be able to safely and efficiently complete the job for you.
Conclusion
Wiring a ceiling fan light is a relatively simple process that can be completed by most homeowners in just a few easy steps. Whether you choose to do it yourself or hire a professional, make sure you follow the proper safety precautions to ensure a successful installation.