
Introduction
Are you looking for a way to give an old piece of furniture a new lease on life? Whitewashing furniture is a great way to revamp a piece without having to spend too much time or money. It’s a simple process that can be done by anyone and will transform any piece of furniture into a new, updated version. In this article, we’ll explore the basics of whitewashing furniture, provide a step-by-step guide, offer a DIY tutorial for beginners, and discuss some creative uses for whitewashing furniture.
Overview of Whitewashing Furniture
Whitewashing furniture is a popular technique used to give an aged, vintage look to wood. Whitewash is a mixture of paint and water, which is applied to the surface of furniture to give it a light, airy feel. The result is a subtle, elegant finish that looks as if it has been aging in the sun for years. This method of painting furniture is perfect for those who want to add a touch of charm and character to their home without spending a fortune.
Benefits of Whitewashing Furniture
Whitewashing furniture offers many benefits, including:
- It’s a quick and easy way to transform a piece of furniture
- It’s inexpensive compared to other methods of refinishing furniture
- The results are subtle and elegant
- It adds character and charm to a room
- It’s easy to customize with color blending and embellishments
Step-by-Step Guide to Whitewashing Furniture
Whitewashing furniture is a fairly simple process that can be done in just a few steps. Here’s a guide to help you get started:
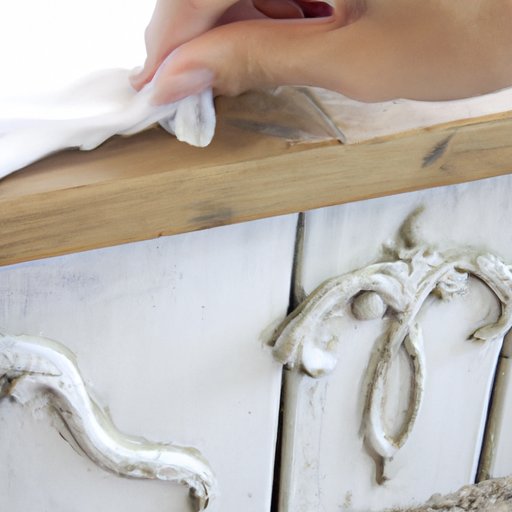
Preparing the Furniture
Before you begin whitewashing furniture, you need to make sure the surface is prepared. Start by wiping down the furniture with a damp cloth to remove any dirt or debris. If there are any scratches or nicks in the surface, use sandpaper to smooth them out. Once the furniture is clean and dry, you’re ready to start whitewashing.
Applying the Whitewash
Now it’s time to apply the whitewash. Mix the paint and water together until you’ve achieved a consistency that’s similar to milk. With a brush or rag, apply the whitewash to the furniture in long, even strokes. Make sure to cover the entire surface, but don’t worry about being too perfect—the beauty of whitewashing is that it looks best when it’s not perfectly even.
Finishing Touches
Once you’ve finished applying the whitewash, let it dry completely. You can use a hair dryer to speed up the process, if desired. Once the whitewash is dry, you can use a soft cloth to buff the surface to give it a beautiful, aged look. You can also add a bit of wax or sealant to protect the finish.

DIY Whitewashing Tutorial for Beginners
If you’re new to whitewashing furniture, here’s a simple tutorial to get you started:
Materials Needed
- Paint (latex or acrylic)
- Water
- Bucket or container to mix the paint and water
- Brush or rag
- Sandpaper (optional)
- Hair dryer (optional)
- Soft cloth
- Wax or sealant (optional)
Step-by-Step Instructions
- Wipe down the furniture with a damp cloth to remove any dirt or debris.
- If necessary, use sandpaper to smooth out any scratches or nicks in the surface.
- Mix the paint and water together until you have a milky consistency.
- Using a brush or rag, apply the whitewash to the furniture in long, even strokes.
- Let the whitewash dry completely. Use a hair dryer to speed up the process, if desired.
- Buff the surface with a soft cloth to give it a beautiful, aged look.
- If desired, add a bit of wax or sealant to protect the finish.
Tips and Tricks for Whitewashing Furniture
Here are some helpful tips and tricks to keep in mind when whitewashing furniture:
Preparing the Surface
Make sure to prepare the surface of the furniture before whitewashing. Wipe it down with a damp cloth to remove any dirt or debris, and use sandpaper to smooth out any scratches or nicks. This will ensure that the whitewash goes on evenly and lasts for years to come.
Choosing the Right Whitewash
When choosing a whitewash, make sure to choose one that is specifically designed for furniture. There are many different types of whitewashes available, so do your research to find the one that works best for your project.
Applying the Whitewash
When applying the whitewash, make sure to use long, even strokes. Don’t worry about being too perfect—the beauty of whitewashing is that it looks best when it’s not perfectly even.
Finishing Touches
Once the whitewash is dry, use a soft cloth to buff the surface to give it a beautiful, aged look. You can also add a bit of wax or sealant to protect the finish.

Creative Uses for Whitewash on Furniture
Whitewashing furniture is a great way to give an old piece of furniture a new lease on life. But why stop at just whitewashing? Here are some creative ways to use whitewash on furniture:
Color Blending
For a unique look, try blending two colors of whitewash together. Simply mix two different shades of paint and water together, then apply the mixture to the furniture in alternating strokes. The result is a beautiful blend of colors that gives the furniture a one-of-a-kind look.
Embellishments
You can also use whitewash to add embellishments to furniture. For example, you can use a stencil to create a pattern on the furniture, or you can use a sponge to dab the whitewash onto the furniture to create a textured look. The possibilities are endless!
Conclusion
Whitewashing furniture is a great way to give old pieces of furniture a new life. It’s a simple process that can be done by anyone and will transform any piece of furniture into a new, updated version. With our step-by-step guide, DIY tutorial, and tips and tricks, you’ll be able to whitewash furniture like a pro. Plus, you can customize your furniture with color blending and embellishments to make it truly unique.