
Introduction
Water bath canning is a process that uses boiling water to preserve food in jars. This method has been used since the early 1800s and is still popular today as a way to store fruits, vegetables, jams, jellies, and other foods. In addition to being a safe and reliable way to store food, water bath canning is also relatively simple and can be done at home with the right supplies and knowledge.
Step-by-Step Guide to Water Bath Canning
The following steps outline the basic process of water bath canning. It’s important to follow these steps carefully and to use only approved canning recipes when preserving food.
Gather Supplies
Before beginning the canning process, it’s important to gather all necessary supplies. This includes a large pot or kettle, a rack or trivet to place jars on, jars, lids, and rings, a ladle, a jar lifter or gripper, a lid wand, and a timer. All of these supplies can be purchased at most grocery stores or online.
Prepare Food for Canning
Once the supplies have been gathered, the next step is to prepare the food for canning. This involves washing, peeling, cutting, and cooking the food according to the recipe. Once the food is prepared, it’s ready to be placed in the jars.
Sterilize Jars and Lids
Before adding food to the jars, they must be sterilized. This can be done by washing them in hot, soapy water, then rinsing them and placing them in a pot of boiling water for 10 minutes. The lids should also be washed and boiled for 10 minutes in a separate pot of boiling water.
Fill Jars with Food
Once the jars and lids are sterilized, it’s time to fill them with the prepared food. The food should be packed tightly into the jars, leaving about an inch of space at the top. Any air bubbles should be removed before sealing the lids.
Place Lids on Jars
Once the jars are filled with food, the lids should be placed on top. The lids should be tightened just until they are finger-tight, then set aside.
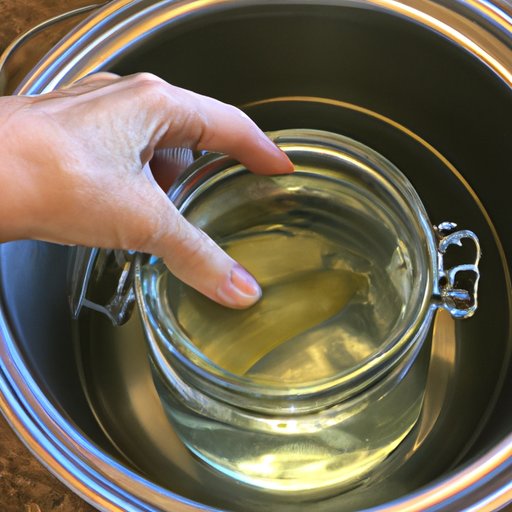
Place Jars in Water Bath Canner
The next step is to place the jars in a water bath canner. This is a large pot or kettle that is used to heat the jars and their contents. The jars should be placed on a rack or trivet in the canner and covered with at least 2 inches of water.
Process Jars
Once the jars are in the canner, the water should be heated to a rolling boil. The jars should be processed for the amount of time indicated in the recipe, usually 10-20 minutes. During this time, the temperature of the water should remain at a rolling boil.
Remove Jars from Water Bath Canner
Once the processing time has elapsed, the jars should be removed from the canner and placed on a towel or cooling rack. They should not be moved or disturbed while cooling.
Let Jars Cool
The jars should be allowed to cool undisturbed for 12-24 hours. During this time, the lids should form a vacuum seal, which will indicate that the jars are properly sealed.
Test Seals
Once the jars have cooled, the seals should be tested to make sure they are secure. To do this, press down on the center of each lid. If the lid does not flex up and down, the seal is secure.
Label and Store Canned Goods
Once the seals have been checked, the jars should be labeled with the date and contents. The canned goods should then be stored in a cool, dark place for up to one year.
A Comprehensive Overview of Water Bath Canning
Water bath canning is a safe and reliable way to preserve food. But there are some important things to consider before attempting this method of food preservation. Here is a comprehensive overview of water bath canning.
What is the Difference Between Water Bath Canning and Pressure Canning?
Water bath canning and pressure canning are two methods of preserving food. Water bath canning is used for high-acid foods such as fruits and tomatoes. Pressure canning is used for low-acid foods such as meats, vegetables, and soups. Water bath canning requires less equipment and is easier to do, but pressure canning is more effective for preserving certain types of food.
What Types of Foods Can Be Water Bath Canned?
Water bath canning is best suited for high-acid foods such as fruits, tomatoes, jams, jellies, pickles, and relishes. Low-acid foods such as meats, vegetables, and soups should be pressure canned.
What Are the Benefits of Water Bath Canning?
Water bath canning is a great way to preserve food because it is relatively easy to do and requires minimal equipment. It also allows you to control the ingredients in your canned goods, ensuring that you know exactly what is going into the food you are eating. Finally, it is an economical way to store food, as it can be done at home without the need to purchase expensive canning equipment.

How to Get Started with Water Bath Canning
Getting started with water bath canning is relatively simple. First, gather all necessary supplies. Next, choose a recipe and prepare the food for canning. When filling the jars, make sure to leave at least an inch of headspace and remove any air bubbles. Place the lids on the jars and tighten them until finger-tight. Place the jars in a water bath canner and process them for the recommended amount of time. Once the jars have cooled, test the seals and label the cans with the date and contents. Finally, store the canned goods in a cool, dark place for up to one year.

Tips and Tricks for Water Bath Canning
Water bath canning can be a fun and rewarding experience, but it’s important to follow instructions carefully and to use only approved recipes. Here are a few tips and tricks to help ensure success:
Use Fresh Ingredients
Always use fresh ingredients when canning. This helps to ensure the best flavor and quality of the finished product.
Use a Timer
It’s important to keep track of the processing time, so it’s a good idea to use a timer. This will help to ensure that the jars are processed for the proper amount of time.
Wear Appropriate Clothing
When canning, it’s important to wear protective clothing, such as long sleeves and pants. This will help to protect you from hot steam and splatters.
Maintain Cleanliness
Make sure to wash all supplies, jars, and lids before beginning the canning process. This helps to ensure that the food is free from bacteria and other contaminants.
A Beginner’s Guide to Water Bath Canning
Water bath canning is a great way to preserve food, but it’s important to take the time to learn the basics before getting started. Here are a few tips for beginners:
Follow Instructions Carefully
It’s important to read and follow all instructions carefully. This will help to ensure the safety and quality of the finished product.
Start with Simple Recipes
For beginners, it’s best to start with simple recipes. This will help to build confidence and provide a better understanding of the canning process.
Practice Makes Perfect
Canning takes practice, so don’t be discouraged if your first attempt isn’t perfect. With time and practice, you will get better.
Don’t be Afraid to Experiment
Once you have mastered the basics, don’t be afraid to experiment with different recipes and flavors. This is a great way to explore new tastes and expand your culinary horizons.
Conclusion
Water bath canning is a great way to preserve food at home. It’s relatively simple and requires minimal equipment. By following the steps outlined above and utilizing the tips and tricks provided, you can become a successful water bath canner in no time.