
Introduction
The timer feature on your iPhone camera is an incredibly useful tool when it comes to taking pictures. Whether you’re trying to capture the perfect selfie or you’re looking to take a sharp group photo, the timer can help you get the best shot. In this article, we’ll explore the benefits of using the timer feature on your iPhone camera, provide a step-by-step guide to setting up and using it, as well as offer some tips for taking better photos with it.
Overview of the Timer Feature on iPhone Camera
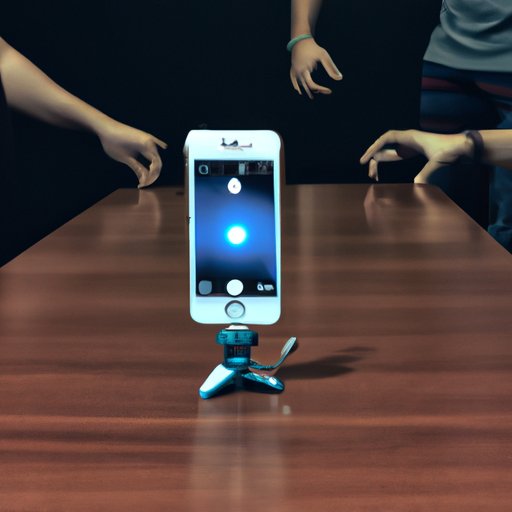
The timer feature on your iPhone camera allows you to set a timer for a certain amount of time before the camera takes a picture. This is especially useful if you want to take a photo of yourself (a selfie) or a group photo. It also helps avoid any motion blur in the picture that may occur if you press the shutter button too quickly.

Benefits of Using the Timer Feature
Using the timer feature on your iPhone camera offers several benefits. First, it allows you to take a photo of yourself or a group of people without having to ask someone else to take the photo. Second, it prevents any motion blur that may occur if you press the shutter button too quickly. Finally, it gives you the opportunity to get into position before the camera takes the picture.
Target Audience
This article is primarily intended for those who are new to using the timer feature on their iPhone camera. However, even experienced photographers can benefit from the tips and tricks presented here.
Step-By-Step Guide to Setting Up and Using the Timer Feature on Your iPhone Camera
Setting up and using the timer feature on your iPhone camera is relatively straightforward. Here’s a step-by-step guide to help you get started.
How to Access the Timer Feature
To access the timer feature on your iPhone camera, open the Camera app and tap the “Timer” icon at the top of the screen. This will open a menu where you can select the amount of time you want the timer to count down before the camera takes the picture.
How to Set Up a Timer
Once you have selected the amount of time you want the timer to count down, you can start the timer by tapping the “Start” button. The timer will start counting down and the camera will take the picture when the timer reaches zero.
Tips for Taking Better Photos with the Timer Feature
When using the timer feature on your iPhone camera, there are a few things you can do to ensure that you get the best possible photo. First, make sure that you are in the correct position before you start the timer. Second, if you are taking a group photo, make sure everyone is in the frame before you start the timer. Finally, make sure to keep the camera steady while the timer is counting down to ensure that the photo is not blurry.
A Beginner’s Guide to Taking Selfies Using the Timer Function of an iPhone Camera
Taking selfies with the timer function of an iPhone camera is a great way to capture moments that you don’t want to miss. However, it can be tricky to get the perfect shot. Here are some tips for framing the perfect selfie.
Tips for Framing the Perfect Selfie
When taking a selfie, it’s important to make sure that you are in the frame and that the background is visible. To do this, adjust the camera angle so that you are centered in the frame and the background is visible. You should also consider the lighting when taking a selfie. Natural light is usually the best option, but you can also use the flash if necessary.
Choosing the Right Lighting
Lighting is one of the most important aspects of taking a good selfie. Natural light is usually the best option, as it helps bring out the colors in your skin and eyes. However, if natural light is not available, you can use the flash on your iPhone camera. Just be sure to point the flash away from your face to avoid harsh shadows.
Tips for Taking the Best Selfie
In addition to framing and lighting, there are a few other tips you should keep in mind when taking a selfie. First, make sure that you are holding the camera at the right angle. Too low or too high and your face won’t be visible in the shot. Second, pay attention to your facial expression and posture. Smiling and sitting up straight will make for a better selfie. Finally, make sure to check the background of the shot to make sure there is nothing distracting or unflattering in the photo.

How to Use the Timer Function on Your iPhone Camera for Perfect Group Photos
Taking group photos can be tricky, especially if you don’t have someone to take the photo for you. Fortunately, the timer feature on your iPhone camera can help. Here are some tips for capturing the best group photo.
Tips for Capturing the Best Group Photo
When taking a group photo, it’s important to make sure that everyone is in the frame. To do this, adjust the angle of the camera until everyone is visible. You should also make sure that everyone is close enough together so that they all fit in the frame. Finally, make sure that everyone is smiling and looking at the camera.
Tips for Posing for Group Photos
When posing for a group photo, it’s important to make sure that everyone looks natural and relaxed. To do this, have everyone stand in a circle or line facing each other. You can also have them lean in towards each other for a more intimate shot. Also, be sure to tell everyone to smile and look at the camera before you start the timer.
Tips for Finding the Best Angle for Group Photos
Finding the best angle for group photos can be tricky. To get the best shot, try adjusting the camera angle until everyone is visible and the background is clear. If you are having trouble finding the right angle, try standing on a chair or ladder to get a better view. You can also take multiple shots from different angles to ensure that you get the best shot.
Tips for Taking Better Photos with the Timer Feature on Your iPhone Camera
Using the timer feature on your iPhone camera is a great way to take better photos. Here are some tips to help you get the most out of the timer feature.
Understanding the Different Modes
Your iPhone camera has several different modes that you can use when taking photos. Each mode has its own set of settings and features that you can use to get the best possible shot. Be sure to familiarize yourself with the different modes and settings to get the most out of the timer feature.
Utilizing the Focus and Exposure Features
The focus and exposure features of your iPhone camera can help you take sharper, brighter photos. When using the timer feature, make sure to adjust the focus and exposure settings to get the best possible shot. You can also use the grid lines to help you compose the shot and make sure that everything is in focus.
Making Use of the Grid Lines
The grid lines on your iPhone camera can be used to help you compose the shot and make sure that everything is in focus. When using the timer feature, be sure to make use of the grid lines to ensure that your shot is composed correctly and that everything is in focus.

Learn the Basics of Photographing with the Timer Feature on Your iPhone Camera
If you’re new to photography, learning the basics of taking photos with the timer feature on your iPhone camera can help you get the best possible shots. Here are some tips to help you get started.
Learning the Different Types of Shots
Photography involves taking a variety of different types of shots. From close-up portraits to wide-angle landscapes, understanding the different types of shots and how to take them will help you get the best photos with the timer feature on your iPhone camera.
Mastering the Basic Settings
Once you understand the different types of shots, it’s important to learn how to use the basic settings on your iPhone camera. Things like focus, exposure, and white balance can all affect the quality of your photos, so it’s important to master these settings to get the best possible results.
Tips for Taking Professional-Looking Photos
When taking photos with the timer feature on your iPhone camera, there are a few things you can do to ensure that you get professional-looking results. First, make sure that you are using the right settings for the type of shot you are taking. Second, try experimenting with different angles and perspectives to get unique shots. Finally, make sure to check the background of the shot to make sure that there are no distractions or unflattering elements in the photo.
Get Creative with the Timer Feature on Your iPhone Camera for Professional-Looking Photos
The timer feature on your iPhone camera can be used to take creative, professional-looking photos. Here are some tips to help you get started.
Tips for Taking Creative Photos
When taking creative photos with the timer feature on your iPhone camera, it’s important to think outside the box. Try experimenting with different angles and perspectives to get interesting shots. You can also use props and accessories to add interest to your photos. Finally, make sure to use the right settings to get the best possible results.
Utilizing Different Angles
Experimenting with different angles and perspectives can help you take creative, professional-looking photos with the timer feature on your iPhone camera. Try shooting from high or low angles, or from a distance to get unique shots. You can also use foreground elements to add depth and interest to your photos.
Making Use of Props and Accessories
Props and accessories can be used to add interest and creativity to your photos. When using the timer feature on your iPhone camera, try incorporating items such as hats, scarves, or sunglasses to add a fun element to your shots. Just be sure to keep the items in the frame and in focus for the best results.
Conclusion
Using the timer feature on your iPhone camera is a great way to take better photos. From taking selfies to capturing the perfect group photo, the timer can help you get the best shot. This article provided a step-by-step guide to setting up and using the timer feature, as well as tips for taking better selfies, group photos, and creative photos. With these tips, you’ll be able to take professional-looking photos with the timer feature on your iPhone camera.
Summary
The timer feature on your iPhone camera is an incredibly useful tool when it comes to taking pictures. In this article, we explored the benefits of using the timer feature on your iPhone camera, provided a step-by-step guide to setting up and using it, as well as offered some tips for taking better selfies, group photos, and creative photos with your iPhone camera.
Final Thoughts
Using the timer feature on your iPhone camera is a great way to take better photos. With the right settings and a bit of practice, you’ll be able to take professional-looking photos with the timer feature on your iPhone camera.