
Introduction
Gel nail polish is a type of nail lacquer that is cured under ultraviolet (UV) or LED light. It usually lasts longer than regular nail polish, making it a popular choice for those who want a chip-resistant mani/pedi. In this article, we’ll explore how to use gel nail polish at home and provide tips for getting long-lasting results. We’ll also include a tutorial for creating the perfect gel nail look with a DIY manicure.

Overview of Gel Nail Polish
Gel nail polish is a special type of nail lacquer that requires curing under a UV or LED lamp in order to set. It is typically thicker than regular nail polish and provides a glossy finish that is more resistant to chips and scratches. Most gel polishes are available in a wide range of colors and finishes, including glitter and matte. They can last up to two weeks without chipping or fading, which makes them a great option for those who want a long-lasting manicure or pedicure.
Benefits of Using Gel Nail Polish
There are several benefits to using gel nail polish, including:
- Longer-lasting results than regular nail polish
- Resistant to chips and scratches
- Can be applied quickly and easily
- Wide range of colors and finishes available
Step-by-Step Guide: Applying Gel Nail Polish at Home
If you’re looking to apply gel nail polish at home, here’s a step-by-step guide on how to do it:
Step 1: Preparing the Nails
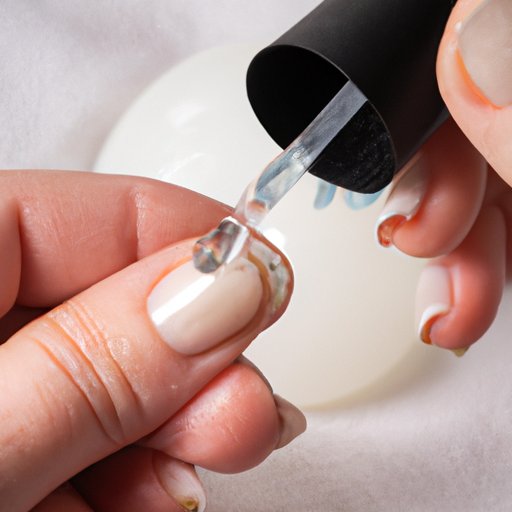
The first step in applying gel nail polish is to prepare your nails. Start by washing your hands with soap and water to remove any dirt or oils. Then, use a nail file to shape your nails and remove any ridges. Finally, use a buffer to smooth out the surface of the nail and create a clean canvas for the polish.
Step 2: Applying the Base Coat
Once your nails are prepped, it’s time to apply the base coat. Apply a thin layer of the base coat to each nail and cure it under the UV or LED light for one minute. This will help the color coat adhere to the nail better.
Step 3: Applying the Color Coat
Now it’s time to apply the color coat. Start by applying a thin layer of the color polish to each nail. Make sure to cover the entire nail, including the edges. Cure the color coat under the UV or LED light for two minutes.
Step 4: Curing with a UV or LED Lamp
After the color coat has been applied, it’s time to cure it with a UV or LED lamp. Place your hand or foot in the lamp and turn it on. The lamp will emit UV or LED light, which will harden the polish and ensure it lasts longer. Depending on the brand and type of gel nail polish you’re using, you may need to cure it for two to three minutes.
Step 5: Applying the Top Coat and Curing Again
Once the color coat has been cured, it’s time to apply the top coat. The top coat helps protect the color coat and gives the nails a glossy finish. Apply a thin layer of the top coat to each nail and then cure it under the UV or LED light for one minute.
Step 6: Removing Excess Polish and Finishing
After the top coat has been cured, it’s time to remove any excess polish from the cuticles and around the edges of the nails. Use a cotton swab dipped in nail polish remover to carefully wipe away any excess. Finally, apply cuticle oil to nourish the skin around the nails and you’re done!
Tips for Getting Long-Lasting Results with Gel Nail Polish
If you want to get the most out of your gel nail polish, here are some tips for getting long-lasting results:
Properly Preparing the Nail
It’s important to properly prep the nail before applying the polish. Start by washing your hands with soap and water to remove any dirt or oils. Then, use a nail file to shape your nails and remove any ridges. Finally, use a buffer to smooth out the surface of the nail and create a clean canvas for the polish.
Choosing Quality Products
When choosing a gel nail polish, it’s important to select a quality product. Look for polishes that are specifically formulated for use with UV or LED lamps, as these will be more likely to provide long-lasting results. You should also make sure to select a top coat that is compatible with your chosen base and color coats.
Avoiding Overcuring
It’s important to avoid overcuring your nails when using a UV or LED lamp. If you leave your nails in the lamp for too long, the polish may become brittle and prone to cracking. For best results, follow the instructions on the product label and only cure each coat for the recommended amount of time.

How to Choose the Right Gel Nail Polish for Your Needs
When selecting a gel nail polish, there are several factors to consider:
Consider the Type of Finish You Want
Gel nail polishes come in a variety of finishes, so it’s important to choose the one that best suits your needs. For a glossy finish, look for polishes labeled “shiny” or “glossy.” For a matte finish, look for polishes labeled “matte” or “velvet.”
Pay Attention to Color Intensity
Gel nail polishes come in a wide range of colors, so it’s important to pay attention to the intensity of the color. Some polishes are sheer and subtle, while others are highly pigmented and intense. Consider the look you’re going for and choose a color accordingly.
Read Reviews
Before purchasing a gel nail polish, it’s a good idea to read reviews from other users. This will give you a better idea of the quality of the product and whether or not it is worth the price.

DIY Manicure Tutorial: Creating a Perfect Gel Nail Look
Ready to try your hand at a DIY manicure? Here’s a tutorial on how to create a perfect gel nail look:
Step 1: Selecting the Right Shade
First, select the right shade for your look. Consider the type of finish you want and the color intensity you prefer. Once you’ve selected the right shade, apply a thin layer of the base coat to each nail and cure it under the UV or LED lamp for one minute.
Step 2: Applying the Base Coat
After the base coat has been applied, it’s time to apply the color coat. Start by applying a thin layer of the color polish to each nail. Make sure to cover the entire nail, including the edges. Cure the color coat under the UV or LED light for two minutes.
Step 3: Applying the Color Coat(s)
If you’re going for a more elaborate look, you can apply multiple coats of different colors. Start by applying a thin layer of the first color to each nail. Cure the first color coat under the UV or LED light for two minutes. Then, apply a thin layer of the second color and cure for another two minutes.
Step 4: Applying the Top Coat
Once the color coats have been applied and cured, it’s time to apply the top coat. Apply a thin layer of the top coat to each nail and then cure it under the UV or LED light for one minute.
Step 5: Curing with a UV or LED Lamp
Finally, it’s time to cure the top coat with a UV or LED lamp. Place your hand or foot in the lamp and turn it on. The lamp will emit UV or LED light, which will harden the polish and ensure it lasts longer. Depending on the brand and type of gel nail polish you’re using, you may need to cure it for two to three minutes.
Conclusion
Gel nail polish is a great way to achieve a long-lasting and chip-resistant manicure or pedicure. With the right products and proper application techniques, you can get salon-quality results at home. In this article, we’ve provided an overview of gel nail polish, a step-by-step guide for applying it at home, tips for getting long-lasting results, and a tutorial for creating the perfect gel nail look with a DIY manicure.