
Introduction
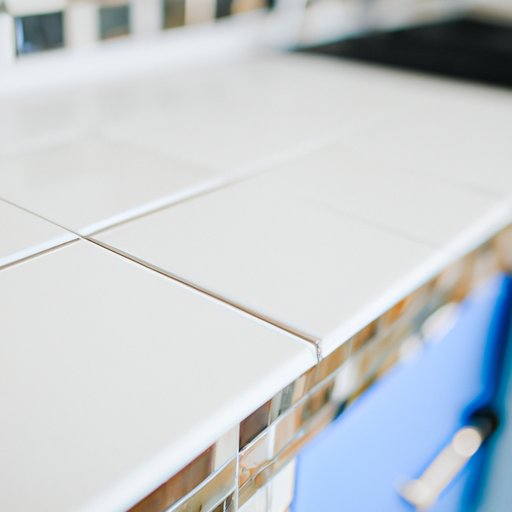
A kitchen backsplash is an important feature that adds style and protection to your cooking area. Not only does it keep walls clean from splatters and spills, but it can also be used as a design element to enhance the overall look of your kitchen. Tiling a backsplash is a great way to add color, texture, and pattern to your space, and it’s relatively easy to do yourself.
Installing a tile backsplash can transform a dull kitchen into a stylish, modern one. It’s a relatively inexpensive project compared to other home improvement projects, and it doesn’t take long to complete. Plus, it’s an easy way to make a big impact on the overall look and feel of your kitchen.
Step-by-Step Guide to Installing a Kitchen Backsplash
If you’re ready to tackle this project yourself, follow these steps to ensure a successful result:
1. Preparing the Area
The first step is to prepare the wall for tiling. Remove any existing wallpaper or tile, and then sand the surface down to create a smooth base for the new tiles. Fill any holes or cracks with spackle, and make sure the surface is completely dry before moving on to the next step.
2. Measuring and Marking
Measure the area where the backsplash will go, and mark the measurements on the wall. Make sure to include enough room for grout lines, which should be about 1/8-inch wide. You may also want to draw a level line to ensure the tiles are even.
3. Cutting the Tiles
Once you’ve marked the measurements, it’s time to cut the tiles. Use a wet saw or tile nipper to cut the tiles to size, making sure to wear safety glasses and gloves while doing so. If you’re using mosaic tiles, you won’t need to cut them since they come pre-cut.
4. Applying Adhesive
Next, spread a thin layer of adhesive on the wall with a notched trowel. Make sure to cover the entire area, including the corners and edges. Once the adhesive has been applied, leave it to set for a few minutes before moving on to the next step.
5. Laying the Tiles
Now it’s time to start laying the tiles. Begin at the bottom corner and work your way up, pressing each tile firmly into place. Make sure to leave a small gap between the tiles for grout. If you’re using mosaic tiles, use a sponge to press the tiles into the adhesive.
6. Sealing the Tiles
After the tiles have been laid, seal them with a waterproof sealer. Allow the sealer to dry before adding grout. Once the grout is dry, you can wipe away any excess with a damp cloth.

DIY: Tiling Your Kitchen Backsplash on a Budget
Tiling a kitchen backsplash doesn’t have to be expensive. There are plenty of ways to save money on materials and still get a professional-looking result. Here are some tips for creating a beautiful backsplash without breaking the bank:
1. Finding Affordable Materials
Start by shopping around for tile. Look for sales, clearance items, and discount stores to find the best deals. Don’t be afraid to buy second-hand tiles either – they can often be found at thrift stores or flea markets for a fraction of the cost of new tiles.
2. Making Use of Leftovers
If you’re tiling a small area, you may be able to get away with using leftover tiles from another project. This is a great way to save money and reduce waste.
3. Shopping for Discounts
Many home improvement stores offer discounts on supplies and materials if you purchase in bulk. Take advantage of these discounts when buying tile, adhesive, grout, and other supplies.
How to Choose the Best Tile for Your Kitchen Backsplash
When selecting tile for your kitchen backsplash, there are a few things to consider. Here are some tips for choosing the right tile for your space:
1. Consider Durability
Kitchen backsplashes are exposed to water, grease, and other liquids, so it’s important to choose a tile that can withstand these elements. Porcelain, ceramic, and glass tiles are all good choices, as they are waterproof and stain-resistant.
2. Think About Maintenance
Make sure to choose a tile that is easy to clean and maintain. Glazed tiles are a good choice, as they provide a protective layer against stains and dirt. Avoid textured tiles, which can be difficult to clean.
3. Consider Aesthetic Appeal
Tile is available in a variety of colors, patterns, and styles, so you can create a unique look for your kitchen. Consider the existing décor of your kitchen and choose a tile that complements it.

Tips and Tricks for Tiling a Kitchen Backsplash
Tiling a kitchen backsplash can be intimidating, but it doesn’t have to be. Here are some helpful tips and tricks to make the process easier:
1. Plan Ahead
Before starting the project, measure the area and plan out the design. Draw a sketch of the layout to help visualize the end result. This will help ensure the final product looks the way you want it to.
2. Take Time to Prep
Proper preparation is key to a successful tiling job. Make sure the wall is completely clean and dry before beginning, and fill any holes or cracks with spackle. This will help ensure the tiles adhere properly.
3. Work in Sections
Work in manageable sections to make the job easier. Start at the bottom corner and work your way up, taking care to press each tile firmly into place. This will help ensure the tiles are even and aligned correctly.

Creative Ideas for Upgrading Your Kitchen Backsplash with Tile
Tiles can be used to create many different looks and designs. Here are some creative ideas for upgrading your kitchen backsplash with tile:
1. Accentuate Appliances
Create a focal point by using tiles to accentuate appliances like the stove or sink. You can use contrasting colors or shapes to draw attention to these features.
2. Create a Focal Point
Create a unique design by using tiles to create a focal point. Try combining different colors and patterns to create an eye-catching design.
3. Incorporate Color
Add color and texture to your kitchen by incorporating colorful tiles. This is a great way to brighten up a neutral kitchen.
Conclusion
Tiling a kitchen backsplash is a great way to add style and protection to your cooking area. With the right supplies and a bit of patience, you can easily install a tile backsplash yourself. When selecting tile for your backsplash, make sure to consider durability, maintenance, and aesthetic appeal. And don’t forget to have fun with it – there are endless possibilities for creating unique and creative designs.
Installing a tile backsplash is a rewarding project that can be completed in just a few days. With the right preparation and careful planning, you can achieve a professional-looking result that will last for years to come.