
Introduction
Tiling a kitchen floor can be a great way to add style and value to your home. It’s often one of the first things people notice when they enter a room, so it’s important to get it right. But if you’ve never done it before, the process can seem intimidating. Fortunately, with the right tools, materials, and a bit of patience, anyone can learn how to tile a kitchen floor.
This article will provide a comprehensive overview of the steps involved in tiling a kitchen floor, as well as some helpful DIY tips and budgeting advice. We’ll also discuss common mistakes to avoid and provide a beginner’s guide for those who are just getting started.
Step-by-Step Guide to Tiling a Kitchen Floor
Tiling a kitchen floor is a relatively straightforward process that involves four main steps: preparation of the floor, laying out the tiles, cutting and fitting them, and grouting. Let’s take a closer look at each step.
Preparation of the Floor
Before you begin tiling, it’s important to make sure the surface is clean and level. If you’re working on an existing floor, you’ll want to remove any existing tiles, as well as any dirt, dust, or debris that may have accumulated. You should also fill any cracks or holes with a high-quality filler. Once the area is prepped, you can move on to the next step.
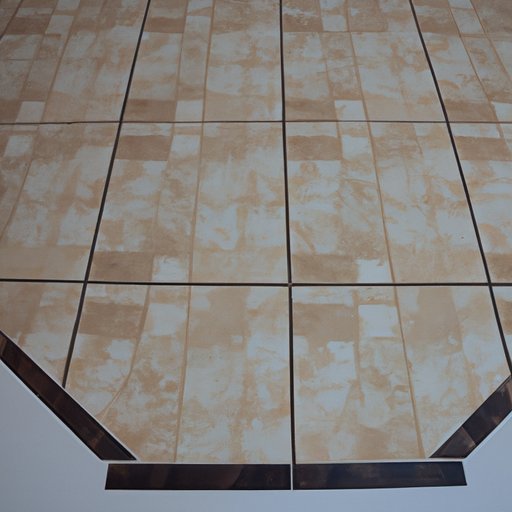
Layout of Tiles
Once the floor is ready, it’s time to lay out the tiles. Start by determining the center point of the room and work outward from there. Be sure to leave enough space around the perimeter for grout and expansion joints. As you lay out the tiles, use spacers to ensure a consistent gap between them.
Cutting and Fitting Tiles
Once you’ve laid out the tiles, it’s time to start cutting and fitting them. Depending on the size and shape of your tiles, you may need to use a wet saw or other specialized tools to get the job done. When cutting tiles, be sure to wear protective gear, such as goggles and a dust mask.
Grouting
Once all of the tiles are in place, it’s time to grout. Grout is a mixture of water, sand, and cement that fills the spaces between the tiles and helps hold them in place. It’s important to choose the right type of grout for your project, as different types are suited for different applications. Be sure to follow the manufacturer’s instructions when mixing and applying the grout.
Finishing Touches
Once the grout has had time to dry, you can add the finishing touches. If needed, apply a sealer to help protect the grout and keep it looking its best. Finally, you can add trim pieces around the edges to give the floor a finished look.

DIY Tips for Tiling a Kitchen Floor
If you’re taking on the project yourself, there are a few things you can do to ensure success. First, make sure you have the right tools for the job. You’ll need a wet saw, tile nippers, a notched trowel, a rubber mallet, and a grout float, among other items. It’s also important to choose the right materials. Natural stone tiles, for example, require a special adhesive, while porcelain tiles require a different type of grout.
It’s also important to plan out the project. Before you start, measure the area and determine how many tiles you’ll need. You should also create a layout plan that includes the location of any outlets, switches, and other obstacles. Taking the time to plan ahead will help ensure that your project goes smoothly.

How to Tile a Kitchen Floor on a Budget
Tiling a kitchen floor can be an expensive project, but there are a few ways to save money. Shopping around is key; compare prices at different stores and online to find the best deals. You can also save money by reusing existing tiles if possible. Don’t forget to look for discounts, too – many retailers offer reduced prices on select items.
A Beginner’s Guide to Tiling a Kitchen Floor
If you’re new to tiling, don’t worry. There are plenty of resources available to help you get started. Watching instructional videos is a great way to familiarize yourself with the basics. You can also consult professional help, such as a tile installer or contractor. And when it comes to the actual tiling, take it slow and steady – rushing the job can lead to costly mistakes.
Common Mistakes to Avoid When Tiling a Kitchen Floor
When tiling a kitchen floor, it’s important to avoid common mistakes. One of the most common mistakes is measuring incorrectly. Be sure to double check your measurements before cutting any tiles. Another mistake is poorly cutting tiles – make sure you use the right blade and follow the manufacturer’s instructions. And finally, make sure you use enough adhesive. If you don’t, you risk having your tiles come loose over time.
Conclusion
Tiling a kitchen floor is a great way to add style and value to your home. With the right tools, materials, and a bit of patience, anyone can learn how to tile a kitchen floor. This article provided an overview of the steps involved, as well as some helpful DIY tips and budgeting advice. We also discussed common mistakes to avoid and provided a beginner’s guide for those who are just getting started.
By following these tips and keeping the above points in mind, you’ll be well on your way to a successful project.