
Introduction
A kitchen backsplash is a stylish and practical way to protect your walls from splashes and spills while adding personality to your cooking space. Tiling a kitchen backsplash is an easy and affordable DIY project that anyone can do with the right supplies and knowledge. In this article, we’ll cover everything you need to know about how to tile a kitchen backsplash, including a step-by-step guide, expert advice, and design ideas.
Step-by-Step Guide to Tiling a Kitchen Backsplash
Tiling a kitchen backsplash requires some basic supplies and skills. Here’s a step-by-step guide to help you get started:
Gather Supplies
Before you begin, make sure you have all the supplies you’ll need. This includes tile, adhesive, grout, a tile saw, spacers, and a notched trowel. You’ll also want to pick up a few basic tools such as a hammer, level, chisel, and utility knife.
Prepare the Surface
The surface must be clean, dry, and free of any debris before you begin tiling. If you’re working with existing tile, you may need to remove it first. To do this, use a hammer and chisel to chip away at the old tile. Make sure to wear safety goggles and gloves when doing this. Once the old tile is removed, use sandpaper to smooth out any rough spots on the wall.
Layout the Tile
Now it’s time to measure and mark where each tile will go. Start from the center of the wall and work your way out. Use a level to make sure each row is straight. When you’re finished, you should have a template for the entire backsplash.
Apply Adhesive
Now it’s time to apply the adhesive. Using the notched trowel, spread the adhesive over the area you marked off in the previous step. Make sure to spread the adhesive evenly and smoothly. Allow the adhesive to cure for at least 24 hours.
Cut and Install the Tile
Once the adhesive is cured, it’s time to cut and install the tile. Using a tile saw or wet saw, cut the tile to fit the area you measured and marked off. Make sure the cuts are precise. Then, using spacers, install the tile onto the wall. Make sure to press down firmly on each tile to ensure a secure bond.
Grout and Seal
Once the tile is installed, it’s time to grout and seal. Mix the grout according to the instructions on the package. Spread the grout over the tile using a rubber float. Wipe away any excess grout with a damp sponge. Allow the grout to cure for 24 hours before applying a sealer to protect the tile from water damage.

DIY Kitchen Backsplash: How to Tile Your Own
If you’re ready to tackle a DIY kitchen backsplash, here are some tips to help you get started:
Necessary Tools
In addition to the tools listed above, you’ll need a few other items to complete your project. These include a measuring tape, pencil, drop cloth, and bucket. Make sure you have all the necessary tools before you start.
Preparing the Area
Before you begin tiling, make sure the wall is clean and dry. Remove any nails, screws, or other debris from the wall. It’s also important to check for any cracks or defects in the wall. If there are any, repair them before you begin tiling.
Installing the Tile
Start by laying out a few tiles to get a feel for the pattern. Once you have a layout you like, apply the adhesive and start installing the tile. Make sure to use spacers between each tile to ensure even spacing. Once all the tile is installed, allow it to sit for 24 hours to ensure a secure bond.
Finishing Touches
Once the tile has been installed, it’s time to finish the project. Spread the grout over the tile and wipe away any excess. Allow the grout to cure for 24 hours before applying a sealer. Finally, enjoy your new kitchen backsplash!
Tips for Planning & Installing a Kitchen Backsplash
When planning and installing a kitchen backsplash, there are a few things to keep in mind. Here are some tips to help you get started:
Measure Twice, Cut Once
Before you begin cutting tile, make sure to measure twice and cut once. This will help ensure that your tile is cut precisely and fits perfectly in the space.
Use Quality Materials
Using quality materials is key to a successful kitchen backsplash installation. Make sure to buy high-quality tile, adhesive, grout, and sealer. This will help ensure a long-lasting and durable backsplash.
Take Your Time
Tiling a kitchen backsplash is not a quick job. Take your time and make sure you follow each step carefully. Rushing through the process can lead to mistakes and an uneven finish.

Kitchen Design Ideas: Adding a Tiled Backsplash
Adding a tiled backsplash to your kitchen is a great way to add color, texture, and personality to the space. Here are a few design ideas to consider when adding a tiled backsplash to your kitchen:
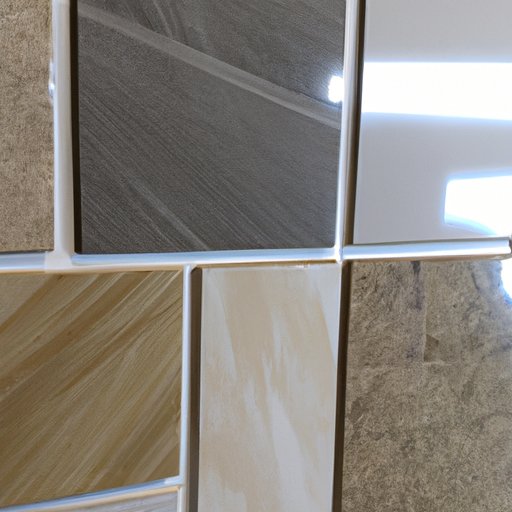
Color and Pattern
When choosing a tile for your kitchen backsplash, consider the colors and patterns available. You can choose a solid color tile or opt for a patterned tile for a more unique look. Consider what colors and patterns will match your existing kitchen decor.
Texture and Shine
Tile comes in a variety of textures and finishes. For a classic look, opt for a glossy tile. If you want a more rustic vibe, choose a textured tile. There are also options for a matte finish or glittery sheen if you want something more modern.
Shape and Size
Tile come in many different shapes and sizes. Choose smaller tiles for a more intricate pattern, or larger tiles for a simpler look. You can also mix and match different shapes and sizes for a more eclectic look.
Expert Advice on How to Tile a Kitchen Backsplash
If you’re looking for expert advice on how to tile a kitchen backsplash, there are several options available. Here are some of the best ways to get professional help:
Getting Professional Help
If you don’t feel comfortable tackling the job yourself, you can hire a professional to do it for you. Look for experienced contractors who specialize in tiling. Ask for references and read reviews before hiring someone.
Working with a Contractor
If you decide to hire a contractor, make sure to discuss your project and budget beforehand. Get a written estimate and ask questions about the timeline and materials needed. Make sure to communicate clearly throughout the process.
Hiring a Designer
If you’d like to create a unique kitchen backsplash, consider hiring a designer. They can help you create a custom design that complements your existing kitchen décor. Designers can also provide helpful advice on materials and installation.

Transform Your Kitchen with a Tiled Backsplash
A tiled kitchen backsplash is a great way to transform your kitchen. Here are a few benefits of adding a tiled backsplash to your space:
Create a Focal Point
A tiled kitchen backsplash can serve as a focal point in the room. The vibrant colors and patterns will draw the eye and add visual interest to your kitchen.
Increase Home Value
Adding a tiled backsplash to your kitchen is a great way to increase your home’s value. A well-designed backsplash can make your kitchen look more modern and appealing to potential buyers.
Enhance Aesthetic Appeal
A tiled kitchen backsplash can enhance the aesthetic appeal of your kitchen. The vibrant colors and patterns will add energy and life to your space.
Conclusion
Tiling a kitchen backsplash is a great way to add style and personality to your cooking space. With the right supplies and knowledge, anyone can tackle this DIY project. Follow our step-by-step guide and get expert advice to help you create the perfect kitchen backsplash. Transform your kitchen with a tiled backsplash and enjoy the benefits of increased home value and enhanced aesthetic appeal.