
Introduction
It is important for cyclists to have properly functioning disc brakes on their bikes. This ensures that they can safely ride on different terrain and in various weather conditions. Unfortunately, it is common for these brakes to become loose over time. To prevent any accidents or damage to the bike, it is essential to know how to properly tighten bike disc brakes.
The purpose of this article is to provide a comprehensive guide on how to tighten bike disc brakes. It includes a step-by-step guide as well as visual tutorials and explanations of the dynamics of tightening bike disc brakes. With this information, cyclists will be able to properly adjust their brakes and ensure that they are riding safely.
Step-by-Step Guide to Tightening Bike Disc Brakes
The first step in tightening bike disc brakes is to gather the necessary tools. These include a 4mm hex key, a 2mm hex key, a flathead screwdriver, a rag, and a torque wrench. Once all the tools are collected, the bike must be prepared for adjustment.
To begin, the wheel should be removed from the bike. The brake caliper should then be loosened so that the brake pads can be adjusted. The brake pads should be centered and tightened until they are firmly in place. After the brake pads are adjusted, the caliper should be tightened back into place.
Once the adjustments have been made, the brakes should be tested to make sure that they are functioning properly. The cyclist should press down on both the front and back brakes and make sure that the brakes respond correctly. If the brakes are not functioning properly, further adjustments may need to be made.
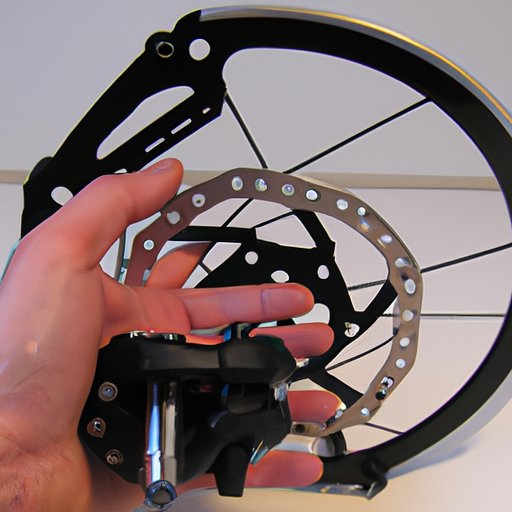
Visual Tutorial on How to Tighten Bike Disc Brakes
In addition to a step-by-step guide, there are also video tutorials and visual diagrams available online that can help cyclists understand how to properly tighten bike disc brakes. These resources are incredibly helpful and can provide a better understanding of the process.
For example, a video demonstration of how to tighten bike disc brakes can be found on YouTube. This video shows exactly how to adjust the brake pads and how to properly secure the caliper. It also explains the importance of testing the brakes after making the adjustments.
In addition to videos, there are also visual diagrams that explain the entire process of tightening bike disc brakes. These diagrams can help cyclists visualize the steps and understand the process better. They also provide a great reference for when adjustments need to be made.

Explaining the Dynamics of Tightening Bike Disc Brakes
When tightening bike disc brakes, it is important to understand the dynamics of the process. In order to properly adjust the brakes, the cyclist must understand how brake pad contact works and how to adjust the calipers. It is also important to ensure that the brake pads are properly aligned.
Brake pad contact refers to the amount of pressure that is applied to the brake pads when the brakes are engaged. The more pressure that is applied, the more effective the brakes will be. In order to adjust the brake pad contact, the cyclist must adjust the calipers. This can be done by turning the screws on the calipers.
Once the calipers are adjusted, the brake pads must be properly aligned. This means that the pads should be parallel to each other and evenly spaced. If the pads are not properly aligned, the brakes may not function correctly.

Tips and Tricks for Tightening Bike Disc Brakes
When adjusting the brakes on a bike, it is important to use the right tools and techniques. One of the best tools to use when tightening bike disc brakes is a torque wrench. This tool allows the cyclist to accurately measure the amount of force being applied to the brakes.
In addition to using the right tools, it is also important to regularly check for wear and tear on the brakes. Over time, the brake pads may become worn out and need to be replaced. It is important to replace the pads when necessary in order to ensure that the brakes are working correctly.
Finally, it is important to use lubricant on the brakes in order to avoid sticking. This can help reduce friction and ensure that the brakes are functioning properly. Lubricants can also help prevent rust and corrosion.
Conclusion
Tightening bike disc brakes is an important part of maintaining a safe and reliable bike. By following the steps outlined in this article, cyclists will be able to properly adjust their brakes and ensure that they are riding safely. It is also important to understand the dynamics of the process and use the right tools and techniques.
In conclusion, the steps for tightening bike disc brakes are as follows: gather the necessary tools, prepare the bike, adjust the brake pads, test the brakes, and use a torque wrench. It is also important to regularly check for wear and tear and use lubricant to avoid sticking. By following these steps, cyclists can ensure that their brakes are working properly and keep themselves safe while riding.
Safety should always be the top priority when adjusting bike disc brakes. It is important to follow the instructions carefully and never attempt to repair the brakes without proper knowledge and experience. Additionally, it is always a good idea to consult a professional if you are unsure about anything.
For more information on how to tighten bike disc brakes, please refer to the following resources: