
Introduction
Ceiling fans are an essential part of any home. Not only do they provide ventilation and air circulation, but they can also help reduce energy costs. Installing a ceiling fan is relatively easy, but if it’s not done correctly, it can become loose and unstable over time. This can cause the fan to wobble and even come crashing down. In this article, we’ll explore how to tighten a ceiling fan and secure it for optimal performance and safety.
What is a Ceiling Fan?
A ceiling fan is a mechanical device that uses electricity to rotate paddles or blades, creating a cooling breeze. The fan is usually attached to the ceiling by a mounting bracket and consists of a motor, blades, and a hanging chain. The motor powers the blades, which move air around the room. Ceiling fans are helpful in regulating the temperature of a room by providing ventilation and air circulation.

Benefits of Installing a Ceiling Fan
Ceiling fans offer several benefits for homeowners. For starters, they can help lower energy costs by up to 40%. During the summer months, ceiling fans can be used to circulate cool air throughout the entire house. During the winter months, they can be used to push warm air down from the ceiling, allowing you to lower the thermostat settings without sacrificing comfort. Additionally, ceiling fans can add a decorative touch to any room.
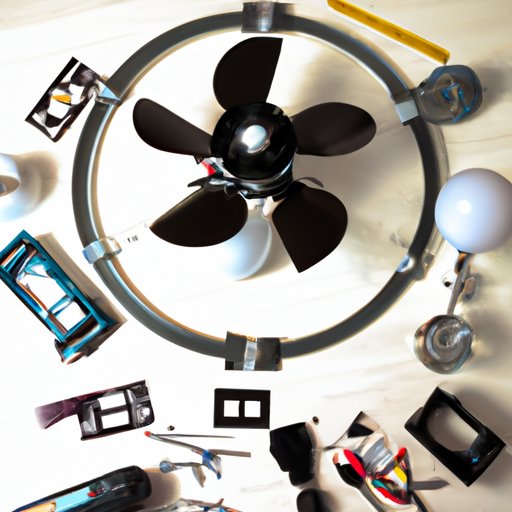
Step-by-Step Guide to Tightening a Ceiling Fan
Tightening a ceiling fan isn’t as complicated as you might think. Here’s a step-by-step guide to help you get started:
1. Identifying the Problem
The first step is to identify the source of the problem. Is the fan wobbling? Are the blades loose? Does the motor seem to be off-balance? Take note of any issues you may notice before attempting to fix them.
2. Gather the Necessary Tools
Once you’ve identified the issue, it’s time to gather the necessary tools. You’ll need a ladder, a screwdriver, a socket wrench, and an adjustable wrench. Some fans may require additional tools, so make sure to check the manufacturer’s instructions for a complete list of tools.
3. Removing the Blades and Disassembling the Fan
Next, remove the blades from the fan. Carefully unscrew them and set them aside. Then, remove the screws that hold the fan motor in place. Once you’ve removed the motor, you can access the mounting bracket and begin to disassemble the fan.
4. Tighten the Mounting Bracket and Reassemble the Fan
Using the socket wrench, tighten all of the bolts on the mounting bracket. Make sure the bracket is securely attached to the ceiling and that all of the bolts are tightened firmly. Once you’ve finished tightening the bolts, reassemble the fan, making sure all of the parts are properly aligned. Finally, replace the blades and turn the fan on to test it out.

DIY Tips for Securing Your Ceiling Fan
If you’re looking for additional ways to secure your ceiling fan, there are a few DIY tips you can try. Utilizing locking washers, adding a support brace, and using duct tape are all great options.
Utilizing Locking Washers
Locking washers are a great way to ensure that your fan is securely attached to the ceiling. They are designed to fit around the mounting bolt and provide extra grip. This will ensure that the fan doesn’t become loose over time.
Adding a Support Brace
If your ceiling fan is particularly large or heavy, you may want to consider adding a support brace. This will provide additional stability and prevent the fan from becoming loose or wobbly. It’s important to make sure the brace is securely attached to the ceiling.
Using Duct Tape
Duct tape can be used to secure the fan blades to the motor. This will help prevent the blades from becoming loose and will also reduce vibration. Make sure to use high-quality duct tape that won’t degrade over time.

How to Secure a Wobbly Ceiling Fan with Simple Tools
If you don’t have the necessary tools for tightening a ceiling fan, there are still a few simple methods you can try. Here are three effective solutions for securing a wobbly ceiling fan:
Using a Nail Gun
A nail gun is a great tool for securing a ceiling fan. Simply fire a few nails into the mounting bracket to ensure it’s securely attached to the ceiling. Be careful not to damage the fan motor or blades.
Making Use of Adhesive Caulk
Adhesive caulk is another great option for securing a ceiling fan. Apply a generous amount of caulk to the mounting bracket and press it into place. This will help keep the fan secure and reduce vibrations.
Installing Screws
If you don’t have a nail gun or adhesive caulk, you can always install screws into the mounting bracket. This will help keep the fan secure and prevent it from becoming loose over time.
A Quick and Easy Way to Make Sure Your Ceiling Fan is Safe and Secure
In addition to tightening the mounting bracket, there are a few other steps you can take to ensure your ceiling fan is safe and secure. Here are three quick and easy tips:
Inspecting the Hanging Chain
The hanging chain should be inspected regularly to make sure it’s not frayed or damaged. If the chain is worn or broken, replace it immediately.
Checking the Blades for Balance
The blades should be checked for balance every few months. If one of the blades is heavier than the others, it can cause the fan to vibrate and become unstable. To balance the blades, simply adjust the screws on each blade until they are even.
Ensuring the Motor is Properly Mounted
Finally, make sure the motor is mounted properly. Check to see if the fan is level and make sure the mounting bolts are tight. If the motor is not mounted correctly, it could cause the fan to become loose over time.
Troubleshooting Common Ceiling Fan Issues: How to Tighten it Up
There are a few common issues that can arise with ceiling fans. Here’s how to troubleshoot them and tighten them up:
Loose Blades
If the blades are loose, use a screwdriver to tighten the screws on each blade. Make sure the screws are tight and that the blades are evenly balanced.
Loose Motor
If the motor is loose, use a socket wrench to tighten the mounting bolts. Make sure the bolts are tight and that the motor is securely attached to the ceiling.
Loose Mounting Bracket
If the mounting bracket is loose, use a socket wrench to tighten the bolts. Make sure the bracket is securely attached to the ceiling and that all of the bolts are tightened firmly.
Conclusion
Tightening a ceiling fan is a relatively simple process. All you need is a few basic tools and a bit of patience. Start by identifying the source of the problem, then gather the necessary tools. Next, remove the blades and disassemble the fan. Finally, tighten the mounting bracket and reassemble the fan. You can also use locking washers, a support brace, or duct tape to increase the fan’s stability. With these steps, you can ensure that your ceiling fan is safe and secure.
Recap of Steps
To recap, here are the steps to tightening a ceiling fan:
- Identify the source of the problem
- Gather the necessary tools
- Remove the blades and disassemble the fan
- Tighten the mounting bracket and reassemble the fan
- Secure the fan with locking washers, a support brace, or duct tape
Final Thoughts
Tightening a ceiling fan isn’t as complicated as you might think. With the right tools and a bit of know-how, you can easily secure a wobbly fan and ensure it’s safe and secure. Remember to inspect the fan regularly and make sure all of the parts are properly aligned. With these steps, you can enjoy the benefits of a properly installed ceiling fan.