
Introduction
Making a tote bag is a great way to express your creativity and add a unique accessory to your wardrobe. Whether you’re an experienced sewer or a complete beginner, sewing a tote bag is a fun and rewarding project. In this article, we’ll provide an overview of the project and explain the benefits of making a tote bag, before diving into our step-by-step guide on how to sew one from scratch. We’ll also discuss some tips and tricks to help you craft your own custom tote bag with ease!
Step-by-Step Guide: How to Sew a Tote Bag
If you’re new to sewing, it can be intimidating to start a project. But don’t worry — with our simple step-by-step guide, you’ll be able to sew your own tote bag in no time! Here are the steps you’ll need to follow:
Gather Necessary Materials
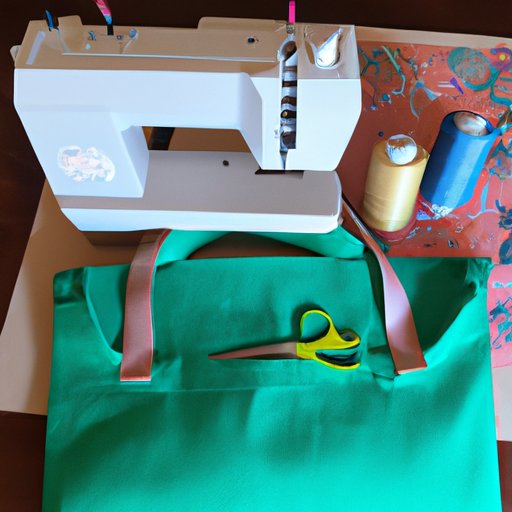
Before you get started, make sure you have all the necessary materials. You’ll need a few yards of fabric (depending on the size of the tote bag you’re creating), a pair of scissors, a measuring tape, thread, a needle, and any additional embellishments you may want to add (like buttons or patches).
Cut Fabric Pieces
Once you have all your materials ready, the next step is to cut the fabric pieces. Measure out two rectangles of the same size, which will become the front and back of the tote bag. If you want to add pockets, measure out two smaller rectangles as well. All the pieces should be slightly larger than the desired final size of the tote bag.
Assemble the Pieces
Now it’s time to assemble the pieces. Lay one rectangle flat on a table and place the other rectangle on top of it. Line up the edges and pin them together. If you’re adding pockets, place them between the two rectangles and pin them in place.
Sew the Tote Bag
The last step is to sew the tote bag. Starting at one end, use a straight stitch to sew the two rectangles together. Make sure to leave a small gap so that you can turn the tote bag inside out when you’re done. Once you’ve sewn the entire length of the rectangles, turn the bag inside out and press the seams with an iron. Finally, sew the gap shut and you’re finished!

DIY Tutorial: How to Make a Tote Bag from Scratch
Making a tote bag from scratch doesn’t have to be complicated! Here are the steps you’ll need to follow to create your own custom tote bag:
Select Fabric and Supplies
The first step is to select your fabric and supplies. Choose a sturdy fabric such as canvas or denim, and make sure to pick up enough fabric to create two rectangles that are slightly larger than the desired final size of the tote bag. For the straps and handles, you can use webbing, leather, or fabric strips. Once you have everything you need, you’re ready to move on to the next step.
Measure and Cut Fabric
Using a measuring tape, measure out two rectangles of the same size. These will become the front and back of the tote bag. If you’re adding pockets, measure out two smaller rectangles as well. Once all the pieces are measured and cut, you’re ready to assemble them.
Sew the Pieces Together
Lay one rectangle flat on a table and place the other rectangle on top of it. Line up the edges and pin them together. If you’re adding pockets, place them between the two rectangles and pin them in place. Starting at one end, use a straight stitch to sew the two rectangles together. Make sure to leave a small gap so that you can turn the tote bag inside out when you’re done.
Add Straps and Handles
Now it’s time to add the straps and handles. Measure the desired length of the straps and cut two strips of webbing, leather, or fabric. Pin the strips to the sides of the tote bag, then sew them in place with a zigzag stitch. Finally, turn the tote bag inside out, press the seams with an iron, and sew the gap shut.

How to Create Your Own Custom Tote Bag
Creating your own custom tote bag is a great way to show off your style and make a unique fashion statement. Here are a few tips to help you design a tote bag that’s perfect for you:
Choose a Pattern
First, choose a pattern for your tote bag. You can opt for a classic rectangular shape or get creative with a more unusual shape. If you’re feeling adventurous, you can even create your own pattern from scratch!
Decide on Colors and Fabrics
Next, decide on the colors and fabrics you’d like to use. You can mix and match different fabrics to create an interesting texture, or choose a single color for a more unified look. Don’t be afraid to experiment — the possibilities are endless!
Consider Size and Shape
When designing your tote bag, consider the size and shape you’d like it to be. A larger tote bag can be great for carrying around books or groceries, while a smaller one is perfect for everyday use. Think about what you’ll be using the tote bag for and choose a size and shape accordingly.
Attach Embellishments
Finally, you can add any embellishments you’d like to your tote bag. You can attach buttons, patches, or other decorations to give it a personalized touch. Have fun and let your creativity shine through!
Beginner’s Guide to Sewing a Tote Bag
If you’re a beginner to sewing, it’s important to understand some basic terms and techniques before getting started. Here are a few tips to help you master the art of sewing a tote bag:
Understand Basic Sewing Terms
The first step is to familiarize yourself with the basics of sewing. Learn the names of different stitches — such as the running stitch, the backstitch, and the zigzag stitch — and understand how they’re used. This will make it easier to follow along with tutorials and instructions.
Learn How to Thread a Needle
The next step is to learn how to thread a needle. It’s important to know how to do this properly, since it’s a key part of the sewing process. Practice threading the needle until you feel comfortable with the technique.
Practice Basic Stitches
Once you’ve mastered threading the needle, it’s time to practice the different stitches. Start with a simple running stitch and gradually work your way up to more complex stitches like the backstitch or the zigzag stitch. As you practice, pay attention to the tension of the thread and keep the stitches even and tight.
Master the Art of Pinning
Pinning is an important skill when it comes to sewing. Take some time to practice pinning fabric pieces together accurately and securely. This will help ensure that the pieces stay in place as you sew them together.
Crafting a Tote Bag: Tips and Tricks for Sewers
If you’re an experienced sewer, here are a few tips and tricks to help you craft the perfect tote bag:
Utilize a Sewing Machine
If you have access to a sewing machine, use it! Sewing machines are much faster and more precise than hand stitching, so they can save you a lot of time and effort. Plus, they can handle heavier fabrics like canvas and denim.
Use Heavy Duty Thread
When sewing a tote bag, it’s important to use heavy duty thread. Regular thread can break easily under the weight of the fabric, so make sure to use a strong thread that won’t snap.
Reinforce Seams
To ensure that your tote bag is strong and durable, reinforce the seams with a zigzag stitch or a double row of stitches. This will help prevent the fabric from fraying or ripping over time.
Add Pockets and Linings
Finally, add pockets and linings to the tote bag for added convenience and protection. Pockets are great for storing small items, and a lining can help protect the fabric from dirt and wear and tear.
Conclusion
Sewing a tote bag is a fun and rewarding project, whether you’re a beginner or an experienced sewer. With our step-by-step guide, you’ll be able to create your own custom tote bag with ease! From gathering materials and cutting fabric, to adding straps and handles, you’ll be able to sew a tote bag that’s perfect for you.