
Introduction
Drawstring bags are an easy and versatile sewing project that anyone can make with minimal supplies and a bit of time. Whether you’re a beginner or an experienced sewer, this article will provide a step-by-step guide on how to sew your own drawstring bag. We’ll also discuss ideas for decorating it and tips for choosing the right fabric.
Step-by-Step Tutorial: How to Sew a Drawstring Bag
Sewing a drawstring bag is a simple process that requires only a few steps. Here’s what you need to know:
Gather Your Supplies
Before you begin, make sure you have all the necessary supplies. You’ll need fabric, thread, scissors, pins, a needle, and a measuring tape. If you’re using heavier fabrics like canvas or denim, you may want to consider iron-on interfacing to add structure and stability to the bag.
Cut Fabric Pieces
Measure and cut two pieces of fabric that measure the same size. The size of the pieces will determine the size of the finished bag, so make sure to take your measurements carefully. For example, if you want to make a 12-inch square bag, you’ll need to cut two pieces of fabric that measure 12 inches by 12 inches.
Sew Sides Together
Lay the two pieces of fabric together with the right sides facing each other. Begin by sewing along one side, then sew along the opposite side. Make sure to backstitch at the beginning and end of each seam to secure the stitches.
Attach Drawstrings
Fold over the top of the fabric about 1/2 inch and press with an iron. Then, fold it over again about 1/4 inch and press. Pin in place and sew along the edge. Repeat this process on the opposite side. Cut two pieces of drawstring that measure twice the length of your bag plus one inch. Feed one end of the drawstring through each side of the bag and tie a knot at the end.
Finish the Edges
Turn the bag right-side out and press the edges with an iron. Fold in the raw edges of the opening and pin in place. Sew along the edges to finish the bag.
DIY Craft Project: Create Your Own Drawstring Bag
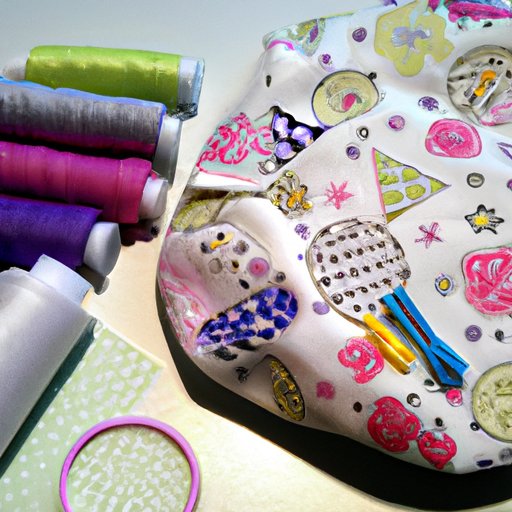
Now that you know how to sew a drawstring bag, you can start creating your own unique designs. There are endless possibilities when it comes to decorating your bag. You can use fabric paint, embroidery, ribbons, and more. Get creative and have fun with it!
Ideas for Decorating Your Drawstring Bag
There are lots of ways to customize your drawstring bag. Here are a few ideas to get you started:
- Embroider a design onto the front of the bag.
- Add patches or appliques.
- Paint a pattern or design onto the fabric.
- Add ribbon, lace, or trim to the edges.
- Create tassels or fringe.
Tips for Choosing the Right Fabric
Choosing the right fabric is key to making a great drawstring bag. Look for fabrics that are lightweight yet durable. Cotton, linen, and canvas are all good choices. If you’re using a heavier fabric like canvas or denim, be sure to use iron-on interfacing to add structure and stability to the bag.

How to Sew a Drawstring Bag in 6 Easy Steps
Here’s a quick overview of the steps involved in sewing a drawstring bag:
Gather Your Supplies
Gather all the supplies you’ll need to make your drawstring bag. This includes fabric, thread, scissors, pins, a needle, and a measuring tape.
Cut Fabric Pieces
Measure and cut two pieces of fabric that measure the same size. This will determine the size of the finished bag.
Sew Sides Together
Lay the two pieces of fabric together with the right sides facing each other. Begin by sewing along one side, then sew along the opposite side. Make sure to backstitch at the beginning and end of each seam to secure the stitches.
Attach Drawstrings
Fold over the top of the fabric about 1/2 inch and press with an iron. Then, fold it over again about 1/4 inch and press. Pin in place and sew along the edge. Cut two pieces of drawstring that measure twice the length of your bag plus one inch. Feed one end of the drawstring through each side of the bag and tie a knot at the end.
Finish the Edges
Turn the bag right-side out and press the edges with an iron. Fold in the raw edges of the opening and pin in place. Sew along the edges to finish the bag.
Finishing Touches
You can customize your drawstring bag with fabric paint, patches, embroidery, ribbons, and more. Get creative and have fun with it!
A Beginner’s Guide to Sewing a Drawstring Bag
If you’re new to sewing, don’t worry – sewing a drawstring bag is a great way to practice your skills. Here are some tips to help you get started:
Tips for Choosing the Right Fabric
Look for fabrics that are lightweight yet durable. Cotton, linen, and canvas are all good choices. If you’re using a heavier fabric like canvas or denim, be sure to use iron-on interfacing to add structure and stability to the bag.
Troubleshooting Common Issues
If you’re having trouble with any part of the process, don’t hesitate to ask for help. You can also look online for tutorials and tips to help you along the way. Remember, practice makes perfect!

Sew a Drawstring Bag with These Simple Tips and Tricks
Whether you’re a beginner or an experienced sewer, here are some tips and tricks to help you make a great drawstring bag:
Choose Quality Fabric
Look for fabrics that are lightweight yet durable. Cotton, linen, and canvas are all good choices. If you’re using a heavier fabric like canvas or denim, be sure to use iron-on interfacing to add structure and stability to the bag.
Use Iron-on Interfacing
Iron-on interfacing helps to add structure and stability to the bag. It’s especially useful if you’re using a heavier fabric like canvas or denim.
Sew with Precision
Make sure to backstitch at the beginning and end of each seam to secure the stitches. This will ensure that your seams are strong and won’t come undone.
Use a Marker or Tailor’s Chalk
Using a marker or tailor’s chalk to mark your fabric before cutting is a great way to ensure accuracy. This will help you achieve a professional-looking finish.
Conclusion
Sewing a drawstring bag is a simple and rewarding project. With just a few basic supplies and a bit of time, you can create a unique bag that is both practical and stylish. Use the tips and tricks outlined in this article to make your own drawstring bag with ease.
Summary of the Process
To sew a drawstring bag, you’ll need to gather your supplies, cut fabric pieces, sew sides together, attach drawstrings, finish the edges, and add any finishing touches. Be sure to choose quality fabric, use iron-on interfacing if needed, and sew with precision.
Final Thoughts
Drawstring bags are a great way to practice your sewing skills and show off your creativity. Have fun with it and don’t be afraid to experiment! With a bit of practice, you’ll be able to make your own unique and stylish drawstring bags in no time.