
Introduction
Sending photos from your iPhone to your computer can be tricky, especially if you don’t know the right methods. Fortunately, there are several ways to do it, ranging from using Apple’s native services like AirDrop to third-party applications. In this article, we will explore these options in detail so that you can choose the best one for your needs.
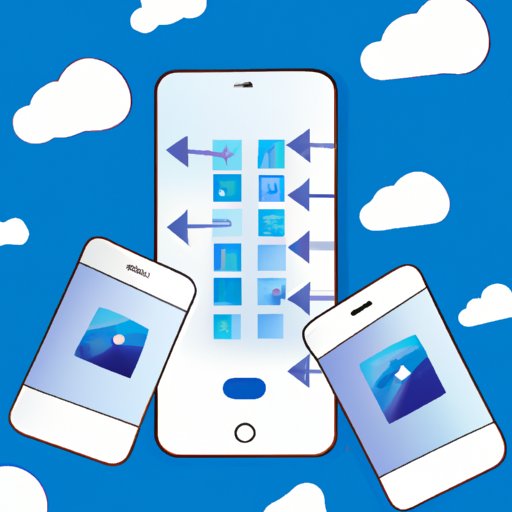
Using AirDrop
AirDrop is a feature built into iOS and macOS that allows you to quickly and easily transfer files between devices. It uses Bluetooth and Wi-Fi Direct to connect devices and transfer data wirelessly. Here’s how to set up and use AirDrop to transfer photos from your iPhone to your computer.
Setting Up AirDrop
To use AirDrop, both the sending and receiving devices must have Bluetooth and Wi-Fi enabled. On your iPhone, go to Settings > General > AirDrop and make sure that AirDrop is turned on. On your Mac, open the Finder window, click on “AirDrop” in the sidebar and make sure that “Allow me to be discovered by” is set to “Everyone”. Your Mac should now be visible to other devices.
How to Use AirDrop to Send Photos
Once AirDrop is set up, you can start transferring photos from your iPhone to your Mac. First, open the Photos app on your iPhone and select the photos that you want to transfer. Tap the share button (the square with an arrow pointing up) and select AirDrop from the list of available sharing options. You should see your Mac appear in the list of available devices. Tap on it to initiate the transfer. Once the transfer is complete, the photos will be saved to your Mac.
Syncing with iTunes
iTunes is Apple’s media management software, and it can also be used to sync photos between your iPhone and your computer. Here’s how to set up and use iTunes to transfer photos.
Setting Up iTunes Sync
First, make sure that you have the latest version of iTunes installed on your computer. Connect your iPhone to your computer with a USB cable, and then open iTunes. Select your device from the list of available devices and then click on the “Photos” tab. Check the box next to “Sync Photos from” and then select the folder that contains the photos that you want to sync. Click the “Apply” button to save your changes.
How to Use iTunes to Transfer Photos
Once you’ve set up iTunes sync, you can start transferring photos from your iPhone to your computer. Open iTunes and select your device from the list of available devices. Click on the “Photos” tab and check the box next to “Sync Photos from”. Select the folder that contains the photos that you want to transfer and then click the “Sync” button. Once the sync is complete, the photos will be saved to your computer.
Emailing Photos to Yourself
You can also email photos from your iPhone to your computer. This requires setting up an email account on your iPhone, but it is a quick and easy way to transfer photos. Here’s how to set up and use email to transfer photos.
Setting Up Email Account
If you already have an email account set up on your iPhone, you can skip this step. Otherwise, open the Settings app and tap on “Mail, Contacts, Calendars”. Tap on “Add Account” and then select the type of email account that you want to set up (e.g. Gmail, Outlook, etc.). Enter your email address and password, and then follow the on-screen instructions to finish setting up your account.
How to Email Photos
Once your email account is set up, you can start emailing photos from your iPhone to your computer. Open the Photos app and select the photos that you want to transfer. Tap the share button (the square with an arrow pointing up) and select Mail from the list of available sharing options. Enter your own email address as the recipient and then tap “Send”. The photos will be sent to your inbox, and you can download them from there.
Transferring Photos via iCloud
iCloud is Apple’s cloud storage service, and it can also be used to transfer photos between devices. Here’s how to set up and use iCloud to transfer photos.
Setting Up iCloud
First, make sure that you have an iCloud account set up on both your iPhone and your computer. On your iPhone, open the Settings app and tap on “iCloud”. Make sure that iCloud Drive is turned on and then tap on “Options” next to iCloud Drive. Select the folders that you want to sync with iCloud and then tap “Done”. On your Mac, open System Preferences and click on “iCloud”. Check the box next to “iCloud Drive” and then select the folders that you want to sync with iCloud.
How to Use iCloud to Transfer Photos
Once iCloud is set up, you can start transferring photos from your iPhone to your computer. Open the Photos app on your iPhone and select the photos that you want to transfer. Tap the share button (the square with an arrow pointing up) and select iCloud Drive from the list of available sharing options. Select where you want to save the photos and then tap “Save”. The photos will be saved to your iCloud account, and they will be synced to your computer automatically.
Using Photo Stream
Photo Stream is a feature built into iOS and macOS that automatically syncs photos between devices. Here’s how to set up and use Photo Stream to transfer photos.
Setting Up Photo Stream
On your iPhone, open the Settings app and tap on “iCloud”. Make sure that “My Photo Stream” is turned on. On your Mac, open System Preferences and click on “iCloud”. Check the box next to “Photo Stream” and then select the folder where you want to save the photos. Your Mac should now be connected to your Photo Stream.
How to Use Photo Stream to Transfer Photos
Once Photo Stream is set up, you can start transferring photos from your iPhone to your Mac. Open the Photos app on your iPhone and select the photos that you want to transfer. Tap the share button (the square with an arrow pointing up) and select Photo Stream from the list of available sharing options. The photos will be uploaded to your Photo Stream, and they will be synced to your Mac automatically.
Transferring Photos with Third-Party Apps
There are also several third-party apps that can be used to transfer photos from your iPhone to your computer. These apps typically require you to install a companion app on your computer, but they offer a more reliable way to transfer photos than the other methods mentioned above. Here’s how to find and use a reliable third-party app to transfer photos.
Finding Reliable Third-Party Apps
When looking for a reliable third-party app to transfer photos, it’s important to make sure that the app is secure and has good reviews. Do a little research before downloading any apps and read the reviews to make sure that other users have had a good experience with the app.
How to Use Third-Party Apps to Transfer Photos
Once you’ve found a reliable third-party app, you can start transferring photos from your iPhone to your computer. Download the companion app on your computer and then open the app on your iPhone. Select the photos that you want to transfer and then follow the on-screen instructions to initiate the transfer. The photos will be transferred to your computer automatically.
Conclusion
Transferring photos from your iPhone to your computer doesn’t have to be complicated. With the methods outlined in this article, you should be able to find a solution that works for you. Whether you use AirDrop, iTunes, iCloud, Photo Stream, or a third-party app, you can easily transfer photos from your iPhone to your computer.
Summary of Solutions
In this article, we explored several solutions for transferring photos from your iPhone to your computer, including AirDrop, iTunes, iCloud, Photo Stream, and third-party apps.
Final Thoughts
Now that you know how to transfer photos from your iPhone to your computer, you should be able to easily move photos between devices. No matter which method you choose, you can rest assured that your photos will be safely transferred.