
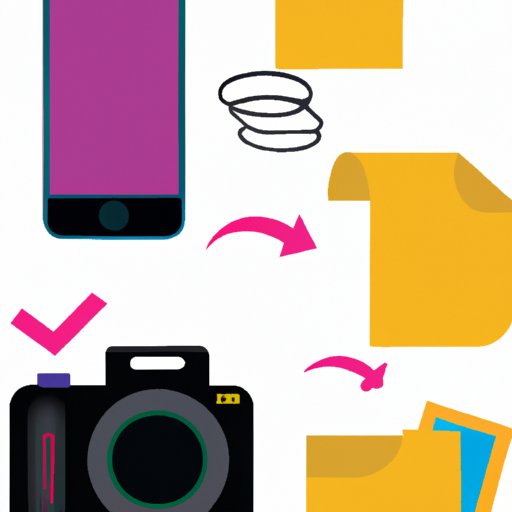
Introduction
With the advancement of technology, more and more people are relying on their smartphones for everyday tasks. One of those tasks is scanning documents. Scanning documents with an iPhone is not only convenient, but it’s also easy to do. In this article, we’ll provide a step-by-step guide for scanning documents with your iPhone, as well as explore the various scanning features of the camera app, third-party scanning apps, and tips to improve the quality of your scans.
Step-by-Step Guide on How to Scan Documents Using Your iPhone
The first step in scanning documents with your iPhone is to open the Camera app. This can be done by tapping on the Camera icon on your home screen. Once the Camera app is open, you’ll need to set up the document for scanning. This involves positioning the document so that it fits within the frame of the camera. Make sure that the document is straight and all four corners are visible. Once the document is in place, take a picture of it.
Once the picture has been taken, it’s time to save and edit the scanned image. To save the image, tap on the thumbnail at the bottom left corner of the screen. This will open the photo in the Photos app, where you can crop and rotate the image if needed. You can also adjust the brightness and contrast of the image. When you’re finished editing, tap on the Done button to save the image.

Exploring the Scanning Features of the iPhone Camera App
The iPhone Camera app comes with several useful scanning features that can help you create high-quality scans. There are two different scanning modes available: Color and Black & White. You can switch between the two modes by tapping on the Settings icon in the top right corner of the screen. The Color mode is best used for scanning documents with colored text or images, while the Black & White mode is best used for documents with black text or images.
The iPhone Camera app also allows you to access advanced settings. These settings include adjusting the exposure, focus, and white balance of the image. To access these settings, tap on the Settings icon again and select Advanced Settings from the menu. Here, you can make adjustments to the image to ensure that it looks as clear and crisp as possible.
Finally, the iPhone Camera app also allows you to crop and rotate images. To crop an image, tap on the Crop tool in the top right corner of the screen. Here, you can drag the edges of the image to crop it to the desired size. To rotate an image, tap on the Rotate tool and then drag the image to the desired angle.
Getting Started with Third-Party Scanning Apps for iPhone
In addition to using the Camera app, there are also several third-party scanning apps available for the iPhone. These apps offer more advanced features than the Camera app, such as automatic document detection, text recognition, and barcode/QR code scanning. Some of the most popular options include Adobe Scan, Tiny Scanner, and Microsoft Office Lens.
When choosing a third-party scanning app, there are a few things to consider. First, you’ll want to decide whether you want to use a free or paid app. Free apps usually come with fewer features than paid apps, but they may still be enough for your needs. You’ll also want to look at the features offered by each app, as some may have features that are more suited to your needs than others. Finally, you should read user reviews to get an idea of how well each app performs.

Tips and Tricks for Scanning Documents with Your iPhone
When it comes to scanning documents with your iPhone, there are a few tips and tricks that can help you get the best results. The first tip is to prepare the document before taking the picture. This means making sure that the document is flat and there aren’t any creases or wrinkles that could affect the quality of the scan. The second tip is to make sure you’re in a well-lit area when taking the picture. This will ensure that the image is bright and clear.
Another tip is to make sure you keep your hand steady when taking the picture. If your hand moves even slightly, it can cause the image to blur. Finally, it’s important to take multiple pictures of the document. This will ensure that you have a few different versions to choose from when editing the scanned image.
How to Improve Your Scanned Document Quality on iPhone
Once you’ve taken the picture of the document, you can further improve the quality of the scanned image. The first step is to adjust the brightness and contrast of the image. This can be done by tapping on the Adjust button in the Photos app. Here, you can slide the sliders to increase or decrease the brightness and contrast of the image. You can also reduce any noises or backgrounds that may appear in the image by tapping on the Noise Reduction button.
In addition, you can sharpen the image by tapping on the Sharpen button. This will make the image look clearer and crisper. However, be careful not to over-sharpen the image, as this can cause the image to look unnatural.

Understanding the Different Types of Scans You Can Do on iPhone
In addition to scanning documents, the iPhone can also be used to scan other types of items. For example, the iPhone can be used to scan text using optical character recognition (OCR). OCR allows the iPhone to recognize text within an image and convert it into editable text. The iPhone can also be used to scan barcodes and QR codes, as well as 3D objects.
Comparing Scanning Apps: What’s Best for Your Needs?
When looking for a scanning app for your iPhone, it’s important to compare the different options available. As mentioned earlier, there are both free and paid apps available. It’s important to consider the features offered by each app to make sure that it meets your needs. You should also read user reviews to get an idea of how well each app performs.
Conclusion
Scanning documents with an iPhone is a quick and easy process. With the step-by-step guide provided in this article, you’ll be able to create high-quality scans with your iPhone. Additionally, you can explore the various scanning features of the Camera app, as well as third-party scanning apps, to find the best option for your needs. Lastly, you can use the tips and tricks provided to ensure that your scans look as clear and crisp as possible.