
Introduction
Scanning documents is a convenient way to transfer physical documents into digital versions that can be stored, shared, and printed as needed. Scanning involves using a device such as a scanner or a printer with a scanner function to capture an image of the document and then transferring it to a computer. In this article, we will explore how to scan a document from printer to computer.
Definition of “Scanning”
Scanning is the process of capturing an image of a two-dimensional object, such as a document, and converting it into a digital file. The scanned image is saved in a graphics format, such as JPEG or PNG, and can then be manipulated or printed. Scanning is often used to create digital copies of physical documents, such as receipts, invoices, contracts, and other forms.

Overview of the Problem and its Solution
The problem of scanning documents from printer to computer is a common one for many people. Fortunately, it is not difficult to do, and with a few simple steps, you can quickly learn how to scan a document from printer to computer. We will provide a step-by-step guide on how to scan a document from printer to computer, as well as some tips for efficiently scanning documents from printer to computer.
Step-by-Step Guide on How to Scan a Document from Printer to Computer
Before you begin, make sure that you have the appropriate hardware and software installed on your computer. You will need a printer with a scanner function, a USB cable to connect the printer to the computer, and scanning software. Once you have these items, you are ready to begin.
Preparing Your Printer
Before you can scan a document from your printer to your computer, you must first prepare your printer. Make sure that it is connected to a power source and that it has paper loaded in the input tray. If your printer is connected to a wireless network, ensure that it is connected to the same network as your computer.
Connecting Your Printer to Your Computer
Once your printer is prepared, you must connect it to your computer. Depending on the type of printer you have, this may be done via a USB cable or wirelessly. Refer to your printer’s manual for instructions on how to connect it to your computer.
Configuring Your Scanner Settings
Once your printer is connected to your computer, you must configure the scanner settings. This includes setting the resolution, color mode, file type, and other options. Refer to your printer’s manual for instructions on how to configure the scanner settings.
Scanning Your Document
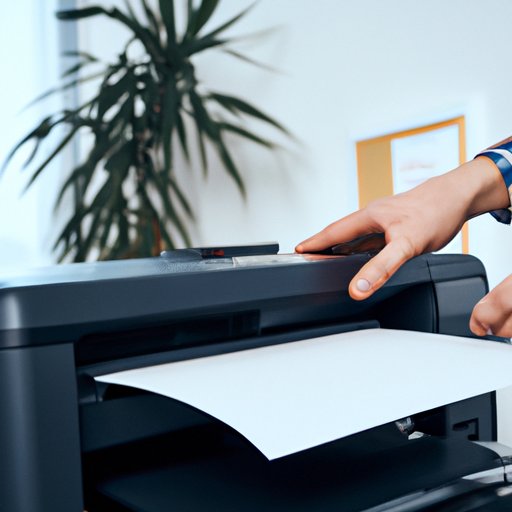
When the scanner settings are configured, you can now scan your document. Place the document on the scanner bed and press the “Scan” button. The scanned document will be saved to your computer in the file format you specified.
Tips for Efficiently Scanning Documents from Printer to Computer
To ensure that your scans are of high quality and that the process goes smoothly, there are several things you should keep in mind when scanning documents from printer to computer.
Use Quality Paper
Using quality paper is important when scanning documents. Poor-quality paper can cause streaks, smudges, and other imperfections in your scans. It is best to use thick, acid-free paper for scanning.
Clean the Scanner Bed
Dust, dirt, and other debris can get stuck in the scanner bed and cause imperfections in your scans. To avoid this, make sure to clean the scanner bed before each use.
Set a Suitable Resolution
The higher the resolution of your scans, the better the quality. However, if you set the resolution too high, it can take longer to scan and the file size will be larger. Choose a suitable resolution for your needs.
Organize Your Scanned Files
It is important to organize your scanned files so that they can be easily found and accessed. Create folders and subfolders to keep your scanned documents organized.
How to Use Your Printer’s Scanner Function to Transfer Documents to Your Computer
Most modern printers come with a scanner function that allows you to scan documents directly from the printer to your computer. Here are the steps to follow to use your printer’s scanner function to transfer documents to your computer.
Understanding Your Printer’s Scanner Function
Before you can use your printer’s scanner function, you must understand how it works. Refer to your printer’s manual for information on the scanner function and how to use it.
Connecting Your Printer to Your Computer
You must connect your printer to your computer before you can use the scanner function. Refer to your printer’s manual for instructions on how to connect it to your computer.
Using the Scanner Function to Transfer Documents
Once your printer is connected to your computer, you can use the scanner function to transfer documents. Place the document on the scanner bed and press the “Scan” button. The scanned document will be saved to your computer in the file format you specified.

An Easy Tutorial on How to Scan Documents from Printer to Computer
This tutorial will provide all the information you need to know about scanning documents from printer to computer. We will cover the basics of scanning documents, as well as tips for troubleshooting common scanning problems.
Step-by-Step Instructions
Follow these steps to scan documents from printer to computer:
- Prepare your printer by connecting it to a power source and loading paper into the input tray.
- Connect your printer to your computer.
- Configure the scanner settings.
- Place the document on the scanner bed and press the “Scan” button.
- Save the scanned document to your computer in the desired file format.
Tips for Troubleshooting Common Scanning Problems
If you encounter any problems while scanning documents from printer to computer, here are some tips for troubleshooting:
- Make sure that your printer is connected to the same network as your computer.
- Check that the scanner settings are configured correctly.
- Ensure that the document is placed correctly on the scanner bed.
- Make sure that the resolution is set to a suitable level.
- Check that the file type is set correctly.

Learn the Basics of Scanning Documents from Printer to Computer in Just a Few Simple Steps
Scanning documents from printer to computer is a straightforward process that can be completed in just a few simple steps. Follow these steps to learn the basics of scanning documents from printer to computer.
Overview of Scanning Process
Scanning documents involves capturing an image of a two-dimensional object, such as a document, and converting it into a digital file. The scanned image is saved in a graphics format, such as JPEG or PNG, and can then be manipulated or printed.
Setting Up Your Printer
Before you can scan a document from your printer to your computer, you must first prepare your printer. Make sure that it is connected to a power source and that it has paper loaded in the input tray. If your printer is connected to a wireless network, ensure that it is connected to the same network as your computer.
The Scanning Process
Once your printer is prepared, you must connect it to your computer. Depending on the type of printer you have, this may be done via a USB cable or wirelessly. Refer to your printer’s manual for instructions on how to connect it to your computer. When the scanner settings are configured, you can now scan your document. Place the document on the scanner bed and press the “Scan” button. The scanned document will be saved to your computer in the file format you specified.
Saving and Organizing Your Scanned Documents
Once your documents are scanned, you must save them to your computer. It is important to organize your scanned files so that they can be easily found and accessed. Create folders and subfolders to keep your scanned documents organized.
Conclusion
Scanning documents from printer to computer is a simple process that can be done in just a few steps. Make sure that you have the appropriate hardware and software installed on your computer, and follow the steps outlined in this article to learn how to scan a document from printer to computer. Remember to use quality paper, clean the scanner bed regularly, set a suitable resolution, and organize your scanned files for efficient scanning.
We hope that this article has provided you with a better understanding of how to scan a document from printer to computer. By following these guidelines, you can quickly and easily transfer documents from your printer to your computer.