
Introduction
Rotating your iPhone screen can be a great way to enhance your user experience. Whether you’re looking to improve visibility or increase interactivity, learning how to rotate your iPhone screen is a must-have skill. But what exactly does it mean to rotate an iPhone screen?
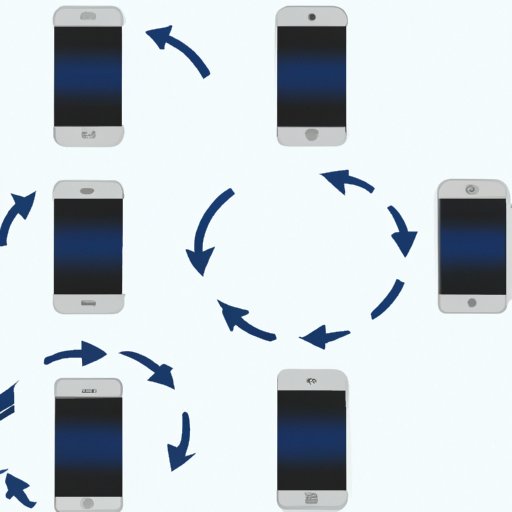
Screen rotation is the process of changing the orientation of an electronic display, such as a monitor or smartphone, so that the content displayed on the screen is shown in a different orientation than it was originally intended. This is done by either physically turning the device or using software settings to adjust the orientation of the screen.
In this article, we will explore the steps necessary to rotate an iPhone screen. We will discuss how to access the rotate feature, how to utilize the rotate feature, and how to master the art of screen rotation. We will also provide some quick tips for troubleshooting common issues. By the end of this article, you should have a better understanding of how to rotate your iPhone screen.
Step-by-Step Guide to Rotating an iPhone Screen
The first step to rotating an iPhone screen is to access the rotate feature. This can be done by going to the “Settings” app on your iPhone and selecting the “Display & Brightness” option. From there, you can select the “Display Zoom” option and then select the “Rotate” option. Once you have accessed the rotate feature, you can then proceed to rotate the screen.
To rotate the screen, simply hold down the Home button and the Power button at the same time. You will then see a pop-up window appear with two options: “Rotate Left” and “Rotate Right”. Select the appropriate option and your screen will be rotated accordingly.
How to Utilize the Rotate Feature on iPhones
Once you have successfully rotated the screen, you can begin to take advantage of the various features offered by the rotate feature. The main benefit of utilizing the rotate feature is that it allows you to change the orientation of the content on your screen. This can be useful if you want to view something in portrait mode instead of landscape mode, or vice versa.
In addition to being able to change the orientation of the content on your screen, you can also use the rotate feature to adjust the brightness of the screen. This can be done by accessing the “Display & Brightness” option in the “Settings” app and then selecting the “Brightness” slider. You can then adjust the brightness of the screen according to your preference.
Another advantage of utilizing the rotate feature is that it allows you to take advantage of the split-screen feature on the iPhone. This feature allows you to have two apps open side-by-side on the same screen. To take advantage of this feature, simply rotate your screen so that it is in landscape mode and then swipe up from the bottom of the screen to access the “Split View” feature.
Finally, the rotate feature can also be used to adjust the size of the text on your screen. To do this, simply access the “Display & Brightness” option in the “Settings” app and then select the “Text Size” slider. You can then adjust the size of the text on your screen according to your preference.
Mastering the Art of Screen Rotation on Your iPhone
Now that you know how to access and utilize the rotate feature on your iPhone, it’s time to learn how to master the art of screen rotation. The first step to mastering this skill is to understand the different orientations available. This includes portrait mode, which is when the phone is held vertically, and landscape mode, which is when the phone is held horizontally.
Once you understand the different orientations, you can then begin to adjust the settings on your iPhone to optimize the rotate functionality. This can include enabling the auto-rotate feature, which will automatically switch between portrait and landscape mode depending on how you are holding the phone. You can also adjust the sensitivity of the rotate feature, which will determine how quickly the phone will respond to changes in orientation.
Unlocking the Mystery Behind iPhone Screen Rotation
Now that you know how to access and utilize the rotate feature on your iPhone, it’s time to explore the settings and tools that can help you troubleshoot any issues you might encounter while attempting to rotate your screen. One of the most important settings to understand is the “Orientation Lock” setting, which will prevent the screen from rotating even if you attempt to rotate it manually.
You should also familiarize yourself with the “Auto-Rotate” setting, which will allow the screen to automatically rotate based on the orientation of the phone. This can be helpful if you don’t want to manually rotate the screen every time you change the orientation of the phone. Finally, you should also become familiar with the “Display Zoom” setting, which will allow you to zoom in or out on the display to make the content easier to read.
The Easiest Way to Rotate Your iPhone Screen
One of the easiest ways to rotate your iPhone screen is to use gestures. This means that you can simply swipe up, down, left, or right to rotate the screen in the desired direction. To activate this feature, simply go to the “Settings” app and select the “Gestures” option. Here, you can enable the “Swipe Up/Down/Left/Right” feature and then use the corresponding gestures to rotate the screen.
You can also take advantage of the “Quick Access Settings” feature, which can be found in the “Settings” app. Here, you can select the “Display & Brightness” option and then select the “Rotate” option. This will allow you to quickly and easily rotate the screen without having to access the “Gestures” menu.
Quick Tips for Rotating Your iPhone Screen
When attempting to rotate your iPhone screen, it’s important to keep a few things in mind. First, you should always make sure that the “Orientation Lock” setting is disabled, as this will prevent the screen from rotating even if you attempt to rotate it manually. Second, you should take advantage of the “Auto-Rotate” setting, which will allow the screen to automatically rotate based on the orientation of the phone. Finally, you should familiarize yourself with the “Display Zoom” setting, which will allow you to zoom in or out on the display to make the content easier to read.
Get the Most Out of Your iPhone by Rotating the Screen
Rotating your iPhone screen can be a great way to get the most out of your device. For starters, it can significantly increase the visibility of the content on your screen by allowing you to adjust the orientation and brightness of the display. Additionally, it can also enhance your overall user experience by allowing you to take advantage of the split-screen feature and adjust the size of the text on your screen.
Conclusion
In conclusion, rotating your iPhone screen can be a great way to enhance your user experience. By following the steps outlined in this article and taking advantage of the settings and tools available, you should now have a better understanding of how to rotate your iPhone screen. Remember, the key to mastering the art of screen rotation is to understand the different orientations, adjust the settings to optimize the rotate functionality, and take advantage of the quick access settings.