
Introduction
Retiling a bathroom is a great way to give your bathroom a fresh new look without the expense of a full renovation. With careful planning and the right tools, you can easily transform your bathroom into a beautiful and modern space. In this article, we’ll cover everything you need to know about retiling a bathroom, from preparation and installation to the cost of materials and labor.
Step-by-Step Guide to Retiling a Bathroom
Retiling a bathroom is not a difficult task if you have the right tools and follow the correct steps. Here’s a step-by-step guide to help you get started:
Preparing the Area
Before you begin retiling the bathroom, you’ll need to prepare the area. This includes removing any existing fixtures, such as toilets, sinks, or bathtubs. You should also check for any loose or damaged tiles that need to be replaced. Once all of the fixtures are removed and the area is cleared, you’re ready to start retiling.
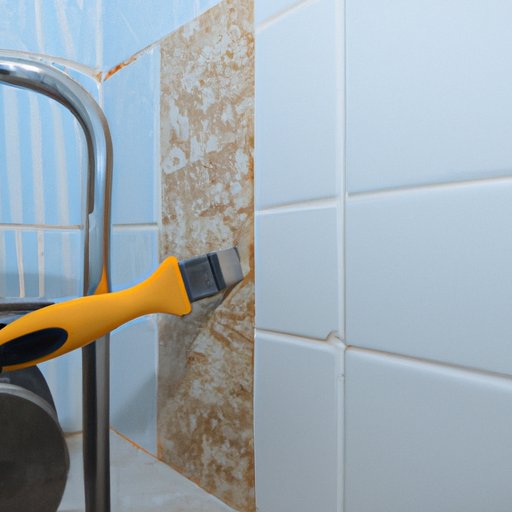
Removing Old Tiles
The next step is to remove the old tiles from the wall and floor. If you’re dealing with ceramic tiles, use a hammer and chisel to break them up. For vinyl tiles, you can use a heat gun to soften the adhesive and then pry them off with a putty knife. Be sure to wear safety goggles and gloves when removing tiles to protect yourself from debris.
Installing New Tiles
Once the area is cleared, you can begin installing the new tiles. Start by laying out the tiles to make sure they fit correctly before you begin applying them to the wall. Use tile spacers to ensure even spacing between the tiles. When you’re ready, apply the adhesive to the back of the tiles and press them firmly onto the wall. Allow the adhesive to dry completely before continuing.
Finishing Touches
Once the tiles are installed, it’s time to add the finishing touches. First, you’ll need to apply grout to the spaces between the tiles. This will help protect the tiles from moisture and dirt. Then, use a sealant to protect the grout and make it more resistant to staining. Finally, replace any fixtures that were removed during the retiling process.
DIY Tips for Retiling a Bathroom
Retiling a bathroom is a relatively straightforward process, but there are some important tips to keep in mind to ensure a successful result. Here are a few DIY tips for retiling a bathroom:
Choose the Right Tools
You’ll need the right tools to complete the job properly. Make sure you have a hammer and chisel, a heat gun, a putty knife, tile spacers, grout, and sealant. These tools will make the process much easier and ensure a professional-looking finish.
Work in Sections
When retiling a bathroom, it’s best to work in sections. This will allow you to focus on one area at a time and ensure that the tiles are placed correctly. Start in one corner and work your way around the room until you’ve finished retiling.
Use Spacers
Tile spacers are essential for ensuring even spacing between the tiles. They come in various sizes, so make sure you choose the right ones for your project. Using spacers will help create a professional-looking finish.

What You Need to Know When Retiling a Bathroom
Retiling a bathroom is a big job, and there are a few things you should know before you get started. Here are a few key points to keep in mind when retiling a bathroom:
Cost
The cost of retiling a bathroom will depend on the size of the room, the type of tiles you choose, and the amount of labor required. On average, expect to pay between $1,000 and $3,000 for a small bathroom and between $3,000 and $5,000 for a larger bathroom.
Types of Tiles
There are many different types of tiles available, including ceramic, porcelain, and natural stone. Each type of tile has its own advantages and disadvantages, so it’s important to do your research before making a decision.
Grout and Sealant
Grout and sealant are essential for protecting the tiles from moisture and dirt. Make sure you use the right products for your project and apply them correctly for the best results.
How to Choose the Right Tiles for Your Bathroom Retiling Project
Choosing the right tiles for your bathroom is an important part of the retiling process. Here are a few tips to help you choose the right tiles for your project:
Consider Durability
Durability is an important factor when choosing tiles for your bathroom. Ceramic and porcelain tiles are usually the most durable, while natural stone tiles may require more maintenance. Consider how often you plan to use the bathroom and choose tiles that can handle the wear and tear.
Match Your Aesthetic
Tiles come in a variety of colors, textures, and patterns, so there’s something to suit every style. Think about the overall aesthetic of your bathroom and choose tiles that will complement the space.
Choose the Right Size
Tiles come in a range of sizes, from small mosaic tiles to large format tiles. Consider the size of your bathroom and choose tiles that will fit the space without making it look too cluttered.

The Cost of Retiling a Bathroom
The cost of retiling a bathroom will depend on several factors, including the size of the room, the type of tiles you choose, and the amount of labor required. Generally speaking, expect to pay between $1,000 and $5,000 for a standard-sized bathroom. This cost will include materials, such as tiles, grout, and sealant, as well as labor costs for installation.

Common Mistakes to Avoid When Retiling a Bathroom
Retiling a bathroom is no easy task, and there are a few common mistakes you should avoid. Here are a few mistakes to watch out for when retiling a bathroom:
Not Preparing the Area Correctly
Before you begin retiling, it’s important to prepare the area properly. This includes removing any existing fixtures, such as toilets, sinks, or bathtubs. Failing to do this could lead to costly mistakes down the line.
Not Using the Right Adhesive
Using the wrong adhesive can cause tiles to become loose and fall off. Make sure you select the right adhesive for your project and follow the manufacturer’s instructions for best results.
Not Spacing Tiles Properly
Tile spacers are essential for creating even spacing between the tiles. Make sure you use the right size spacers for your project and position them correctly for a professional-looking finish.
Conclusion
Retiling a bathroom is a great way to give your bathroom a fresh new look without the expense of a full renovation. With careful planning and the right tools, you can easily transform your bathroom into a beautiful and modern space. We hope this article has provided you with the information you need to get started on your retiling project. Remember, with patience and attention to detail, you can achieve beautiful results.
Retiling a bathroom has many benefits, including giving your bathroom a fresh new look, increasing the value of your home, and saving you money. With careful planning and the right tools, you can easily transform your bathroom into a beautiful and modern space.