
Introduction
A faucet washer is a small rubber or plastic part that connects the handle of a faucet to the valve stem. It helps keep the water from leaking out of the faucet. Over time, the washer can become worn or damaged, resulting in leaks. Replacing the washer is an inexpensive and relatively simple way to fix a leaky faucet.
Step-by-Step Guide to Replacing a Faucet Washer
The following steps will walk you through the process of replacing a faucet washer. Be sure to have the necessary tools on hand before beginning the process.
Gather Necessary Tools
Before starting, gather the tools you will need for the job. You will need a slotted screwdriver, pliers, channel locks, and a basin wrench. You may also want to have a flashlight or headlamp handy to help you see what you are doing.
Determine Type of Washer
Identify the type of washer you need to replace. There are two main types of washers: flat and conical. The shape of the washer should match the shape of the hole in the valve stem. If you don’t know what type of washer you need, take the old one with you to the hardware store when you go to buy a new one.
Shut off Water Supply
Before you begin working on the faucet, make sure you shut off the water supply. Locate the shutoff valve under the sink and turn it clockwise until it stops. This will prevent any water from flowing through the pipe while you are working.
Remove Old Washer
Once the water supply is shut off, use the slotted screwdriver to remove the handle of the faucet. Unscrew the retaining nut and then gently pull the handle away from the valve stem. Use the pliers to unscrew the packing nut and remove the old washer.
Install New Washer
Once the old washer is removed, you can install the new one. Make sure the shape of the new washer matches the shape of the hole in the valve stem. Use the basin wrench to tighten the new washer in place. Also, use the channel locks to secure the packing nut.
Reattach Parts
Once the new washer is installed, reattach the handle to the valve stem. Tighten the retaining nut with the screwdriver. Check the handle to make sure it moves freely and does not bind.
Test for Leaks
Finally, turn on the water supply and test the faucet for leaks. Turn on the faucet and check for any water leakage around the handle or valve stem. If there are no leaks, you’re done!

Video Tutorial on Replacing a Faucet Washer
If you prefer to watch a video tutorial, here is a link to one that will walk you through the process step-by-step: How to Replace a Faucet Washer.

Illustrated Guide to Replacing a Faucet Washer
If you need more visual guidance, here is an illustrated guide that will show you each step of the process: How to Replace a Faucet Washer.
DIY Guide to Replacing a Faucet Washer
Here are some tips and tricks to make the job a little easier:
- Always wear safety glasses when working on a faucet.
- Make sure you have the correct size washer for your faucet.
- Tighten the parts securely, but do not overtighten.
- Use plumber’s tape to seal the threads on the valve stem.
- Check for leaks after you are finished.
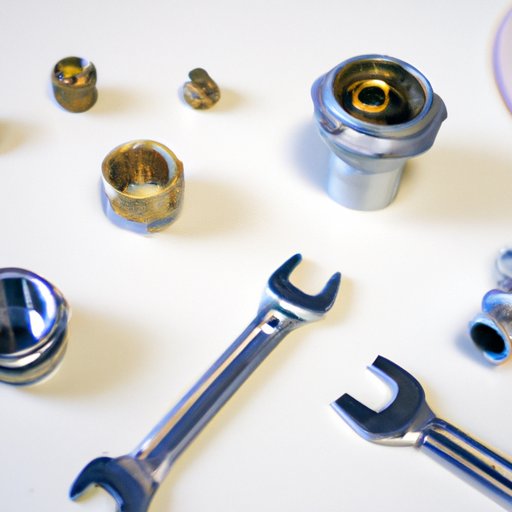
Explaining the Tools Needed to Replace a Faucet Washer
The following list explains the tools needed to replace a faucet washer:
- Slotted Screwdriver: Used to remove the handle of the faucet.
- Pliers: Used to unscrew the packing nut and remove the old washer.
- Channel Locks: Used to tighten the packing nut on the new washer.
- Basin Wrench: Used to tighten the new washer in place.
- Flashlight: Used to illuminate the area beneath the sink.
Troubleshooting Tips for Replacing a Faucet Washer
Here are some common problems and solutions when replacing a faucet washer:
- Leaks: If the faucet is still leaking after you have replaced the washer, check the packing nut and make sure it is tightened securely. You may also need to apply plumber’s tape to the threads of the valve stem.
- Stuck Handle: If the handle is stuck and won’t move, try lubricating the handle with a few drops of oil. If this doesn’t work, you may need to replace the handle.
- Stuck Packing Nut: If the packing nut is stuck, try using penetrating oil to loosen it. You may also need to use a pair of channel locks to loosen it.

A Comparison of Different Types of Faucet Washers
There are several different types of faucet washers available. Here is a comparison of the most common types:
- Flat Washers: These washers are flat and circular in shape. They are used in compression faucets and can be made of rubber or plastic.
- Conical Washers: These washers have a cone-shaped design and are used in compression faucets. They are usually made of rubber.
- Cartridge Washers: These washers are used in cartridge-style faucets. They are usually made of plastic or brass and can be difficult to replace.
- Ball Washers: These washers are used in ball-type faucets. They are usually made of rubber or plastic and are relatively easy to replace.
Conclusion
Replacing a faucet washer is a relatively simple process that can be completed in a few minutes. With the right tools and a step-by-step guide, you can easily replace a faucet washer yourself. Be sure to identify the type of washer you need, shut off the water supply, remove the old washer, install the new washer, reattach the parts, and test for leaks.