
Introduction
A dryer vent hose is an important part of any clothes dryer. It helps to safely remove hot air from your dryer, preventing it from overheating. Over time, however, your dryer vent hose can become worn or clogged. When this happens, it’s important to replace the hose to keep your dryer running safely and efficiently. In this article, we’ll explore how to replace a dryer vent hose in 8 simple steps.
Step-by-Step Guide to Replacing a Dryer Vent Hose
To start, you’ll want to identify the type of dryer vent hose you have. Most dryers use flexible metal hoses, but they may also be made of plastic. Once you know the type of hose you have, you can move on to the next step.
Next, you’ll want to prepare the area around the dryer. Make sure the floor is clear of any debris and that there’s plenty of room to work. You’ll also want to make sure the power is disconnected from the dryer before beginning the replacement process.
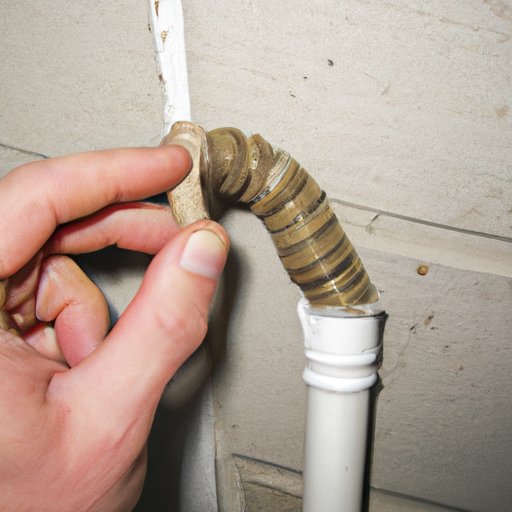
Once the area is prepared, you’ll need to remove the old hose. Start by unscrewing the clamp that holds the hose in place. Then, carefully pull the hose away from the dryer and discard it. If the hose is stuck, you may need to use a pair of pliers to help loosen it.
Now it’s time to install the new hose. Start by attaching one end of the hose to the exhaust port on the back of the dryer. Then, attach the other end of the hose to the wall vent. Make sure the hose is securely fastened with a clamp or other fastening device.
Once the hose is installed, you’ll want to test it to make sure it works properly. Turn on the dryer and check for any leaks or blockages. If everything looks good, you can finish up by tidying up the area and reconnecting the power to the dryer.

DIY Tips for Replacing a Dryer Vent Hose
When replacing a dryer vent hose, it’s important to take some safety precautions. Make sure the power is disconnected from the dryer before beginning the process. Also, wear protective gloves and eye protection while working.
You’ll also want to make sure you have the proper tools for the job. A screwdriver and adjustable wrench are essential for removing and installing the new hose. You may also need a pair of pliers if the old hose is stuck.
It’s also important to get the measurements and fittings right. Measure the distance between the dryer and the wall vent to make sure the hose is the correct length. Make sure the fittings are secure and that the hose fits snugly.
Finally, don’t forget to clean out any debris from the area. Vacuum or sweep up any dirt or dust that might have accumulated during the replacement process. This will help ensure your dryer runs smoothly and safely.

How to Replace a Dryer Vent Hose in 5 Easy Steps
Replacing a dryer vent hose doesn’t have to be difficult. Here’s a quick guide to help you get the job done in 5 easy steps:
Step 1: Disconnect the dryer from the power source. This is essential for safety reasons.
Step 2: Remove the old hose. Unscrew the clamp that holds the hose in place and carefully pull it away from the dryer.
Step 3: Install the new hose. Attach one end of the hose to the exhaust port on the back of the dryer, then attach the other end to the wall vent. Make sure the hose is securely fastened.
Step 4: Secure the hose. Use a clamp or other fastening device to make sure the hose is securely in place.
Step 5: Reconnect the dryer. Turn on the dryer to make sure the hose is working properly, then tidy up the area and reconnect the power.

Video Tutorial on Replacing a Dryer Vent Hose
If you’re still feeling unsure about replacing a dryer vent hose, you can always watch a video tutorial. A good video tutorial will provide an overview of the process, as well as some tips for successful replacement. You can find plenty of tutorials online, so take some time to do your research before beginning the job.
The Beginner’s Guide to Replacing a Dryer Vent Hose
If you’re a beginner when it comes to replacing a dryer vent hose, don’t worry! There are plenty of resources available to help you learn the basics. Before you begin, it’s important to understand what you’ll need to do and what tools you’ll need to get the job done.
You’ll need to disconnect the dryer from the power source, remove the old hose, install the new hose, secure the hose, and reconnect the dryer. As far as tools go, you’ll need a screwdriver, adjustable wrench, and possibly a pair of pliers. You’ll also want to make sure you have the correct measurements and fittings for the job.
Essential Tools You Need to Replace Your Dryer Vent Hose
When replacing a dryer vent hose, it’s important to have the right tools. The most essential items you’ll need are a screwdriver, adjustable wrench, and possibly a pair of pliers. You may also want to have a vacuum cleaner or broom on hand for cleaning up debris.
In addition to these essential items, you may also want to have some optional items. These include duct tape, a drill, and a flashlight. Having these items on hand can make the job go more smoothly and help prevent any potential problems.
Conclusion
Replacing a dryer vent hose is a relatively simple task, as long as you have the right tools and follow the right steps. Start by identifying the type of dryer vent hose you have, preparing the area, removing the old hose, and installing the new hose. Make sure the hose is securely fastened and test it to make sure it’s working properly. Finally, tidy up the area and reconnect the power. With these steps, you should have no problem replacing your dryer vent hose.
Remember to always stay safe when replacing a dryer vent hose. Make sure the power is disconnected from the dryer before beginning the process, and wear protective gloves and eyewear while working. If you’re still feeling unsure, watch a video tutorial or consult a professional for help.