
Introduction
Bike pedals are an essential part of any bicycle. They provide the platform on which you can push off with your feet in order to move forward. As important as they may be, bike pedals do wear out over time and need to be replaced. This article will provide you with a step-by-step guide to replacing bike pedals, so you can get back to riding without any issues.
What are Bike Pedals and Why Do They Need to be Replaced?
Bike pedals are the components that attach to the crank arms of your bicycle and allow you to push off with your feet in order to move forward. They come in many different shapes, sizes, and styles. Over time, bike pedals can become worn down due to use and exposure to the elements. This can cause them to become loose or even completely detached from the crank arms, leading to an unsafe ride. If this happens, it is important to replace the bike pedals with a new set.

Benefits of Replacing Bike Pedals
Replacing bike pedals offers several benefits, including:
- Improved performance – New bike pedals provide better grip and more efficient power transfer, resulting in improved performance when riding.
- Safety – Worn pedals can be dangerous, as they can become loose or detach while riding. Replacing them ensures a safe and secure ride.
- Style – Bike pedals come in a variety of colors and styles, so you can choose a set that matches your bike’s look.
Step-by-Step Guide to Replacing Bike Pedals
Replacing bike pedals is a relatively straightforward process that can be done at home with the right tools. Here is a step-by-step guide to replacing your bike pedals:
Step 1: Gather the Necessary Tools
Before you begin, make sure you have the following tools on hand:
- Pedal wrench
- Allen key
- Grease
- Rags
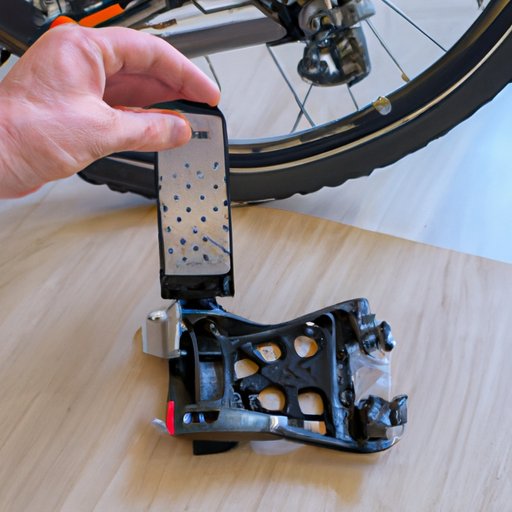
Step 2: Remove the Old Pedals
Once you have gathered the necessary tools, the next step is to remove the old pedals. Start by using the pedal wrench to loosen the left pedal. Once it is loose enough, use your fingers to unscrew it the rest of the way. Repeat this process for the right pedal.
Step 3: Install the New Pedals
With the old pedals removed, it’s time to install the new ones. Start by applying some grease to the threads of the pedals. Then, use the pedal wrench to tighten the left pedal into the crank arm. Again, once it is tight enough, use your fingers to finish tightening it. Repeat this process for the right pedal.

How To: Change Out Your Bike Pedals
Now that you know the basics of replacing bike pedals, let’s take a closer look at the steps involved. Here is a step-by-step guide to changing out your bike pedals:
Step 1: Gather the Necessary Tools
As mentioned above, you will need a few basic tools to complete this job. Make sure you have a pedal wrench, Allen key, grease, and rags on hand before you start.
Step 2: Remove the Old Pedals
Start by using the pedal wrench to loosen the left pedal. Once it is loose enough, use your fingers to unscrew it the rest of the way. Repeat this process for the right pedal.
Step 3: Install the New Pedals
Apply some grease to the threads of the new pedals. Then, use the pedal wrench to tighten the left pedal into the crank arm. Again, once it is tight enough, use your fingers to finish tightening it. Repeat this process for the right pedal.
Step 4: Check the Tightness
Once the new pedals are installed, check their tightness. Use the pedal wrench to give each one a final turn. Make sure they are securely attached and not too tight or too loose.
Replacing Bike Pedals: A Quick and Easy Guide
Replacing bike pedals doesn’t have to be a long and difficult process. Here are some tips for making the process quicker and easier:
- Make sure to gather all the necessary tools before starting.
- Use a lubricant, such as grease, on the threads of the new pedals.
- Check the tightness of the pedals after they are installed.

What You Need to Know Before Replacing Bike Pedals
Before you begin replacing your bike pedals, there are a few things to consider:
- Types of bike pedals available – There are several types of bike pedals available, including flat pedals, clipless pedals, and platform pedals. Choose a type that best suits your riding style.
- Considerations when selecting a new set of pedals – When selecting a new set of pedals, consider factors such as weight, size, material, and price.

All You Need to Know About Replacing Bike Pedals
When replacing bike pedals, there are a few safety precautions and maintenance tips to keep in mind:
- Safety precautions – Always wear protective gear, such as gloves, when replacing bike pedals. Additionally, ensure that the pedals are securely tightened and not too loose or too tight.
- Maintenance tips – Inspect the pedals regularly for signs of wear and tear. If any problems arise, replace the pedals immediately.
An Illustrated Guide to Replacing Bike Pedals
For a visual guide to replacing bike pedals, check out this infographic:
[INSERT ILLUSTRATED GUIDE]
This infographic provides a step-by-step guide to replacing bike pedals, along with helpful tips and tricks. It also includes troubleshooting tips in case you run into any problems.
Replacing Bike Pedals for Beginners
If you’re just getting started with replacing bike pedals, here is an overview of the steps involved:
- Gather the necessary tools – You will need a pedal wrench, Allen key, grease, and rags.
- Remove the old pedals – Use the pedal wrench to loosen the left pedal, then use your fingers to unscrew it the rest of the way. Repeat this process for the right pedal.
- Install the new pedals – Apply some grease to the threads of the new pedals. Then, use the pedal wrench to tighten the left pedal into the crank arm. Repeat this process for the right pedal.
- Check the tightness – Once the new pedals are installed, check their tightness. Use the pedal wrench to give each one a final turn.
Conclusion
Replacing bike pedals is a relatively straightforward process that can be done at home with the right tools. This article has provided a step-by-step guide to replacing your bike pedals, along with helpful tips and tricks. Remember to always wear protective gear, apply a lubricant to the threads of the new pedals, and check the tightness after installation. With these steps in mind, you should have no problem replacing your bike pedals.