
Introduction
Riding a bicycle is one of the most enjoyable ways to get around. Whether you are riding for leisure or commuting, having a well-maintained bike with a working chain is essential. Replacing a bike chain can be a daunting task, but it doesn’t have to be. In this article, we will explore how to replace a bike chain and discuss some tips and tricks that make the job easier.
Overview of the Problem
A bike chain is an integral part of any bicycle. It connects the gears to the pedals, allowing you to move forward. Over time, the chain can become worn out or damaged, making it difficult to ride. If the chain is not replaced in a timely manner, it could eventually cause damage to other components of the bicycle. Replacing a bike chain is relatively simple and can be done with basic tools.

Benefits of Replacing a Bike Chain
Replacing a bike chain can have many benefits. A new chain will run smoother and last longer than an old one. Additionally, a new chain can improve the overall performance of your bike. A well-maintained chain will also help reduce wear and tear on other components of the bike, such as the gears and derailleurs.
Step-by-Step Guide to Replacing a Bike Chain
The following steps will guide you through the process of replacing a bike chain. Before getting started, make sure you have all the necessary tools and supplies. You will need a chain breaker tool, a new chain, and some lubricant.
Removing the Old Chain
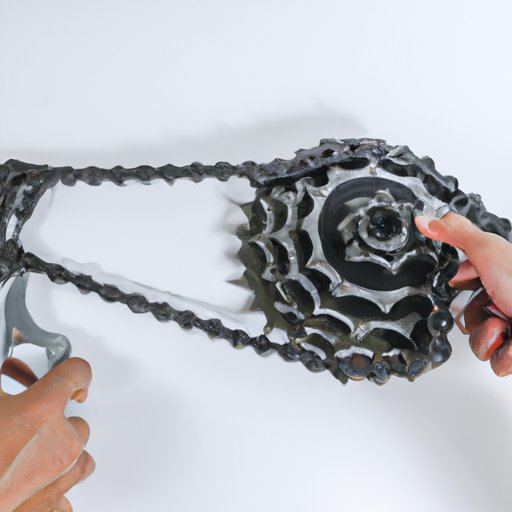
The first step is to remove the old chain. To do this, use the chain breaker tool to push out one of the pins that holds the chain together. Once the pin is out, separate the chain segments and set the old chain aside. Make sure to keep the removed pin, as you will need it to join the new chain.
Installing the New Chain
Next, take the new chain and place it on the drivetrain. Make sure the chain is routed correctly and that the links match up with the sprockets. Once the chain is in place, use the chain breaker tool to insert the removed pin and join the two ends of the chain.
Adjusting the Chain Tension
The final step is to adjust the chain tension. This is done by loosening the rear wheel axle nut and moving the wheel back and forth until the chain is taut. Once the chain is properly tensioned, tighten the axle nut and check the chain again to make sure it is still secure.
A Beginner’s Guide to Replacing a Bike Chain
Replacing a bike chain is not a difficult process, but there are some tips and tricks that can make the job easier. Here are some important things to keep in mind when replacing a bike chain.
Tools Needed
The most important tool you will need is a chain breaker tool. This tool is used to remove and install the pins that hold the chain together. You will also need a replacement chain and some lubricant. The lubricant is used to keep the chain running smoothly.
Tips and Tricks
One tip to keep in mind is to lay the chain out on a flat surface before installing it. This will make it easier to ensure that the links line up correctly with the sprockets. Additionally, make sure to check the chain tension after installation. If the chain is too loose, it can slip off the sprockets and cause damage to the drivetrain.
Video Tutorial on Replacing a Bike Chain
If you are new to replacing a bike chain, watching a video tutorial can be helpful. There are many tutorials available online that can walk you through the entire process. Here are some tips for finding and following along with a tutorial.
Where to Find Tutorials
You can find video tutorials on YouTube, as well as other websites that specialize in bicycle repair. Look for detailed tutorials that explain each step in the process. Additionally, look for tutorials that are specific to your type of bicycle, as some models may require different steps.
How to Follow Along
When following a tutorial, make sure you have all the necessary tools and supplies. Also, pause the video as needed to give yourself more time to complete each step. Finally, remember to double-check your work before taking your bike for a ride.

Tools and Tips for Replacing a Bike Chain
Replacing a bike chain is a relatively simple process, but there are some important tools and tips that can make the job easier. Here are some of the most important tools and tips to keep in mind.
What Tools Are Necessary
The most important tool you will need is a chain breaker tool. This tool is used to remove and install the pins that hold the chain together. You will also need a replacement chain and some lubricant. The lubricant is used to keep the chain running smoothly.
Other Tips and Tricks
When removing the old chain, make sure to keep the removed pin, as you will need it to join the new chain. Additionally, make sure to check the chain tension after installation. If the chain is too loose, it can slip off the sprockets and cause damage to the drivetrain.
How to Replace a Bike Chain in 10 Easy Steps
Replacing a bike chain is not a difficult process, but it does require some patience and attention to detail. Follow these 10 easy steps and you will be back on the road in no time!
Step 1: Prepare the Bicycle
Before starting, make sure the bicycle is in a stable position. You may need to turn the handlebars or shift the frame so that you have enough room to work. Additionally, make sure you have all the necessary tools and supplies.
Step 2: Remove the Old Chain
Use the chain breaker tool to push out one of the pins that holds the chain together. Once the pin is out, separate the chain segments and set the old chain aside. Make sure to keep the removed pin, as you will need it to join the new chain.
Step 3: Install the New Chain
Take the new chain and place it on the drivetrain. Make sure the chain is routed correctly and that the links match up with the sprockets. Once the chain is in place, use the chain breaker tool to insert the removed pin and join the two ends of the chain.
Step 4: Adjust Chain Tension
To adjust the chain tension, loosen the rear wheel axle nut and move the wheel back and forth until the chain is taut. Once the chain is properly tensioned, tighten the axle nut and check the chain again to make sure it is still secure.
Step 5: Connect Master Link
If the chain is equipped with a master link, connect the two ends of the chain together. Make sure the link is securely fastened and check the chain for proper tension.
Step 6: Check for Proper Chain Tension
After connecting the master link, check the chain for proper tension. The chain should be tight enough so that it does not slip off the sprockets, but not so tight that it causes binding or rubbing.
Step 7: Lubricate the Chain
Once the chain is installed, it is important to lubricate it. This will help keep the chain running smoothly and reduce wear and tear on other components of the bike. Use a lubricant specifically designed for bicycle chains and apply it liberally.
Step 8: Test Ride
Before taking your bike out for a long ride, it is a good idea to take it for a test ride. This will give you an opportunity to make sure the chain is running smoothly and that the chain tension is correct.
Step 9: Re-Check Chain Tension
After the test ride, check the chain tension again. If the chain is too loose, you may need to adjust the chain tension again. Make sure to check the chain tension periodically to ensure it remains properly adjusted.
Step 10: Enjoy the Ride!
Now that the chain has been replaced, you can enjoy the ride! Make sure to check the chain tension periodically to ensure it remains properly adjusted.

DIY: Replacing a Bike Chain
Replacing a bike chain is a relatively simple process, but it is important to take certain safety precautions. Here are some tips to keep in mind when replacing a bike chain.
Safety Precautions
When working on a bicycle, make sure to wear protective gear. Additionally, make sure the bicycle is in a stable position before beginning the repair. Finally, be sure to read and follow the manufacturer’s instructions when using any tools or supplies.
Troubleshooting Common Problems
If the chain slips off the sprockets, it may be because the chain tension is too low. Try adjusting the chain tension and see if that resolves the issue. If the chain is still slipping, it may be time to replace the chain.
Conclusion
Replacing a bike chain is not a difficult process, but it does require some patience and attention to detail. By following the steps outlined in this article, you can easily replace your bike chain and get back on the road in no time. Just remember to always wear protective gear, read the manufacturer’s instructions, and double-check your work before taking your bike for a ride.
Summary of Steps
In summary, the steps for replacing a bike chain include: preparing the bicycle, removing the old chain, installing the new chain, adjusting the chain tension, connecting the master link, checking for proper chain tension, lubricating the chain, taking a test ride, re-checking the chain tension, and enjoying the ride!
Final Thoughts
Replacing a bike chain is an important part of maintaining your bicycle. With the right tools and knowledge, you can easily replace a bike chain and get back on the road. Just remember to always take safety precautions and follow the manufacturer’s instructions when using any tools or supplies.