
Introduction
Water damage to ceilings can be a serious problem, especially if it’s left unchecked. Ceiling repairs can be costly and time consuming, so it’s important to take steps to prevent water damage from occurring in the first place. This article will provide an overview of water damage to ceilings, discuss the reasons for water damage, and provide step-by-step instructions on how to repair water damaged ceilings.

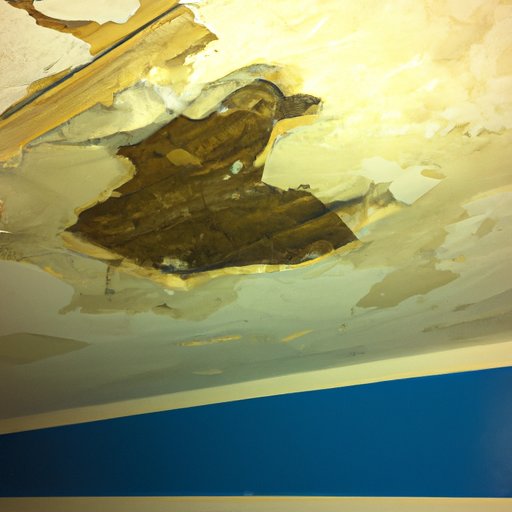
Overview of Water Damage to Ceilings
Water damage to ceilings is caused by a variety of sources, including leaks, floods, and condensation. When water seeps into the ceiling, it can cause structural damage, rot, mold, and mildew. In addition, water damage can weaken the integrity of the ceiling and lead to sagging or warping. If left unchecked, water damage to ceilings can become a serious safety hazard.
Reasons for Water Damage
There are several reasons why water can damage ceilings. Leaks are one of the most common causes of water damage. Leaks can occur in pipes, roofs, and other areas of the home or building. In addition, flooding can also cause water damage to ceilings. Other potential sources of water damage include condensation, poor ventilation, and inadequate insulation.

Identify the Source of the Water Damage
The first step in repairing water damaged ceilings is to identify the source of the water damage. Start by inspecting for any obvious signs of leaks or other sources of water. Look for stains or discoloration on the ceiling or walls, as well as any evidence of water pooling or dripping. It’s also important to consider the age of the home or building, as older homes may have aged pipes that are more prone to leaking.
Assess the Extent of the Damage
Once you’ve identified the source of the water damage, it’s time to assess the extent of the damage. Start by examining the structure of the ceiling. Look for any signs of sagging, warping, or other structural damage. Additionally, check for mold or mildew, which can be a sign of more extensive water damage.
Remove Damaged Ceiling Material
If the water damage is extensive, it’s likely that some of the ceiling material needs to be removed. Start by cutting out any sections of drywall or other materials that are obviously damaged. Be sure to dispose of the materials properly; contact your local waste management company for information on how to do this safely.
Dry the Area
Once all of the damaged materials have been removed, it’s important to dry the area thoroughly. The best way to do this is to use fans and dehumidifiers. Monitor the progress of the drying process to ensure that the area is completely dry before proceeding with any repairs.
Replace Damaged Materials
Once the area is dry, it’s time to replace any damaged materials. Purchase replacement materials such as drywall, insulation, and ceiling tiles. Make sure to follow manufacturer’s instructions when installing the new materials.
Refinish the Ceiling
The final step in repairing water damaged ceilings is to refinish the ceiling. Choose appropriate finishes such as paint or wallpaper, and apply them according to manufacturer’s instructions. Be sure to take proper safety precautions, such as wearing gloves and a face mask.
Conclusion
Repairing water damaged ceilings can be a complex and time-consuming process. However, by following the steps outlined in this article, you can successfully repair your ceiling and prevent further water damage. To summarize, start by identifying the source of the water damage, assess the extent of the damage, remove damaged materials, dry the area, replace materials, and refinish the ceiling. Taking these steps can help you save time and money in the long run, and protect your home or building from future water damage.