
Introduction
Drywall cracks are an unsightly and potentially dangerous issue in any home or office. They can occur in ceilings due to settling of the building, humidity, temperature changes, or other causes. Fortunately, it is possible to repair these cracks and restore the appearance of the ceiling.
In this article, we will provide a comprehensive overview of repairing drywall cracks in ceilings. We will discuss the definition of drywall cracks, the problems they can cause, and the steps required to fix them. Additionally, we will discuss DIY techniques for fixing drywall cracks in ceilings, as well as tips for patching and hiding them. Finally, we will provide a summary of everything you need to know about repairing drywall cracks in ceilings.
Definition of Drywall Cracks
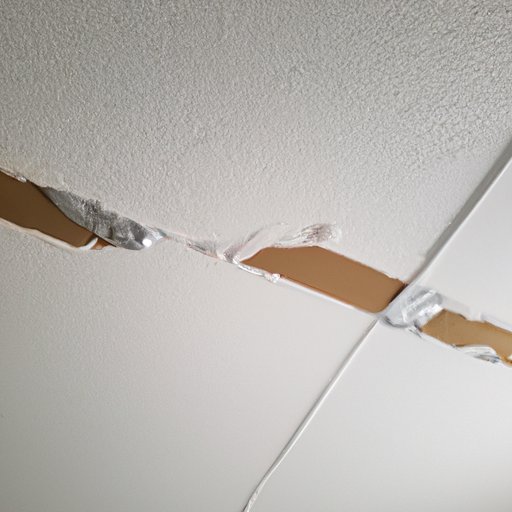
Drywall cracks are visible splits in the material that makes up your walls and ceilings. These cracks can range from small hairline fissures to large gaping holes. They can be caused by settling of the building, humidity, temperature changes, plumbing leaks, or even just normal wear and tear over time.
It is important to note that while most drywall cracks are merely cosmetic, some can indicate serious structural damage. If your drywall cracks are accompanied by bulging, sagging, or other signs of a damaged structure, you should contact a professional immediately.
Overview of Problems Caused By Drywall Cracks
Drywall cracks can lead to a variety of problems, depending on their size and location. Small cracks may not be noticeable, but larger ones can be unsightly and damaging to your property value. In addition, drywall cracks can also lead to water damage if left unchecked, as well as mold growth.
Therefore, it is important to repair drywall cracks as soon as possible. This will help prevent further damage and ensure that your walls and ceilings look their best.
Step-by-Step Guide to Repairing Drywall Cracks in Ceiling
Repairing drywall cracks in ceiling isn’t difficult, but it does require patience and attention to detail. Follow these steps for a successful repair:
Preparing the Area
The first step in repairing drywall cracks is to prepare the area. This means removing any furniture, carpets, and other items from the vicinity. Once the area is clear, use a vacuum cleaner to remove any dust or debris from the crack.
Applying Joint Compound
Next, spread a thin layer of joint compound over the crack using a putty knife. Allow the compound to dry completely, then apply a second layer. Continue until the crack is completely filled in. Once the compound has dried, sand the area smooth with fine-grit sandpaper.
Sanding and Finishing
Once the area is sanded, use a damp cloth to remove any remaining dust. Then, apply a third layer of joint compound to the area and allow it to dry. Finally, sand the area one more time and wipe off any excess dust.

DIY Techniques for Fixing Drywall Cracks in Ceiling
In addition to the traditional method of repairing drywall cracks, there are several DIY techniques that you can use. These techniques can be used for both minor and major drywall cracks, depending on the severity of the damage.
Using Mesh Tape
Mesh tape is a great option for minor drywall cracks. It is easy to apply and provides a strong bond that will last for years. Simply cut a piece of mesh tape to fit the length of the crack, then press it into place. Use a putty knife to smooth out any bumps or air bubbles, then apply joint compound to the tape.
Using Spackle
Spackle is a lightweight filler material that is ideal for shallow cracks. Simply apply it to the crack with a putty knife and allow it to dry. Once dry, sand the area smooth and apply another layer of spackle if necessary.
Using Patch Kits
For larger cracks, patch kits are a great option. These kits come with a pre-cut piece of drywall and all the tools and materials needed to repair the crack. To use the kit, simply cut the piece of drywall to fit the size of the crack, then attach it to the wall with screws. Apply joint compound over the patch and allow it to dry before sanding the area smooth.

How to Patch and Hide Drywall Cracks in Your Ceiling
Once you have repaired the drywall crack, the next step is to patch and hide it. This involves applying a primer to the area, followed by a coat of paint. The primer will help seal the joint compound and ensure that the paint adheres properly.
Once the primer has dried, apply a coat of paint to the area. Use a brush or roller to apply the paint evenly. Allow it to dry, then apply a second coat if necessary. Finally, use a sanding block to smooth out the area and blend it in with the rest of the ceiling.
Everything You Need to Know About Repairing Drywall Cracks in Ceiling
Before attempting to repair drywall cracks in your ceiling, there are a few things you should know. Here is a brief overview of the common causes of drywall cracks, the tools used for repairs, and safety precautions you should take.
Common Causes of Drywall Cracks
Drywall cracks can be caused by a number of factors, including settling of the building, humidity, temperature changes, plumbing leaks, and normal wear and tear over time. If you are unsure of the cause of your drywall cracks, it is best to contact a professional.
Common Tools Used for Repairs
To repair drywall cracks, you will need the following tools: a vacuum cleaner, putty knife, fine-grit sandpaper, damp cloth, mesh tape, spackle, patch kit, primer, paintbrush or roller, and a sanding block.
Safety Precautions
When repairing drywall cracks, always wear protective gear such as goggles, gloves, and a dust mask. Additionally, make sure that the area is well ventilated, as some of the materials used can be harmful if inhaled.

Tips for Fixing Drywall Cracks in Ceiling Quickly and Easily
Repairing drywall cracks in ceiling can seem like a daunting task, but it doesn’t have to be. Here are a few tips for making the process quick and easy:
Assess the Damage Before Starting
Before attempting to repair drywall cracks in your ceiling, assess the damage. This will help you determine the best course of action and the materials you will need.
Take Time to Prepare the Area
Make sure to take the time to prepare the area before beginning your repair. This includes removing any furniture, carpets, and other items from the vicinity, as well as vacuuming away any dust or debris.
Use Quality Materials
It is important to use quality materials when repairing drywall cracks. Invest in high-quality joint compound, mesh tape, spackle, and patch kits for the best results.
Conclusion
Repairing drywall cracks in your ceiling doesn’t have to be difficult. With the right materials and a bit of patience, you can easily repair drywall cracks and restore the appearance of your ceiling. Follow the steps outlined in this article for a successful repair.
By properly repairing drywall cracks, you can help prevent further damage and ensure that your walls and ceilings look their best. Plus, you can avoid costly repairs in the future. With the right knowledge and tools, you can quickly and easily repair drywall cracks in your ceiling.