
Introduction
A leaky outdoor faucet can be a nuisance, not to mention an expensive one. Water bills can skyrocket if the issue is not addressed in a timely manner. But don’t worry – you can easily repair a leaky outdoor faucet yourself in no time. This article will provide a step-by-step guide on how to repair a leaky outdoor faucet, as well as some troubleshooting advice and DIY tips to help you get the job done right.
Step-By-Step Guide to Repairing a Leaky Outdoor Faucet
The first step in repairing a leaky outdoor faucet is to gather the necessary tools. You’ll need adjustable pliers, a basin wrench, a screwdriver, and a new faucet. Make sure that the new faucet matches the old one in size, shape, and style. Now that you have the tools, you’re ready to begin.
Start by shutting off the water supply to the outdoor faucet. This is usually done at the main water valve, which is typically located inside the home. Once the water has been shut off, use the adjustable pliers to unscrew the old faucet from the wall. Be careful to avoid damaging any pipes or fittings in the process.
Next, use the basin wrench to remove the old faucet. If the faucet is corroded or stuck, spray it with a lubricant before attempting to loosen it. Once the old faucet is removed, you can install the new one. Use the screwdriver to secure the new faucet in place. Then, turn the water back on and check for leaks.
Troubleshooting Common Causes of Leaky Outdoor Faucets
Sometimes, a leaky outdoor faucet can be caused by something as simple as a clogged faucet head. To remedy this, simply remove the faucet head and clean out any debris or sediment. If the faucet is still leaking, it could be due to worn out washers or corroded parts. Replacing these components should fix the problem.

How to Quickly and Easily Fix a Leaky Outdoor Faucet
If you’re looking for a quick and easy fix for a leaky outdoor faucet, the best thing to do is to identify the source of the leak. Once the cause has been identified, you can replace or repair the source and the leak should be gone. This approach is much faster than replacing the entire faucet.

DIY Tips for Fixing a Leaky Outdoor Faucet
When attempting to repair a leaky outdoor faucet, it’s important to use quality replacement parts. After all, cheap parts may not last as long and may require more frequent repairs. Additionally, always make sure to follow manufacturer instructions when installing the new faucet. And finally, be sure to test for leaks after installation in order to ensure that your repair was successful.

What to Look for When Diagnosing a Leaky Outdoor Faucet
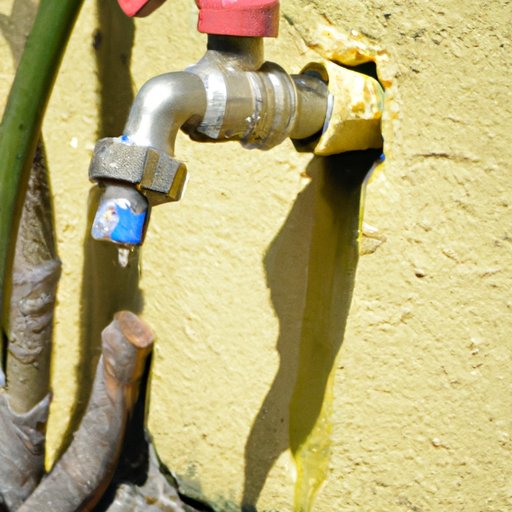
When diagnosing a leaky outdoor faucet, start by checking for obvious leaks. Look for any visible signs of water, such as puddles or wet spots. Next, inspect the washers and seals for any signs of wear and tear. Finally, look for any corrosion or rust on the faucet itself, as this could be a sign that the faucet needs to be replaced.
Safety First: Repairing a Leaky Outdoor Faucet
When repairing a leaky outdoor faucet, safety should always be your top priority. Wear protective gear such as goggles and gloves to protect yourself from any sharp edges or hazardous materials. Exercise caution around water, as it can be dangerous if not handled properly. Finally, be sure to dispose of old parts properly in order to prevent environmental contamination.
Conclusion
Repairing a leaky outdoor faucet doesn’t have to be a daunting task. With the right tools and knowledge, anyone can quickly and easily fix a leaky outdoor faucet. By following the steps outlined in this article, you can save money on costly repairs and keep your water bill down. Plus, you’ll gain a sense of satisfaction knowing that you fixed the problem yourself.