
Introduction
The Dyson Ball Vacuum is one of the most powerful and reliable vacuums on the market today. It’s designed to provide superior cleaning performance and is considered one of the best vacuums for pet owners. However, even the best vacuums need regular maintenance and repairs from time to time.
This article will provide a step-by-step guide for troubleshooting and repairing a Dyson Ball Vacuum. We’ll explore common problems and solutions, discuss DIY fixes, explain the parts and accessories of a Dyson Ball Vacuum and how to replace them, and offer tips and tricks for extending the life of your vacuum.
Step-by-Step Guide for Troubleshooting and Repairing a Dyson Ball Vacuum
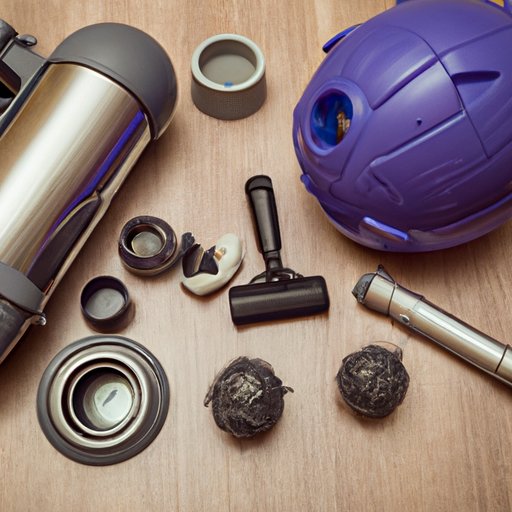
The first step to troubleshooting and repairing a Dyson Ball Vacuum is to identify the problem. Common problems with Dyson Ball Vacuums include clogged filters, worn or broken belts, and jammed brushes. Depending on the issue, you may be able to resolve it with a simple DIY fix.
If the problem is related to a clogged filter, it can usually be resolved by removing the filter and washing it in warm soapy water. If the filter is damaged beyond repair, it should be replaced. Worn or broken belts can also be replaced fairly easily. To replace a belt, simply remove the old belt and install the new one. If the brushes are jammed, they should be cleaned or replaced depending on the severity of the jam.
Exploring the Parts and Accessories of a Dyson Ball Vacuum and How to Replace Them
In addition to troubleshooting and repairing a Dyson Ball Vacuum, it’s important to understand how to replace its parts and accessories. The filters and bags of a Dyson Ball Vacuum should be replaced regularly to ensure optimal performance. To replace these items, simply remove the old filter or bag and install the new one.
It’s also important to keep your Dyson Ball Vacuum clean and well maintained. To do this, periodically use a brush attachment to remove dust and debris from the crevices of the vacuum. Additionally, check the motor and hoses for any blockages or obstructions that could prevent the vacuum from working properly.

Tips and Tricks for Extending the Life of Your Dyson Ball Vacuum
Once you’ve learned how to troubleshoot and repair a Dyson Ball Vacuum, the next step is to take steps to extend the life of your vacuum. Regular maintenance is key to keeping your vacuum running smoothly and efficiently. This includes cleaning the filters and bags, checking the hoses and motor for blockages, and ensuring all parts are in good working order.
Proper storage is also important. When not in use, store the vacuum in a cool dry place away from direct sunlight. Additionally, it’s important to troubleshoot any issues quickly. If you notice something isn’t working correctly, take the time to investigate the problem and address it as soon as possible.
Conclusion
Troubleshooting and repairing a Dyson Ball Vacuum is relatively straightforward and can often be done with a few simple DIY fixes. However, it’s important to understand the parts and accessories of a Dyson Ball Vacuum and how to replace them. Additionally, following proper maintenance and storage guidelines can help extend the life of your vacuum.
By following the tips outlined in this article, you should have no trouble keeping your Dyson Ball Vacuum in top condition. With regular maintenance and timely repairs, your vacuum should provide years of reliable service.