
Introduction
If you own a Maytag washer, you may need to remove the agitator at some point. This is important because the agitator helps ensure that your clothes get thoroughly washed. Removing the agitator can be tricky, but with the right tools and knowledge, it can be done safely and efficiently.
In this article, we will explore why removing the agitator from a Maytag washer is important, provide a step-by-step guide on how to do it, and offer some helpful tips and tricks. We’ll also provide a quick tutorial on identifying parts and following the steps in the right order.
Why Removing the Agitator from a Maytag Washer is Important
The agitator is an important part of a Maytag washer. It is responsible for agitating the clothes during a wash cycle and helping them become clean. Without it, the clothes would not be as thoroughly cleaned.
Removing the agitator from a Maytag washer is also important if you need to replace any other parts within the machine. If the agitator is not removed, then you won’t be able to access these parts. Additionally, if the agitator is damaged or worn out, then it needs to be replaced.
Step-by-Step Guide to Removing the Agitator from a Maytag Washer
Before attempting to remove the agitator from a Maytag washer, make sure that you have all of the necessary tools, such as a Phillips screwdriver, pliers, and a wrench. Once you have gathered the tools, you can begin the process.
Step 1: Unplug the Washer
The first step is to unplug the washer from the wall outlet. This is an important safety precaution and should not be overlooked.
Step 2: Disconnect the Water Supply Hoses
The next step is to disconnect the water supply hoses from the back of the washer. Make sure to turn off the water before doing this.
Step 3: Remove the Lid
Once the water supply hoses are disconnected, you can remove the lid of the washer. This is usually held in place by several screws that need to be removed.
Step 4: Remove the Screws Holding the Agitator
Once the lid is off, you can locate the screws holding the agitator in place and remove them. Be sure to keep track of where each screw goes so that you can put them back in the right place.
Step 5: Lift the Agitator from the Washer
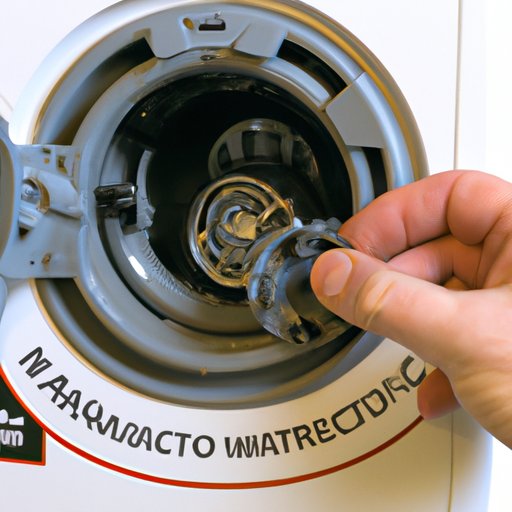
Once the screws have been removed, you can lift the agitator from the washer. Be careful when handling the agitator, as it is heavy and could cause injury if not handled properly.
DIY: How to Easily Remove the Agitator from a Maytag Washer
Removing the agitator from a Maytag washer is relatively easy if you have the right tools and know-how. Here are the steps you need to follow:
Gather the Necessary Tools
You will need a Phillips screwdriver, pliers, and a wrench to remove the agitator from the washer.
Follow the Steps Listed Above
Follow the steps listed above to carefully remove the agitator from the washer.
Troubleshooting Potential Issues
If you encounter any issues while removing the agitator, consult the user’s manual or contact a professional for help.

A Quick Tutorial on Removing the Agitator from a Maytag Washer
Removing the agitator from a Maytag washer is not difficult, but it does require you to follow the steps in the right order. Here is a quick tutorial on how to do it:
Identifying the Parts
First, you need to identify the parts of the washer that need to be removed. These include the lid, the screws, and the agitator itself.
Following the Steps in the Right Order
Next, you need to follow the steps outlined above in the correct order. This includes unplugging the washer, disconnecting the water supply hoses, removing the lid, and removing the screws holding the agitator.
Tips and Tricks for Removing the Agitator from a Maytag Washer
Here are some helpful tips and tricks for removing the agitator from a Maytag washer:
Use Caution when Handling the Agitator
When handling the agitator, use caution. It is heavy and could cause injury if not handled properly.
Have an Assistant Help You with the Process
Having an assistant help you with the process can make it easier and safer. This way, one person can hold the agitator while the other removes the screws.
Wear Protective Gear
It is always a good idea to wear protective gear such as gloves and eyewear when working with machinery.

Expert Advice on Removing the Agitator from a Maytag Washer
If you are having difficulty removing the agitator from your Maytag washer, here is some expert advice that can help:
Ask a Professional
If you are having trouble with the process, it is best to ask a professional for help. They can provide valuable insight and advice.
Consult the User’s Manual
The user’s manual can also be a great resource for troubleshooting potential issues. It contains detailed instructions on how to remove the agitator from a Maytag washer.

Everything You Need to Know About Removing the Agitator from a Maytag Washer
Removing the agitator from a Maytag washer is an important task that must be done correctly in order to ensure the safety of you and your family. Here is everything you need to know about the process:
Safety Precautions
Always unplug the washer before beginning the process and wear protective gear such as gloves and eyewear. Have an assistant help you with the process if possible.
Troubleshooting Tips
If you are having trouble with the process, consult the user’s manual or ask a professional for help.
Repairing or Replacing the Agitator
If the agitator is damaged or worn out, it needs to be repaired or replaced. This is best done by a professional.
Conclusion
Removing the agitator from a Maytag washer is an important task that must be done correctly in order to ensure the safety of you and your family. By following the steps outlined in this article, you can easily and safely remove the agitator from your Maytag washer.
Remember to always unplug the washer before beginning the process and wear protective gear such as gloves and eyewear. Have an assistant help you with the process if possible. If you encounter any issues while removing the agitator, consult the user’s manual or contact a professional for help.
For more information on removing the agitator from a Maytag washer, please consult the user’s manual or contact a professional for expert advice.