
Introduction
An old kitchen faucet is one that has been in place for many years and may be showing signs of wear and tear. It may be leaking or not functioning properly, or it may have become outdated in terms of style and design. Whatever the reason, it’s important to know how to safely and effectively remove and replace an old kitchen faucet.
In this article, we’ll provide a comprehensive guide on how to remove and replace an old kitchen faucet. We’ll look at the tools you’ll need, offer step-by-step instructions on how to do the job, and provide some helpful tips and tricks for a successful installation.
Step-by-Step Guide to Removing an Old Kitchen Faucet
Removing an old kitchen faucet isn’t too difficult, but it does require some patience and attention to detail. Here is a step-by-step guide on how to do it:
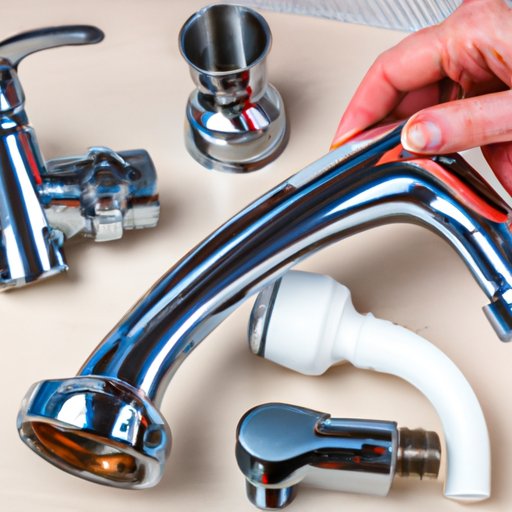
1. Gather necessary tools. You will need a wrench, pliers, a basin wrench, and a screwdriver. Make sure you have these items on hand before you begin.
2. Shut off water supply. Before you start, make sure the water supply to the faucet is shut off. This can usually be done at the valves under the sink.
3. Disconnect hoses. Use the wrench to disconnect the hot and cold water hoses from the faucet.
4. Remove old faucet. Unscrew the fittings that hold the faucet in place, then use the pliers to remove any stubborn fittings. Finally, pull out the old faucet.

DIY Instructions for Replacing a Kitchen Faucet
Once you’ve removed the old faucet, it’s time to install the new one. Here are the steps you need to take:
1. Measure sink area. Measure the area where the faucet needs to be installed so that you know what size faucet to purchase.
2. Purchase new faucet. Choose a new faucet that fits your needs and budget. Make sure it is the correct size for your sink.
3. Install new faucet. Follow the instructions that came with the new faucet to install it. Make sure all the connections are secure and there are no leaks.

How to Easily Remove and Replace an Old Kitchen Faucet
Removing an old kitchen faucet and installing a new one doesn’t have to be complicated or time-consuming. Here’s how to do it quickly and easily:
1. Unscrew fittings. Unscrew the fittings that hold the faucet in place, using a wrench and/or a screwdriver.
2. Remove mounting screws. Use the wrench or screwdriver to remove the mounting screws that hold the faucet in place.
3. Pull out old faucet. Carefully pull out the old faucet from the sink.
4. Insert new faucet. Line up the new faucet with the holes in the sink and insert it.

A Comprehensive Guide to Disconnecting Your Old Kitchen Faucet
Before you can install a new faucet, you need to disconnect the old one. Here’s how to do it:
1. Turn off water supply. Make sure the water supply to the faucet is shut off. This can usually be done at the valves under the sink.
2. Remove water lines. Use the wrench to disconnect the hot and cold water hoses from the faucet.
3. Unscrew fittings. Unscrew the fittings that hold the faucet in place, using a wrench and/or a screwdriver.
4. Detach faucet from sink. Carefully lift the faucet out of the sink.
Tips & Tricks for Uninstalling an Outdated Kitchen Faucet
When removing an old kitchen faucet, it’s important to take the right safety precautions. Here are some tips and tricks to keep in mind:
1. Wear protective gloves. Make sure you wear protective gloves when handling sharp or rough edges.
2. Use pliers for stubborn fittings. If the fittings are stuck, use a pair of pliers to loosen them.
3. Use a sealant when reinstalling. When reinstalling the new faucet, use a sealant to ensure a tight fit and prevent leaks.
Quick & Easy Steps to Take Out an Old Kitchen Faucet
If you’re in a hurry and need to get the job done quickly, here is a quick and easy way to remove an old kitchen faucet:
1. Turn off the water supply. Make sure the water supply to the faucet is shut off. This can usually be done at the valves under the sink.
2. Unscrew fittings. Unscrew the fittings that hold the faucet in place, using a wrench and/or a screwdriver.
3. Lift out the old faucet. Carefully lift the old faucet out of the sink.
A Guide to Taking Apart and Replacing an Obsolete Kitchen Faucet
Replacing an outdated kitchen faucet can be a daunting task, but it doesn’t have to be. Here’s a guide to taking apart and replacing an obsolete kitchen faucet:
1. Prepare the area. Make sure the area around the sink is clean and clear of debris.
2. Remove existing components. Carefully remove the old faucet, hoses, and fittings.
3. Install new parts. Install the new faucet, hoses, and fittings according to the instructions that came with the faucet.
4. Test the new faucet. Once everything is in place, turn on the water supply and test the new faucet.
Conclusion
Removing and replacing an old kitchen faucet is a fairly simple and straightforward process. As long as you have the right tools and follow the steps outlined in this article, you should be able to do the job in no time.
To sum up, the steps to remove and replace an old kitchen faucet are: shut off the water supply, disconnect the hoses, unscrew the fittings, remove the mounting screws, pull out the old faucet, measure the sink area, purchase a new faucet, install the new faucet, and test it. Remember to wear protective gloves and use a sealant when reinstalling the new faucet.