
Introduction
A kitchen tile backsplash is an important component of any kitchen. It can add a decorative touch, protect your walls from splashes, and even make your kitchen look more spacious. But if your backsplash is outdated or you just want to try something new, then you may be considering removing the existing kitchen tile backsplash and replacing it with something else.
What is a Kitchen Tile Backsplash and Why Should You Remove It?
A kitchen tile backsplash is a wall covering that is installed behind a sink, stove, or countertop. It typically extends up to the underside of the upper cabinets. Kitchen tile backsplashes are usually made from ceramic, porcelain, glass, or stone tiles. They come in a variety of colors and designs, so you can choose one that fits your style and décor.
Although kitchen tile backsplashes are durable and long-lasting, they can become outdated over time. If you’re looking to give your kitchen a fresh new look, then removing the existing tile backsplash and replacing it with something else is a great way to do so. Removing the old backsplash will also allow you to install a new one that better suits your needs.

Benefits of Removing Kitchen Tile Backsplash
Removing your existing kitchen tile backsplash can have many benefits. First, it will give your kitchen an entirely new look and feel. You can choose a different color, pattern, or material for your new backsplash, which can dramatically change the overall look of your kitchen. Second, removing the old backsplash will allow you to make repairs or upgrades to the area behind it. This could include fixing any water damage, installing new electrical outlets, or simply cleaning up the mess left behind by the old backsplash.
Finally, removing the old kitchen tile backsplash can save you money in the long run. By replacing the old backsplash with a new one, you won’t have to worry about costly repairs down the line. Plus, you can often find much cheaper options when shopping for a new backsplash.
Step-by-Step Guide to Removing Kitchen Tile Backsplash
If you’re ready to get started on removing your kitchen tile backsplash, then follow this step-by-step guide to ensure that everything goes as smoothly as possible.
Gather Necessary Materials
Before you begin, you will need to gather all the materials you’ll need to complete the job. This includes pry bars, hammers, chisels, putty knives, screwdrivers, pliers, and a bucket. You may also want to wear protective gear such as goggles, gloves, and a dust mask. Additionally, you’ll need a wet/dry vacuum and some cleaning supplies.
Prepare the Area
Once you’ve gathered all the necessary materials, you’ll need to prepare the area. Start by clearing away any furniture and appliances that may be in the way. Then, use a wet/dry vacuum to remove any debris from the area. Finally, cover the floor with drop cloths or newspaper to protect it from any spills or messes.
Start Removing the Tiles
Now that the area is prepared, you can start removing the tiles. Begin by using a pry bar or hammer and chisel to loosen the grout around the edges of the tile. Once the grout has been loosened, use a putty knife to carefully remove each individual tile. Be sure to take your time and work slowly to avoid damaging the wall or surrounding tiles.
Clean Up
Once all the tiles have been removed, use a wet/dry vacuum to clean up any debris. Then, use a damp cloth to wipe down the wall to remove any remaining dirt or grout residue. Finally, dispose of the old tiles and grout in a responsible manner.
Tips for Removing Old Kitchen Tile Backsplash
When removing an old kitchen tile backsplash, there are a few tips you should keep in mind to ensure the job is done correctly. First, use the right tools for the job. A pry bar or hammer and chisel are the best tools for loosening and removing the tiles. Second, wear protective gear such as goggles, gloves, and a dust mask while working. And finally, take the necessary safety precautions to avoid any accidents or injuries.

DIY: How to Remove Kitchen Tile Backsplash
Removing kitchen tile backsplash is a project that almost anyone can do themselves. All it takes is a little bit of time, patience, and the right tools. Here’s a simple step-by-step guide to help you get started.
Assess the Situation
The first step is to assess the situation. Take a look at the area you’ll be working in to determine how much tile needs to be removed and what type of tools you’ll need. Consider the layout of the room and any obstacles that might be in the way.
Plan Your Removal Strategy
Once you’ve assessed the situation, it’s time to plan your removal strategy. Decide which tiles you want to remove and how you’re going to go about doing it. Make sure to leave yourself enough room to work without damaging the surrounding tiles.
Begin Removing the Tiles
Now that you’ve planned your removal strategy, you can begin removing the tiles. Use a pry bar or hammer and chisel to loosen the grout around the edges of the tile. Then, use a putty knife to carefully remove each individual tile. Be sure to take your time and work slowly to avoid damaging the wall or surrounding tiles.
A Beginner’s Guide to Removing Kitchen Tile Backsplash
Removing kitchen tile backsplash can be intimidating for those who have never done it before. But with a few tips and tricks, it doesn’t have to be so scary. Here’s a beginner’s guide to help you get started.
Understand What You’re Doing
The first step is to understand what you’re doing. Take the time to read up on the process and familiarize yourself with the tools you’ll be using. This will help ensure that you don’t make any mistakes or cause any damage to your walls.
Choose the Right Tools
Once you’ve familiarized yourself with the process, it’s time to choose the right tools for the job. A pry bar or hammer and chisel are the best tools for loosening and removing the tiles. Make sure to choose tools that are the correct size and strength for the job.
Work Safely
Finally, it’s important to work safely. Wear protective gear such as goggles, gloves, and a dust mask while working. And always take the necessary safety precautions to avoid any accidents or injuries.

The Easiest Way to Remove Kitchen Tile Backsplash
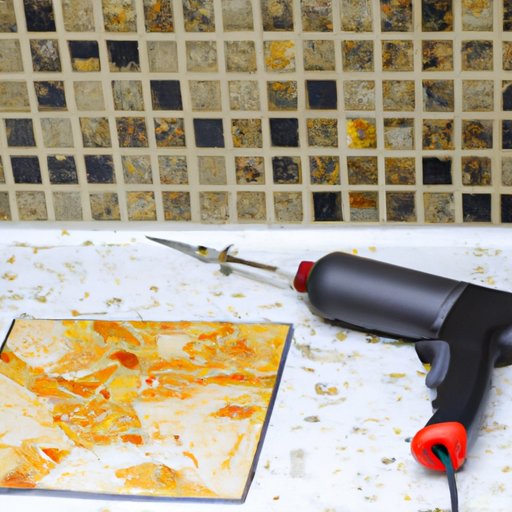
The easiest way to remove kitchen tile backsplash is to use a heat gun or hot air gun. A heat gun works by heating up the adhesive behind the tile, which makes it easier to remove. Simply point the heat gun at the tile and wait until the adhesive begins to melt. Then, use a putty knife to gently scrape away the melted adhesive.
Another option is to use a putty knife to gently pry the tiles off the wall. Start by inserting the putty knife between the tile and the wall and gently wiggling it back and forth. Once the tile is loose, you can then use your hands to peel it off the wall.
Conclusion
Removing kitchen tile backsplash can seem like a daunting task. However, with the right tools and a little bit of patience, it’s actually quite easy. Just remember to take your time, work safely, and choose the right tools for the job. With these tips, you’ll be able to remove your old kitchen tile backsplash and replace it with something new and modern.
By following the steps outlined in this article, you can easily remove your kitchen tile backsplash and enjoy the many benefits that come along with it. From giving your kitchen a fresh new look to saving you money in the long run, removing your old kitchen tile backsplash is a great way to update your home.