
Introduction
Removing kitchen drawers is not as intimidating as it may seem! With the right tools and knowledge, you can easily take out your kitchen drawers for repair or replacement. This article will provide you with a step-by-step guide on how to remove kitchen drawers from their frame.
Gather the Necessary Tools
Before beginning the process of removing kitchen drawers, it is important to gather the necessary tools. The tools needed are a Phillips head screwdriver, a flat head screwdriver, a pair of needle nose pliers, and a putty knife. These tools can be easily found at any hardware store.
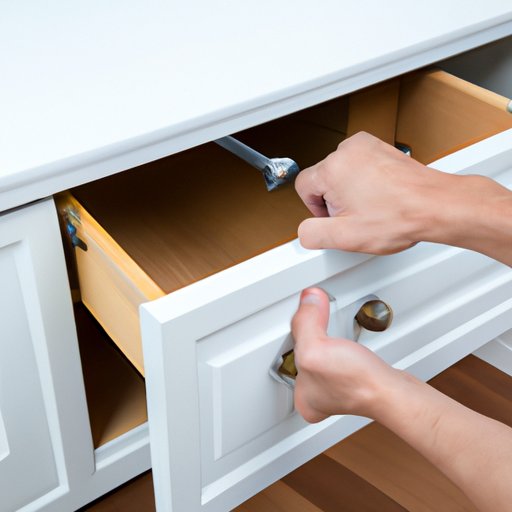
Unscrew and Remove Drawer Handles
The first step in removing kitchen drawers is to unscrew and remove the handles. To do this, use the Phillips head screwdriver to remove the screws that keep the handles in place. Once the screws have been removed, carefully pull the handles off and set them aside. Be sure to handle these pieces gently as they are delicate and can break easily.
Identify and Disconnect Glides
Once the handles have been removed, you need to identify and disconnect the glides. The glides are usually located at the bottom of the drawer and can be identified by their distinctive shape. To disconnect the glides, use the flat head screwdriver to loosen the screws that hold them in place. Once the screws have been loosened, gently pull the glides away from the drawer.
Lift Out the Drawer
Once the glides have been disconnected, you can begin to lift the drawer out of its frame. It is important to use caution when lifting the drawer as it can be heavy and awkward to maneuver. To ensure the safety of yourself and the drawer, use both hands to lift the drawer and be sure to keep your back straight. Once you have secured the drawer, slowly lift it out of its frame.

Inspect and Replace the Glides
After you have removed the drawer, it is important to inspect and replace the glides if necessary. Use the putty knife to inspect the glides for any damage or wear. If any of the glides appear to be damaged, use the needle nose pliers to remove them and replace them with new glides.
Reinstall the Drawer Handles
The last step in the process of removing kitchen drawers is to reinstall the handles. To do this, simply line up the holes in the drawer with the holes in the handles and use the Phillips head screwdriver to secure the handles in place. Be sure to tighten the screws securely to ensure the handles remain in place.
Conclusion
Removing kitchen drawers is not as difficult as it may seem! With the right tools and knowledge, you can easily take out your kitchen drawers for repair or replacement. Remember to use caution when handling the drawer and to inspect and replace the glides if necessary. Following these steps should help you successfully remove your kitchen drawers.
For future maintenance, make sure to regularly check the handles and glides for any signs of wear or damage. By doing so, you can avoid any potential problems and keep your kitchen drawers in good condition.