
Introduction
Removing a kitchen countertop is a labor-intensive job that requires special tools and safety precautions. It’s important to understand the process of removing a kitchen countertop before getting started. This article will provide step-by-step instructions on how to remove a kitchen countertop safely and efficiently.
Definition of Kitchen Countertop Removal
Kitchen countertop removal is the process of removing an existing countertop in order to replace it with a new one. The countertop may be removed for a variety of reasons, including remodeling, replacing damaged or worn out material, or simply changing the look of the kitchen. The countertop may be made of a variety of materials, including laminate, granite, marble, stainless steel, or quartz.
Overview of the Process
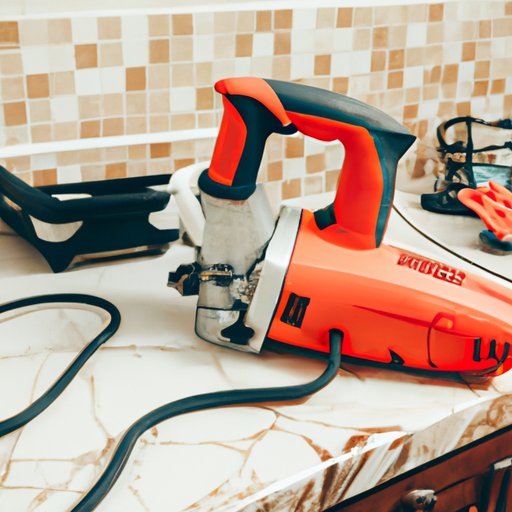
The process of removing a kitchen countertop involves several steps. First, the countertop must be cut with a power saw. Next, a heat gun is used to soften adhesive and peel away the countertop. A reciprocating saw is then used to cut through the countertop. Appliances must be disconnected from the countertop before it is removed. Finally, a putty knife is used to cut through sealant and caulk, and a pry bar is used to lift up the countertop.
Step 1: Remove the Countertop with a Power Saw
The first step in the process of removing a kitchen countertop is to cut through it with a power saw. This tool is ideal for cutting through hard materials such as stone or ceramic tile. Before using a power saw, it’s important to take safety precautions and wear protective gear, such as goggles and a dust mask.
Safety Precautions
When using a power saw, it’s important to take safety precautions to protect yourself and those around you. Be sure to read the manufacturer’s instructions and follow all safety guidelines. Wear protective gear such as goggles and a dust mask to protect your eyes and lungs from flying debris. Keep children and pets away from the work area and unplug the saw when not in use.
Selecting the Right Blade
The type of blade you use will depend on the type of material you are cutting. Consult the manufacturer’s instructions to determine the right type of blade for your project. Make sure the blade is sharp and securely attached to the saw.
Cutting Through the Countertop
Once you have selected the right blade, you can begin cutting through the countertop. Start at one end of the countertop and slowly move the saw along the line. Make sure to keep the saw steady and avoid jerky movements. When you reach the other end, turn off the saw and unplug it.
Step 2: Use a Heat Gun to Soften Adhesive and Peel Away the Countertop
Once the countertop has been cut, a heat gun can be used to soften the adhesive and make it easier to peel away the countertop. The heat gun is ideal for removing stubborn adhesives from surfaces.
Preparing the Heat Gun
Before using the heat gun, read the manufacturer’s instructions and follow all safety guidelines. Make sure the heat gun is plugged in and turned on. Adjust the temperature to the appropriate setting for the type of adhesive you are working with.
Softening the Adhesive
Once the heat gun is ready, hold it approximately three inches away from the surface. Move the gun back and forth until the adhesive begins to soften. Do not point the gun directly at the surface or allow it to remain in one spot for too long, as this can cause damage to the surface.
Peeling Away the Countertop
Once the adhesive has softened, you can begin peeling away the countertop. Gently pull the countertop away from the wall, taking care not to tear or rip it. If the adhesive is still too stubborn, reapply the heat gun and continue to soften it until it can be removed.

Step 3: Cut Through the Countertop Using a Reciprocating Saw
A reciprocating saw can be used to cut through the countertop if the power saw was not able to make a clean cut. The reciprocating saw is ideal for making precise cuts in hard materials.
Selecting the Right Tool
The type of saw you use will depend on the type of material you are cutting. Consult the manufacturer’s instructions to determine the right type of saw for your project. Make sure the saw is sharp and securely attached to the saw.
Setting Up the Reciprocating Saw
Before using the reciprocating saw, read the manufacturer’s instructions and follow all safety guidelines. Make sure the saw is plugged in and turned on. Adjust the speed to the appropriate setting for the type of material you are working with.
Cutting Through the Countertop
Once the saw is ready, start at one end of the countertop and slowly move the saw along the line. Make sure to keep the saw steady and avoid jerky movements. When you reach the other end, turn off the saw and unplug it.

Step 4: Disconnect Appliances from the Countertop before Removing It
Before removing the countertop, it’s important to disconnect all appliances from it. This includes electric appliances, such as dishwashers and stoves, as well as gas appliances, such as ovens and ranges.
Unplugging Electric Appliances
If your appliances are electric, unplug them from the outlet before attempting to remove the countertop. Be sure to check the outlet for any loose wires or frayed cords.
Disconnecting Gas Appliances
If your appliances are gas-powered, they must be disconnected from the gas line before removing the countertop. This should be done by a qualified professional who is familiar with gas lines. Never attempt to disconnect the gas line yourself.

Step 5: Use a Putty Knife for Cutting Through Sealant and Caulk
In some cases, the countertop may be secured with sealant or caulk. In order to remove the countertop, it’s important to cut through these materials. A putty knife is the ideal tool for this job.
Choosing the Right Putty Knife
When selecting a putty knife, make sure to choose one that is the right size and shape for the job. The blade should be wide enough to cover the area where the sealant or caulk is located.
Applying Pressure
Hold the putty knife firmly against the sealant or caulk and gently press down. Apply even pressure as you move the knife along the line. Be careful not to gouge or scratch the surface.
Removing the Sealant and Caulk
Once the sealant or caulk has been cut, it should be easy to remove. Gently scrape away the material with the putty knife. Make sure to dispose of the material properly.
Step 6: Leverage a Pry Bar to Lift Up the Countertop
Once the countertop has been cut and all of the appliances and sealants have been removed, it’s time to lift up the countertop. A pry bar is the ideal tool for this job.
Securing the Pry Bar
Before using the pry bar, make sure it is securely attached to the countertop. Place the bar in the middle of the countertop and press down firmly to secure it.
Gently Prying the Countertop Up
Once the pry bar is securely attached, gently pry up the countertop. Take care not to damage the wall or surrounding surfaces. When the countertop is loose, carefully lift it up and out of the way.

Step 7: Wear Protective Gear When Working with Sharp Objects
When working with sharp objects, such as saws and putty knives, it’s important to wear protective gear. This includes gloves, goggles, and long-sleeved shirts and pants.
Types of Protective Gear
Protective gear comes in a variety of styles and materials. Choose clothing that is made from durable fabrics and fits snugly. Gloves should be thick enough to protect your hands from cuts and abrasions.
Benefits of Wearing Protective Gear
Wearing protective gear can help protect you from serious injuries. It can also help reduce the risk of exposure to hazardous materials. Be sure to wear protective gear whenever working with sharp objects.
Conclusion
Removing a kitchen countertop is a challenging but rewarding task. With the right tools and safety precautions, you can successfully remove your countertop and prepare for installation of a new one. Follow the steps outlined in this article to ensure a safe and successful countertop removal.
Summary of Steps
To remove a kitchen countertop, you will need to: cut through the countertop with a power saw; use a heat gun to soften adhesive and peel away the countertop; cut through the countertop using a reciprocating saw; disconnect appliances from the countertop before removing it; use a putty knife for cutting through sealant and caulk; leverage a pry bar to lift up the countertop; and wear protective gear when working with sharp objects.
Additional Resources
For more information on how to remove a kitchen countertop, consult online tutorials, instructional videos, and professional advice. Make sure to research the tools and materials needed for the job before getting started.