
Introduction
A kitchen backsplash is a wall covering that is installed behind a stove, sink, or other kitchen fixtures. It is usually made of tile, stone, or metal and can be used to protect the walls from splashes and spills. Over time, however, kitchen backsplashes may become outdated or damaged, prompting homeowners to remove them to make way for a new look.
Removing a kitchen backsplash requires some preparation and careful execution. In this article, we will discuss how to go about removing a kitchen backsplash, from gathering the necessary tools and materials to installing new tiles.
Preparing the Surface
Before beginning any work, it is important to prepare the surface. The first step is to gather all of the necessary tools and materials, such as a putty knife, a hammer, a heat gun, a vacuum cleaner, and a damp cloth. You may also need to purchase new tiles if you are planning to replace the existing ones.
Once you have gathered the necessary tools and materials, the next step is to clean the surface. Use a damp cloth to wipe away any dirt and debris that has accumulated over time.
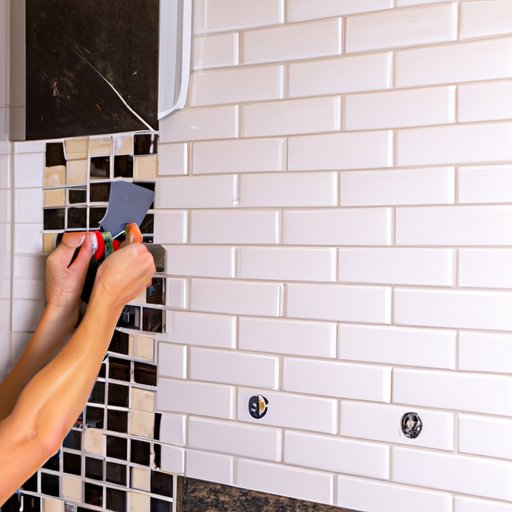
Removing the Backsplash Tiles
Once the surface is clean, it is time to start removing the tiles. Start from one corner and use a putty knife and hammer to carefully pry each tile away from the wall. Be sure to wear safety goggles and gloves to protect your eyes and hands from flying debris.
Releasing the Adhesive
Once all of the tiles have been removed, it’s time to tackle the adhesive. Use a heat gun to soften the adhesive and then use a putty knife to scrape it off the wall. Be sure to move the heat gun in a slow, circular motion to avoid damaging the wall.
Cleaning Up the Area
Once the adhesive has been removed, it’s time to clean up the area. Vacuum up any remaining debris and then wipe down the surface with a damp cloth. This will ensure that the wall is clean and ready for the installation of new tiles.
Replacing the Backsplash
If you are planning to replace the existing tiles with new ones, the first step is to measure the area. This will help you determine how many tiles you need to purchase. Once you have purchased the new tiles, you can begin the installation process.
Installing the New Backsplash
Installing new tiles is relatively easy; just follow the manufacturer’s instructions. Begin by applying adhesive to the back of each tile and then press it into place. Once all of the tiles are in place, you can grout the seams.
Finishing Touches
The final step is to seal the grout to protect it from moisture and dirt. You may also want to add any decorative accents to give the backsplash a unique look. After that, your new backsplash is ready to use!
Conclusion
Removing a kitchen backsplash is a great way to refresh the look of your kitchen. The process involves gathering the necessary tools and materials, cleaning the surface, removing the tiles, releasing the adhesive, cleaning up the area, replacing the tiles, and installing the new backsplash. Finally, don’t forget to seal the grout and add any decorative accents to complete the project.