
Introduction
Removing cabinets from your kitchen or bathroom can be a difficult and time-consuming task. It requires the right tools, as well as knowledge of plumbing, wiring, and other technical aspects. To make the job easier, here is a step-by-step guide on how to remove cabinets.
Before beginning the project, it’s important to understand the benefits of removing cabinets. Removing old cabinetry allows you to update the look of your space with new designs and materials. It also gives you the opportunity to increase storage capacity by adding additional cabinets or shelves. Finally, it can help improve access to plumbing and electrical connections, which may need to be serviced or upgraded.
Gather the Necessary Tools
The first step in removing cabinets is to gather the necessary tools. You’ll need a drill, screwdriver, hammer, pry bar, pliers, and a utility knife. Safety goggles and gloves are also essential for protecting yourself from dust and debris. If you’re working with plumbing or electrical connections, you’ll need to make sure you have the right tools for the job.
It’s also important to take the necessary safety precautions before beginning any project. Make sure you turn off the power and water to the area where you’ll be working. Wear protective gear, such as safety glasses and gloves, when handling sharp objects or tools. Also, keep a fire extinguisher nearby in case of an emergency.

Disconnect Plumbing and Electrical Connections
Once you have gathered the necessary tools, the next step is to disconnect any plumbing and electrical connections. Start by turning off the main water supply to the area. Then, disconnect the water lines from the sink and dishwasher. If the cabinets are connected to electrical outlets, you’ll need to turn off the power to the area and unplug the appliances. Finally, unscrew the light fixtures and remove them from the cabinet.
When working with plumbing and wiring, it’s important to use caution. Be sure to use the right tools for the job and wear safety gear. Always double check your work to make sure everything is disconnected properly.
Remove Cabinet Doors and Drawers
The next step is to remove the cabinet doors and drawers. Start by removing the screws or hinges that hold the doors and drawers in place. Then, carefully pull out the doors and drawers and set them aside. Be careful not to scratch or damage the doors and drawers while removing them.
When removing cabinet doors and drawers, it’s best to take your time and be gentle. Use a flathead screwdriver to pry the doors and drawers open if needed. If the doors and drawers are stuck, try using a lubricant or WD-40 to loosen them up.

Take Out Any Internal Shelving
If the cabinets have internal shelving, the next step is to take it out. Start by unscrewing the shelf supports from the inside of the cabinet. Then, carefully lift out the shelves and set them aside. Be careful not to break or damage the shelves while removing them.
When removing internal shelving, it’s important to be mindful of the weight of the shelves. Use two people to lift the shelves out of the cabinet if necessary. Also, it’s best to use a level to make sure the shelves are even after they are removed.

Unscrew All Fasteners Holding the Cabinets in Place
Once all of the internal components have been removed, the next step is to unscrew all of the fasteners holding the cabinets in place. Start by locating all of the screws and bolts that secure the cabinets to the wall. Then, use a drill or screwdriver to remove the fasteners. Be careful not to strip the screws or damage the surrounding walls.
When unscrewing fasteners, it’s important to use the right tool for the job. If the fasteners are rusty or stuck, try using a lubricant or rust remover to loosen them up. Also, it’s best to use a socket wrench for larger bolts, as it will provide more torque and make the job easier.
Lift the Cabinets Out of Place
Once all of the fasteners have been removed, the next step is to lift the cabinets out of place. Start by having two people lift the cabinets from each end. Make sure you lift with your legs and not your back. Then, carefully carry the cabinets to the desired location. Be sure to avoid any obstacles or tight corners, as this could cause the cabinets to become damaged.
When lifting cabinets, it’s important to use caution. Make sure you have a clear path to the exit, and watch for any low ceilings or doorframes. Also, it’s best to lift the cabinets evenly from each side to avoid any unnecessary strain on your back.
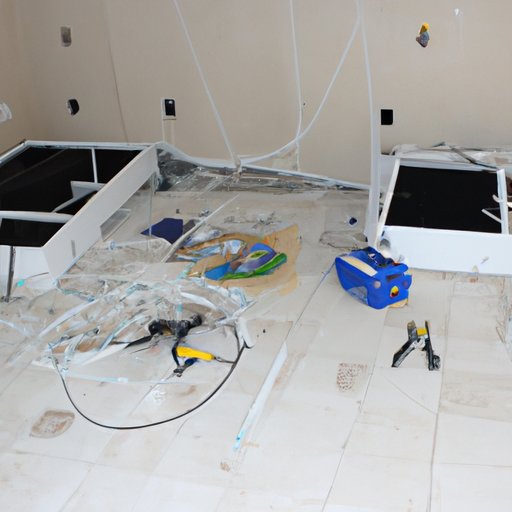
Clean Up and Dispose of Remaining Debris
The final step in removing cabinets is to clean up and dispose of any remaining debris. Start by sweeping up any dust and debris left behind. Then, wipe down the walls and floors with a damp cloth. Finally, dispose of the old cabinets and any other debris in the appropriate manner.
When cleaning up, it’s important to use the right products. Choose a cleaner that won’t damage the walls or floors. Also, it’s best to use a vacuum to pick up any dust or small debris. Finally, check with your local municipality to find out the best way to dispose of the old cabinets.
Conclusion
Removing cabinets is a labor-intensive task that requires the right tools and knowledge. This guide covered the necessary steps, safety precautions, and tips for a successful removal. By following these steps, you can easily remove cabinets from your kitchen or bathroom and make way for new designs and materials.