
Introduction
An aerator is a small device attached to the end of a kitchen faucet that mixes air with the water flow. It helps reduce the amount of water used while still providing adequate pressure for tasks like washing dishes or filling a pot. While an aerator can be beneficial, there are times when it needs to be removed. This article will provide a step-by-step guide on how to remove an aerator from a kitchen faucet.
Why Should You Remove an Aerator from a Kitchen Faucet?
There are several reasons why you may need to remove an aerator from your kitchen faucet. The most common reason is if the aerator is clogged or damaged, which can lead to low water pressure or uneven water flow. In some cases, the aerator may also need to be removed in order to install a new faucet or make repairs to the existing one. Removing the aerator is not a difficult task, but it is important to follow the correct steps in order to ensure a successful removal.
Step-by-Step Guide: How to Remove an Aerator from a Kitchen Faucet
In order to remove an aerator from a kitchen faucet, you will need the following tools: pliers, wrench, cloth, and a replacement aerator. Once you have gathered the necessary tools, follow these steps:

Identifying the Parts of Your Faucet
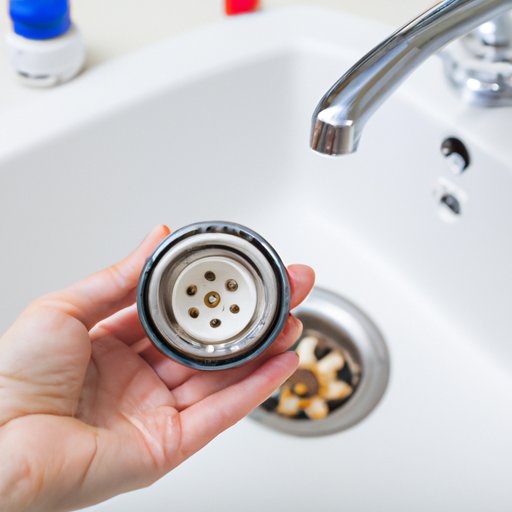
Before attempting to remove the aerator, it is important to identify the parts of your faucet. The aerator is usually located at the end of the spout, and it is typically held in place by a nut or ring. Make sure to familiarize yourself with the parts of your faucet so that you know where to find the aerator.
Removing the Aerator
Once you have identified the parts of your faucet, you can begin removing the aerator. Here are the steps to follow:
Gather the Necessary Tools
Gather the necessary tools before beginning the process. As mentioned earlier, you will need pliers, wrench, cloth, and a replacement aerator.
Loosen the Aerator with Pliers or Wrench
Use the pliers or wrench to loosen the aerator. Be careful not to over-tighten the tool, as this could cause damage to the faucet or aerator.
Unscrew the Aerator
Once the aerator has been loosened, use your hands to unscrew it from the faucet. If it is too tight to unscrew by hand, use the wrench or pliers to gently loosen it.
Clean the Aerator and Faucet Threads
Once the aerator has been removed, use the cloth to clean the threads on the faucet and the aerator. This will help ensure a proper fit when replacing the aerator.
Replace the Aerator
Finally, use your hands to replace the aerator. Tighten it with the wrench or pliers until it is securely in place. Do not overtighten, as this could cause damage to the faucet or aerator.

An Easy Guide to Removing an Aerator from a Kitchen Faucet
If you are looking for an easy way to remove the aerator from your kitchen faucet, here are the steps to follow:
Unscrewing the Aerator
Use the pliers or wrench to loosen the aerator. Once it is loose enough, use your hands to unscrew it from the faucet.
Cleaning the Aerator
Use the cloth to clean the threads on the faucet and the aerator.
Replacing the Aerator
Finally, use your hands to replace the aerator. Tighten it with the wrench or pliers until it is securely in place.
The Basics of Removing an Aerator from a Kitchen Faucet
Before attempting to remove an aerator from a kitchen faucet, it is important to understand the basics. Here are a few key points to keep in mind:
Common Types of Aerators
There are several different types of aerators, including male, female, and dual-threaded aerators. Knowing which type of aerator you have will help you determine the best way to remove it.
Why You Should Remove the Aerator
Removing the aerator is necessary if it is clogged or damaged. It can also be necessary if you are installing a new faucet or making repairs to the existing one.
How to Properly Remove the Aerator
In order to properly remove the aerator, you will need the following tools: pliers, wrench, cloth, and a replacement aerator. Follow the steps outlined in this article to ensure a successful removal.
A Quick and Simple Guide to Removing an Aerator from a Kitchen Faucet
If you are looking for a quick and simple guide to removing an aerator from a kitchen faucet, here are the steps to follow:
Gather the Necessary Tools
Gather the necessary tools before beginning the process. You will need pliers, wrench, cloth, and a replacement aerator.
Loosen the Aerator
Use the pliers or wrench to loosen the aerator. Be careful not to over-tighten the tool, as this could cause damage to the faucet or aerator.
Unscrew the Aerator
Once the aerator has been loosened, use your hands to unscrew it from the faucet. If it is too tight to unscrew by hand, use the wrench or pliers to gently loosen it.

A Comprehensive Guide to Unscrewing an Aerator from Your Kitchen Faucet
For a more comprehensive guide to removing an aerator from a kitchen faucet, here are the steps to follow:
Identify the Parts of the Faucet
Before attempting to remove the aerator, it is important to identify the parts of your faucet. The aerator is usually located at the end of the spout, and it is typically held in place by a nut or ring. Make sure to familiarize yourself with the parts of your faucet so that you know where to find the aerator.
Prepare the Area Around the Faucet
Before beginning the process, make sure the area around the faucet is clear and free of debris. This will help ensure a successful removal.
Unscrew the Aerator
Once you have identified the parts of your faucet, you can begin removing the aerator. Use the pliers or wrench to loosen the aerator, and then use your hands to unscrew it from the faucet.
Clean the Aerator and Faucet Threads
Once the aerator has been removed, use the cloth to clean the threads on the faucet and the aerator. This will help ensure a proper fit when replacing the aerator.
Replace the Aerator
Finally, use your hands to replace the aerator. Tighten it with the wrench or pliers until it is securely in place. Do not overtighten, as this could cause damage to the faucet or aerator.
Conclusion
Removing an aerator from a kitchen faucet is not a difficult task, but it is important to follow the correct steps in order to ensure a successful removal. By following the steps outlined in this article, you should be able to easily remove the aerator from your kitchen faucet and replace it with a new one.