
Introduction
Replacing a kitchen faucet is not as difficult as it may seem. With the right tools and knowledge, you can easily remove and replace your Moen kitchen faucet. This article will provide a comprehensive guide with step-by-step instructions for removing and installing a new Moen kitchen faucet.
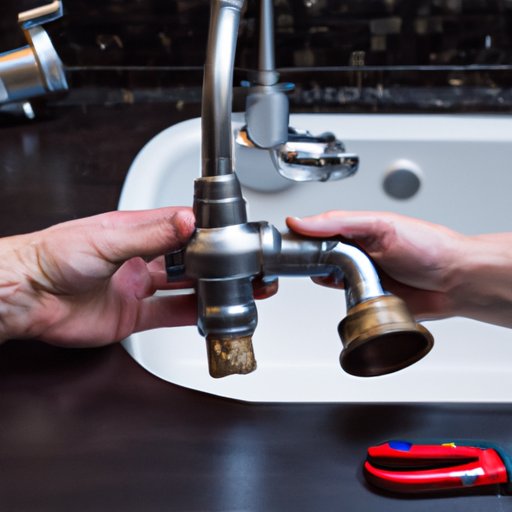
Step-by-Step Guide to Removing a Moen Kitchen Faucet
Before starting any project, it is important to gather all the necessary supplies and tools. You will need adjustable wrenches, pliers, a screwdriver, and a bucket or tray to catch any drips. Wear protective gloves when handling the faucet.
The first step is to shut off the water supply. Locate the shutoff valves under the sink and turn them clockwise to shut off the water. Once the water is shut off, open the faucet to release any remaining water pressure.
Unscrew the faucet handle and spout using an adjustable wrench. Loosen the nuts and lift out the handle and spout. Next, remove the valve cartridge by unscrewing the mounting nut. Lift out the cartridge and set aside.
Detach the supply lines from the faucet using pliers. Unscrew the supply lines from the faucet and disconnect them from the shutoff valves. Be sure to place a bucket or tray underneath the supply lines to catch any drips.
Disconnect the drain assembly from the sink. Unscrew the drain pipe and lift out the old faucet. Set the old faucet aside for disposal.

How to Easily Install a New Moen Kitchen Faucet
Once the old faucet has been removed, you can begin installing the new one. First, assemble the new faucet according to the manufacturer’s instructions. Insert the valve cartridge into the faucet body and secure it with the mounting nut.
Attach the supply lines to the faucet and connect them to the shutoff valves. Tighten the connections with pliers. Then, connect the drain assembly to the sink. Secure the drain pipe with a screwdriver.
Tighten the faucet handle and spout with an adjustable wrench. Turn the water supply back on and check for leaks. If there are no leaks, your new faucet is installed and ready to use.
A Comprehensive Guide to Replacing a Moen Kitchen Faucet
Before beginning the process of replacing a Moen kitchen faucet, it is important to gather all the necessary supplies and tools. Have a bucket or tray on hand to catch any drips. Make sure to wear protective gloves and label each part and connection prior to removal.
Follow the steps outlined above for removing the old faucet. Once the old faucet is out, follow the steps for installing the new one. Make sure to tighten all connections and check for leaks before turning the water supply back on.

How to Unscrew and Remove a Moen Kitchen Faucet
To remove a Moen kitchen faucet, you will need an adjustable wrench and a pair of pliers. Start by using the adjustable wrench to loosen the faucet handle and spout. Then, use the pliers to unscrew the supply lines. Finally, lift out the old faucet.
Tips for Removing a Moen Kitchen Faucet
When removing a Moen kitchen faucet, it is important to take precautions to avoid damaging the sink or faucet. Be sure to label each part and connection prior to removal. It is also advisable to have a bucket or tray on hand to catch any drips.
Wear protective gloves to protect your hands. The metal parts of the faucet can be sharp and cause injury. Also, be sure to turn off the water supply before attempting to remove the faucet.

Essential Tools for Removing a Moen Kitchen Faucet
The essential tools for removing a Moen kitchen faucet include an adjustable wrench, pliers, and a screwdriver. An adjustable wrench is necessary for loosening the faucet handle and spout. Pliers are needed to unscrew the supply lines. A screwdriver is required to disconnect the drain assembly.
Troubleshooting Common Problems When Removing a Moen Kitchen Faucet
If you encounter difficulty unscrewing the faucet handle and spout, try using a lubricant such as WD-40. If the supply lines leak, make sure they are tightly secured. If the drain assembly is loose, tighten the screws with a screwdriver.
Conclusion
Removing and replacing a Moen kitchen faucet is not as difficult as it may seem. By following the steps outlined in this article, you can easily do the job yourself. Before starting the project, make sure to gather all the necessary supplies and tools, and wear protective gloves.
Label each part and connection prior to removal and have a bucket or tray on hand to catch any drips. Follow the steps for removing and installing the new faucet and remember to check for leaks before turning the water supply back on.
If you run into any difficulties, refer to the troubleshooting section for helpful advice. With the right tools and knowledge, you can easily remove and replace your Moen kitchen faucet.