
Introduction
Removing a bathroom sink stopper is not as difficult as it may seem. With the right tools and some patience, anyone can do it. The purpose of this article is to provide a comprehensive guide on how to remove a bathroom sink stopper. We’ll cover everything from what tools are needed to how to identify the type of stopper and how to replace it.
This article will provide a step-by-step guide for removing a bathroom sink stopper as well as a comprehensive guide that covers all the necessary steps. Additionally, we’ll provide five simple steps to take when removing a bathroom sink stopper, DIY tips for removing a bathroom sink stopper, and everything you need to know about removing a bathroom sink stopper.
Step-by-Step Guide: How to Remove a Bathroom Sink Stopper
The first step in removing a bathroom sink stopper is to gather the necessary tools. Depending on the type of sink and stopper, the tools required may vary, but the most common tools needed are an adjustable wrench, a screwdriver, and a bucket or bowl to collect any water that may be present.
Next, you will need to identify the type of sink and stopper. There are several types of sinks and stoppers, so it is important to know which one you have before attempting to remove it. Some common types include pop-up stoppers, lift-and-turn stoppers, and toe-touch stoppers.
Once you have identified the type of sink and stopper, you can begin to disconnect the drain pipes. This is usually done by unscrewing the nuts that connect the drain pipe to the sink. Be sure to use the correct size wrench and be careful not to overtighten the nuts.
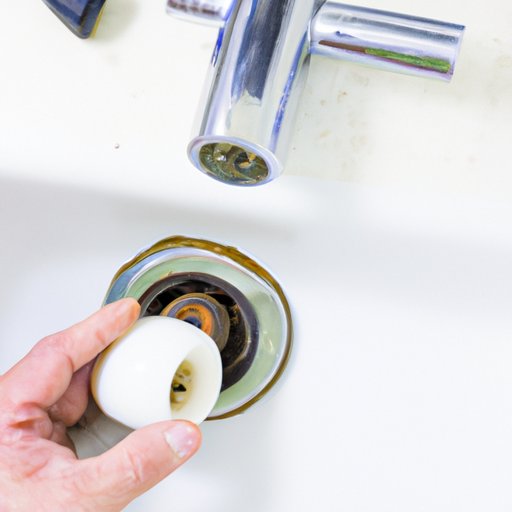
Finally, you can remove the stopper itself. For some types of stoppers, such as pop-up stoppers, you will need to pull up on the stopper and turn it slightly to remove it. For other types, such as lift-and-turn stoppers, you will need to twist the stopper counterclockwise to remove it.

A Comprehensive Guide to Easily Removing a Bathroom Sink Stopper
Understanding the different types of stoppers is key to successfully removing a bathroom sink stopper. Pop-up stoppers are typically found in older bathrooms and are used to block the flow of water. Lift-and-turn stoppers are also common and are used to open and close the drain. Toe-touch stoppers are newer and are operated by pressing down on the top of the stopper.
When attempting to remove a bathroom sink stopper, it is important to assess the situation first. If the stopper is stuck, you may need to use a lubricant or a plumber’s snake to loosen it. Additionally, if there is standing water in the sink, you should use a bucket or bowl to catch it before attempting to remove the stopper.
Once you have assessed the situation, you can begin to take the necessary steps to remove the stopper. Before doing so, it is important to make sure you have the right tools for the job. An adjustable wrench, a screwdriver, and a bucket or bowl are the most commonly used tools for removing a bathroom sink stopper.
5 Simple Steps to Take to Remove a Bathroom Sink Stopper
1. Prepare the area: Ensure that the area around the sink is clear and that you have all the necessary tools.
2. Unscrew and remove the drain pipe: Use an adjustable wrench to loosen the nuts that connect the drain pipe to the sink.
3. Lift the stopper out: Depending on the type of stopper, you may need to twist it or pull it up to remove it.
4. Clean the sink: After removing the stopper, it is important to clean the sink thoroughly.
5. Replace the stopper: Once the sink is clean, you can replace the stopper and reconnect the drain pipe.

DIY Tips for Removing a Bathroom Sink Stopper
When attempting to remove a bathroom sink stopper, it is important to remember a few key tips. First, don’t force anything. If the stopper is stuck, use a lubricant or a plumber’s snake to loosen it before attempting to remove it. Second, wear protective gear such as gloves and safety glasses. Finally, use the right tools for the job. An adjustable wrench, a screwdriver, and a bucket or bowl are the most commonly used tools for removing a bathroom sink stopper.

Everything You Need to Know About Removing a Bathroom Sink Stopper
When removing a bathroom sink stopper, there are a few common problems you may encounter. One of the most common problems is a stuck stopper. In this case, you may need to use a lubricant or a plumber’s snake to loosen it. Another common problem is a broken stopper. If this is the case, you will need to purchase a new stopper and install it.
When dealing with these common problems, it is important to take the necessary steps to prevent future problems. Make sure to use the right tools for the job and to wear protective gear. Additionally, be sure to clean the sink thoroughly after removing the stopper.
An Easy-to-Follow Guide on Removing a Bathroom Sink Stopper
Removing a bathroom sink stopper doesn’t have to be a difficult task. With the right tools and some patience, anyone can do it. Here is an easy-to-follow guide on how to remove a bathroom sink stopper:
Step 1: Gather the necessary tools. An adjustable wrench, a screwdriver, and a bucket or bowl are the most commonly used tools for removing a bathroom sink stopper.
Step 2: Identify the type of sink and stopper. There are several types of sinks and stoppers, so it is important to know which one you have before attempting to remove it.
Step 3: Disconnect the drain pipes. This is usually done by unscrewing the nuts that connect the drain pipe to the sink. Be sure to use the correct size wrench and be careful not to overtighten the nuts.
Step 4: Lift the stopper out. For some types of stoppers, such as pop-up stoppers, you will need to pull up on the stopper and turn it slightly to remove it. For other types, such as lift-and-turn stoppers, you will need to twist the stopper counterclockwise to remove it.
Step 5: Clean the sink. After removing the stopper, it is important to clean the sink thoroughly.
Step 6: Replace the stopper. Once the sink is clean, you can replace the stopper and reconnect the drain pipe.
Conclusion
In conclusion, removing a bathroom sink stopper is not as difficult as it may seem. With the right tools and some patience, anyone can do it. We hope that this article has provided a comprehensive guide on how to remove a bathroom sink stopper. We’ve covered everything from what tools are needed to how to identify the type of stopper and how to replace it.
By following the steps outlined in this article, you can easily remove a bathroom sink stopper and avoid any potential problems. Remember to always use the right tools and to wear protective gear. Additionally, be sure to clean the sink after removing the stopper and to replace it properly.
Finally, if you encounter any difficulties while attempting to remove a bathroom sink stopper, it is best to consult a professional. They will be able to provide you with the necessary advice and assistance to ensure that the job is done correctly and safely.