
Introduction
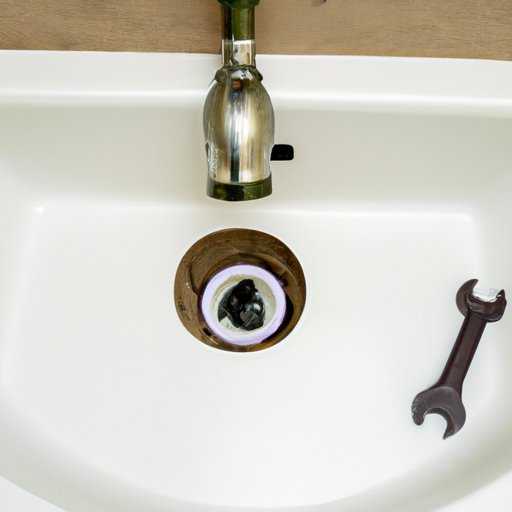
A bathroom sink drain is an important component of your sink setup. It collects water from the sink and directs it down the drainpipe. In order to keep your sink in good working order, you must periodically clean and/or replace the drain. This article provides a step-by-step guide on how to remove a bathroom sink drain, as well as tips on unclogging and replacing the drain.
Step-by-Step Guide to Removing a Bathroom Sink Drain
Removing a bathroom sink drain can be a tricky task, but with the right tools and some patience, you’ll be able to do it yourself. Here is a step-by-step guide to help you get started:
Preparing the area
Before you begin, you should take the time to prepare the area. Start by turning off the water supply to the sink and draining any remaining water from the basin. Once the sink is empty, cover the drain opening with a cloth or towel. This will help to prevent any small parts from falling into the drain.
Removing the drain stopper
The next step is to remove the drain stopper. Depending on the type of drain stopper you have, this may require unscrewing the knob or lever at the top of the drain. If necessary, use a pair of pliers to loosen the knob or lever. Once it is loose, you should be able to pull out the stopper.
Unscrewing the drain flange
Once the stopper has been removed, you can access the drain flange. The drain flange is the metal ring that holds the drain assembly together. Use a wrench to loosen the screws that secure the flange to the sink. Once the screws are removed, you should be able to lift off the flange.
Pulling out the old drain
With the flange removed, you can now pull out the old drain. Carefully grasp the drain pipe and pull it up and out of the sink. If the drain is stuck, you may need to use a pair of pliers to grip the pipe and help you pull it out.
Cleaning the area
After the old drain has been removed, take a few minutes to clean the area. Use a damp cloth to wipe away any debris that may have accumulated around the sink opening. You should also check the drain pipe for any blockages or build-up that could prevent the new drain from fitting properly.

DIY: How to Unclog a Bathroom Sink Drain
If your bathroom sink drain is clogged, there are several ways you can try to unclog it before resorting to removal. Here are a few methods you can try:
Assessing the clog
The first step is to assess the clog. Try running some hot water down the drain to see if that helps to loosen the clog. If the hot water does not work, you can try using a plunger to dislodge the clog.
Utilizing a plunger
A plunger is a simple tool that uses suction to clear clogs. To use a plunger, fill the sink with enough water so that the plunger cup is submerged. Then, press the plunger down firmly and quickly to create a tight seal around the drain opening. Pump the plunger several times to create a vacuum that will help to break up the clog.
Using an auger
If the plunger does not work, you can try using an auger. An auger is a long, flexible cable with a corkscrew tip. Insert the auger into the drain opening and turn the handle to rotate the cable. This will help to break up the clog and allow the water to flow freely again.
Applying chemical cleaners
If the above methods do not work, you can try using a chemical cleaner. These cleaners contain strong chemicals that can help to dissolve the clog. Before using a chemical cleaner, make sure to read the directions carefully and wear protective gloves.
A Beginner’s Guide to Replacing a Bathroom Sink Drain
If you’ve decided to replace your bathroom sink drain, here is a beginner’s guide to help you get started:
Measuring the sink
Before purchasing a new drain, you should measure the sink opening. Measure the length, width, and depth of the opening to ensure that the new drain will fit properly.
Purchasing the new drain
Once you know the measurements of the sink opening, you can purchase the new drain. Make sure to buy a drain that is compatible with your sink. This means that the drain should fit the same size and shape of the opening.
Installing the new drain
To install the new drain, start by inserting the drain pipe into the sink opening. Secure the drain pipe to the sink opening with a drain flange. Tighten the screws to ensure that the flange is secure. Once the drain pipe and flange are in place, you can attach the drain stopper.
Testing the drain
Finally, you should test the drain to ensure that it is installed correctly. Turn on the water supply and run some water through the drain. Check for any leaks or other issues that may indicate that the drain is not installed properly.
Tips for Easily Removing a Bathroom Sink Drain
Here are a few tips to help you easily remove a bathroom sink drain:
Use pliers for a better grip
When removing the drain stopper or unscrewing the drain flange, you may find that it’s difficult to get a good grip. Using a pair of pliers can help you get a better grip on the components and make the job easier.
Place a bucket or towel beneath the sink
As you are removing the old drain, it’s important to make sure that you don’t drop any small parts into the sink opening. Place a bucket or towel beneath the sink to catch any small pieces that may fall out.
Don’t force it if it won’t come out
If the old drain is stuck, don’t try to force it out. Instead, use a pair of pliers to grip the drain pipe and gently pull it out. Applying too much force may damage the pipe or cause it to break.

How to Remove a Bathroom Sink Drain Without Calling a Plumber
Removing a bathroom sink drain doesn’t have to mean calling a plumber. With the right tools and some patience, you can do it yourself. Here’s what you’ll need:
Gather the necessary tools
You’ll need a few basic tools for the job, including a wrench, a pair of pliers, and a bucket or towel. You may also want to have a plunger and an auger on hand in case the drain is clogged.
Follow the step-by-step guide
Refer to the step-by-step guide above for detailed instructions on how to remove the drain. Remember to take the necessary safety precautions, such as wearing protective gloves and eye protection.
Check for leaks after installation
Once the new drain has been installed, test it to make sure that it is working properly. Run some water through the drain and check for any signs of leaking. If you detect any leaking, you may need to adjust the drain flange or tighten the screws.

Common Mistakes to Avoid When Removing a Bathroom Sink Drain
Removing a bathroom sink drain can be a tricky task, so it’s important to avoid making the following common mistakes:
Not preparing the area
Before beginning the job, make sure to prepare the area. Turn off the water supply to the sink and cover the drain opening with a cloth or towel.
Using too much force
When removing the old drain, don’t use too much force. If the drain is stuck, use a pair of pliers to help you pull it out. Applying too much force may damage the pipe or cause it to break.
Forgetting to clean the area
Once the old drain has been removed, take a few minutes to clean the area. Use a damp cloth to wipe away any debris that may have accumulated around the sink opening.
Conclusion
Removing a bathroom sink drain can be a tricky task, but with the right tools and some patience, you can do it yourself. This article provided a comprehensive guide on how to remove a bathroom sink drain, as well as tips on unclogging and replacing the drain. By following the steps outlined in this article, you can easily remove your bathroom sink drain without having to call a plumber.