
Introduction
A kitchen sink is an essential part of any home, and one that gets used quite frequently. Over time, the caulk around the sink can become worn out and cracked, allowing water to seep into the space between the counter and the sink. To prevent this from happening, it is important to recaulk the sink on a regular basis. In this article, we will explore how to recaulk a kitchen sink, as well as provide helpful tips for getting the job done right.
Overview of the Problem
When the caulk around a kitchen sink becomes worn out or cracked, it can cause water to leak into the space between the counter and the sink. This can lead to mold and mildew growth in the area, which can cause health problems and damage to the surrounding surfaces. It is important to recaulk the sink to prevent this from happening. The process is relatively simple and can be done in just a few steps.

Benefits of Recaulking a Kitchen Sink
Recaulking a kitchen sink has several benefits, including:
- It prevents water from leaking into the space between the counter and the sink.
- It helps keep mold and mildew from growing in the area.
- It helps protect the surrounding surfaces from water damage.
- It can make the kitchen look more presentable.
Step-by-Step Guide to Recaulking a Kitchen Sink
Here is a step-by-step guide to recaulking a kitchen sink:
Gather Supplies
Before you begin, gather all the supplies you will need to complete the job. You will need a tube of caulk, a caulk gun, a utility knife, a putty knife, a rag, and a bucket of warm soapy water. Make sure you have all the necessary supplies before you start.
Prepare the Area
Start by cleaning the area around the sink with a damp cloth. Remove any old caulk or debris that may be stuck to the surface. Wipe down the area with a dry cloth to remove any remaining dirt or grime.
Remove the Old Caulk
Using a utility knife, carefully cut away any old caulk from around the sink. Be sure to go slowly and carefully to avoid damaging the area. Once you have removed all the old caulk, use a putty knife to scrape off any remaining bits of caulk.
Clean the Area
Once you have removed all the old caulk, thoroughly clean the area with a rag dampened with warm soapy water. This will help ensure that the new caulk adheres properly to the surface.
Apply New Caulk
Use a caulk gun to apply a bead of caulk around the edges of the sink. Make sure to go slowly and evenly to get a consistent line of caulk. Use a putty knife to smooth out any uneven areas.
Smooth and Seal the New Caulk
Once you have applied the caulk, use a damp cloth to smooth it out and seal it. This will help ensure a tight seal and prevent water from leaking into the space between the counter and the sink.
How to Remove and Replace Old Caulk Around Your Kitchen Sink
If the caulk around your kitchen sink is old, worn out, and cracked, it may be time to replace it. Here is a quick tutorial on how to remove and replace old caulk around your kitchen sink:
How to Identify Old, Worn Out Caulk
The best way to identify old, worn out caulk is to look for gaps, cracks, or discoloration in the caulk. If you notice any of these signs, it is likely time to replace the caulk.
What You’ll Need to Remove Old Caulk
To remove old caulk, you will need a utility knife, a putty knife, a rag, and a bucket of warm soapy water.
Steps for Replacing Old Caulk
Once you have gathered the necessary supplies, follow these steps to replace the old caulk:
- Cut away the old caulk with a utility knife.
- Scrape away any remaining bits of caulk with a putty knife.
- Clean the area with a rag dampened with warm soapy water.
- Apply a bead of caulk around the edges of the sink with a caulk gun.
- Smooth and seal the new caulk with a damp cloth.
DIY: Re-Caulking Your Kitchen Sink in Just a Few Easy Steps
Recaulking a kitchen sink is a relatively simple DIY project that can be done in just a few easy steps. Here is what you will need to get started:
Things You Will Need
- Caulk
- Caulk gun
- Utility knife
- Putty knife
- Rag
- Bucket of warm soapy water
Preparation
Start by cleaning the area around the sink with a damp cloth. Remove any old caulk or debris that may be stuck to the surface. Wipe down the area with a dry cloth to remove any remaining dirt or grime.
Applying the Caulk
Using a caulk gun, apply a bead of caulk around the edges of the sink. Make sure to go slowly and evenly to get a consistent line of caulk. Use a putty knife to smooth out any uneven areas.
Finishing Up
Once you have applied the caulk, use a damp cloth to smooth it out and seal it. This will help ensure a tight seal and prevent water from leaking into the space between the counter and the sink.

A Quick Tutorial on How to Recaulk Your Kitchen Sink
Recaulking a kitchen sink is a relatively simple process that can be done in just a few steps. Here is a quick tutorial on how to recaulk your kitchen sink:
Preparing the Area
Start by cleaning the area around the sink with a damp cloth. Remove any old caulk or debris that may be stuck to the surface. Wipe down the area with a dry cloth to remove any remaining dirt or grime.
Removing the Old Caulk
Using a utility knife, carefully cut away any old caulk from around the sink. Be sure to go slowly and carefully to avoid damaging the area. Once you have removed all the old caulk, use a putty knife to scrape off any remaining bits of caulk.
Cleaning the Area
Once you have removed all the old caulk, thoroughly clean the area with a rag dampened with warm soapy water. This will help ensure that the new caulk adheres properly to the surface.
Applying New Caulk
Use a caulk gun to apply a bead of caulk around the edges of the sink. Make sure to go slowly and evenly to get a consistent line of caulk. Use a putty knife to smooth out any uneven areas.
Sealing the New Caulk
Once you have applied the caulk, use a damp cloth to smooth it out and seal it. This will help ensure a tight seal and prevent water from leaking into the space between the counter and the sink.

Tips for an Easy and Effective Recaulking of Your Kitchen Sink
Here are some tips for an easy and effective recaulking of your kitchen sink:
- Choose the Right Caulk – Make sure to choose a caulk that is designed for use in bathrooms and kitchens. This will help ensure a proper seal.
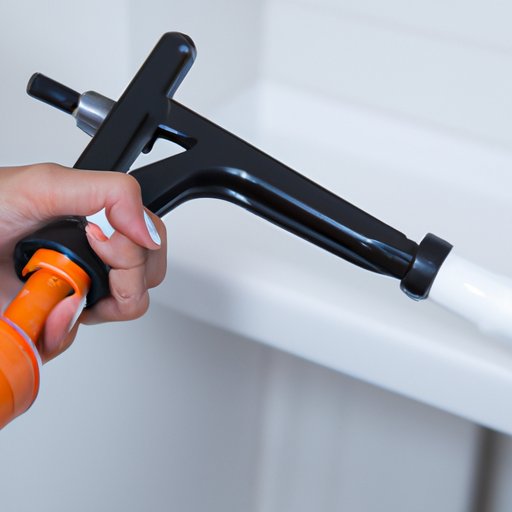
- Use a Caulk Gun – Using a caulk gun makes the application process much easier and more precise.
- Take Your Time – Take your time when applying the caulk. Rushing through the process can result in an uneven line of caulk.
The Best Way to Recaulk Your Kitchen Sink
The best way to recaulk your kitchen sink is to follow these steps:
Gather the Supplies
Before you begin, gather all the supplies you will need to complete the job. You will need a tube of caulk, a caulk gun, a utility knife, a putty knife, a rag, and a bucket of warm soapy water. Make sure you have all the necessary supplies before you start.
Prepping the Area
Start by cleaning the area around the sink with a damp cloth. Remove any old caulk or debris that may be stuck to the surface. Wipe down the area with a dry cloth to remove any remaining dirt or grime.
Applying the Caulk
Using a caulk gun, apply a bead of caulk around the edges of the sink. Make sure to go slowly and evenly to get a consistent line of caulk. Use a putty knife to smooth out any uneven areas.
Sealing the Caulk
Once you have applied the caulk, use a damp cloth to smooth it out and seal it. This will help ensure a tight seal and prevent water from leaking into the space between the counter and the sink.
Get the Job Done Right: How to Re-Caulk Your Kitchen Sink
Here is a quick tutorial on how to re-caulk your kitchen sink the right way:
Preparing the Area
Start by cleaning the area around the sink with a damp cloth. Remove any old caulk or debris that may be stuck to the surface. Wipe down the area with a dry cloth to remove any remaining dirt or grime.
Removing the Old Caulk
Using a utility knife, carefully cut away any old caulk from around the sink. Be sure to go slowly and carefully to avoid damaging the area. Once you have removed all the old caulk, use a putty knife to scrape off any remaining bits of caulk.
Applying the New Caulk
Use a caulk gun to apply a bead of caulk around the edges of the sink. Make sure to go slowly and evenly to get a consistent line of caulk. Use a putty knife to smooth out any uneven areas.
Finishing Up
Once you have applied the caulk, use a damp cloth to smooth it out and seal it. This will help ensure a tight seal and prevent water from leaking into the space between the counter and the sink.
Conclusion
Recaulking a kitchen sink is an important part of maintaining your home. By following the steps outlined in this article, you can easily recaulk your kitchen sink and protect it from water damage. Remember to choose the right caulk, use a caulk gun, and take your time when applying the caulk. With a little bit of effort, you can keep your kitchen sink looking its best for years to come.
Summary of Steps
- Gather the necessary supplies.
- Prepare the area.
- Remove the old caulk.
- Clean the area.
- Apply new caulk.
- Smooth and seal the new caulk.
Final Thoughts
Recaulking your kitchen sink is a relatively simple process that can be done in just a few steps. By taking the time to recaulk your sink on a regular basis, you can prevent water damage and maintain the look of your kitchen. With a little bit of effort, you can keep your kitchen sink looking its best for years to come.