
Introduction
Are you looking for a way to repair and refresh an old chair? Recaning is a great option for bringing life back to a dated or damaged piece of furniture. But what exactly is recaning? And how do you go about doing it yourself? Read on to learn all about recaning a chair and how to do it yourself.
Definition of “Recaning”
Recaning is the process of replacing the seat of a chair with a new piece of cane webbing. Cane webbing is made from the inner bark of rattan plants and is woven into a tight mesh pattern. This mesh is then attached to the seat of the chair using spline, wedges, and glue. The result is a sturdy and attractive seat that can last for years.

Benefits of Recaning a Chair
Recaning a chair has many benefits. Not only does it restore a chair to like-new condition, but it also adds a unique style to any room. It is also a relatively inexpensive way to update an old piece of furniture. And since recaning is a fairly simple process, anyone can do it themselves with a few basic tools and supplies.
Step-by-Step Guide to Recaning a Chair
Ready to get started? Follow these steps for recaning a chair.
Gather Necessary Supplies
Before you begin, make sure you have all the necessary supplies. You’ll need cane webbing, a spline roller, spline, wedges, glue, sandpaper, and a pair of scissors. Depending on the type of chair you’re recaning, you may also need a drill, dowel rods, and a saw.
Remove Old Cane and Clean the Frame
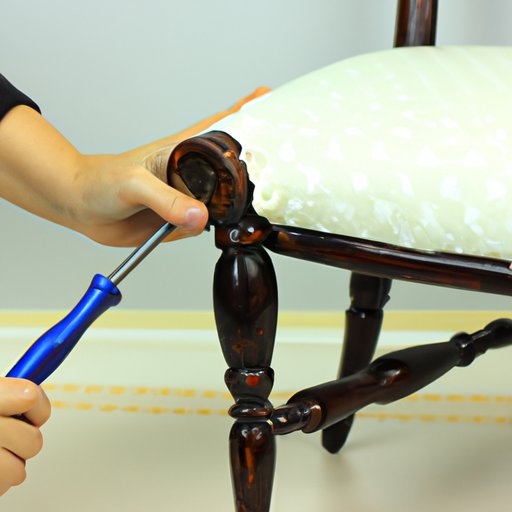
Once you have your supplies, it’s time to get to work. Start by removing the old cane from the frame. Use a flathead screwdriver to carefully pry up the old spline and remove the wedges. If there are any broken parts, you will need to replace them before continuing.
Next, clean the frame with a damp cloth and let it dry completely. Then sand down any rough edges and wipe away the dust.
Cut New Cane to Size
Now it’s time to cut the new cane to size. Measure the seat of the chair and add 1 inch to each side for a total of 2 inches. Cut the cane to the appropriate size using scissors. Make sure to leave a small gap between the end of the cane and the edge of the frame.
Attach Cane to Frame with Spline
Once the cane is cut to size, attach it to the frame with spline. Start at one corner and use a spline roller to press the spline into the groove in the frame. Work your way around the frame, pressing the spline firmly into place.
Secure Cane with Wedges
When the spline is in place, secure the cane to the frame with wedges. Place the wedges between the cane and the frame and tap them lightly with a hammer until they are flush against the frame.
Finish with Stain or Paint
Finally, finish the job with a coat of stain or paint. This will help protect the cane and give it a polished look. Allow the stain or paint to dry completely before using the chair.
Recaning a Chair – The Basics and Beyond
Recaning a chair is a relatively simple process, but there are a few things to keep in mind. Here are some tips for successful recaning.
Different Types of Cane
Not all cane webbing is created equal. There are several different types of cane, including natural, synthetic, and paper. Natural cane is the most traditional and durable option, but it can be expensive. Synthetic cane is less expensive and easier to work with, but it isn’t as durable. Paper cane is the least expensive option, but it isn’t as strong and won’t last as long.
Tools Needed for Recaning
In addition to the supplies mentioned above, you may need a few other tools depending on the type of chair you are recaning. For example, a drill and saw may be needed to make holes in the frame or dowel rods may be required to secure the cane. Be sure to check the instructions for your specific chair before beginning.
Tips and Tricks for Successful Recaning
Recaning a chair is not difficult, but it does require patience and precision. Here are a few tips to ensure success:
- Take your time and measure twice before cutting.
- Work slowly and carefully to avoid mistakes.
- Use a damp cloth to wipe away excess glue.
- Allow enough time for the stain or paint to dry completely before using the chair.
- If possible, practice recaning on an old chair before attempting to recane a valuable piece of furniture.
A Beginner’s Guide to Recaning a Chair
Recaning a chair may seem daunting at first, but with a little patience and the right supplies, it can be done. Here’s a beginner’s guide to recaning a chair.
What You’ll Need
Before you start, make sure you have the necessary supplies. You’ll need cane webbing, a spline roller, spline, wedges, glue, sandpaper, and a pair of scissors. Depending on the type of chair you’re recaning, you may also need a drill, dowel rods, and a saw.
Preparing the Frame
Once you have your supplies, it’s time to prepare the frame. Start by removing the old cane and cleaning the frame with a damp cloth. Sand down any rough edges and wipe away the dust. Next, measure the seat of the chair and add 1 inch to each side for a total of 2 inches. Cut the cane to the appropriate size using scissors.
Installing the Cane
Now it’s time to install the cane. Start at one corner and use a spline roller to press the spline into the groove in the frame. Work your way around the frame, pressing the spline firmly into place. When the spline is in place, secure the cane to the frame with wedges. Place the wedges between the cane and the frame and tap them lightly with a hammer until they are flush against the frame.
Finishing Touches
Finally, finish the job with a coat of stain or paint. This will help protect the cane and give it a polished look. Allow the stain or paint to dry completely before using the chair.

Make Your Old Chair Look New Again: How to Recane It
Recaning is a great way to make an old chair look new again. Follow these steps to recane a chair.
Choosing the Right Cane Material
The first step in recaning a chair is choosing the right cane material. There are three main types of cane: natural, synthetic, and paper. Natural cane is the most durable and traditional option, but it can be expensive. Synthetic cane is less expensive and easier to work with, but it isn’t as durable. Paper cane is the least expensive option, but it isn’t as strong and won’t last as long.
Stripping and Cleaning the Frame
Once you’ve chosen the right cane, it’s time to strip and clean the frame. Start by removing the old cane and cleaning the frame with a damp cloth. Sand down any rough edges and wipe away the dust.
Measuring and Cutting the Cane
Next, measure the seat of the chair and add 1 inch to each side for a total of 2 inches. Cut the cane to the appropriate size using scissors. Make sure to leave a small gap between the end of the cane and the edge of the frame.
Securing the Cane
Now it’s time to secure the cane. Start at one corner and use a spline roller to press the spline into the groove in the frame. Work your way around the frame, pressing the spline firmly into place. When the spline is in place, secure the cane to the frame with wedges. Place the wedges between the cane and the frame and tap them lightly with a hammer until they are flush against the frame.

How to Repair and Refresh a Chair with Recaning
Recaning is a great way to repair and refresh a chair. Here’s how to do it.
Identifying Areas Needing Repair
Start by inspecting the chair for areas that need repair. Check for loose joints, cracks, or broken parts. If any of these are present, they should be repaired or replaced before recaning.
Patching Holes in the Frame
If there are any holes in the frame, they should be patched before recaning. Use wood putty or epoxy to fill in the holes and allow it to dry completely before continuing.
Replacing Broken Parts
If any parts are broken, they should be replaced before recaning. Measure the broken part and purchase a replacement from a hardware store. Install the new part according to the instructions and let it dry completely before proceeding.
Refinishing the Frame
Once the frame is repaired, it’s time to refinish it. Sand down any rough edges and wipe away the dust. Then apply a coat of stain or paint and let it dry completely before recaning.
DIY Recaning: A Comprehensive Tutorial
Recaning a chair is a relatively simple process, but it can be intimidating for beginners. Here’s a comprehensive tutorial for DIY recaning.
Assessing the Damage
Before you begin, assess the damage to the chair. Inspect the frame for any loose joints, cracks, or broken pieces. Make sure to repair or replace any damaged parts before continuing.
Preparing the Frame
Once the frame is repaired, it’s time to prepare it for recaning. Start by stripping the old cane and cleaning the frame with a damp cloth. Sand down any rough edges and wipe away the dust.
Selecting the Right Cane
Now it’s time to select the right cane. There are three main types of cane: natural, synthetic, and paper. Natural cane is the most traditional and durable option, but it can be expensive. Synthetic cane is less expensive and easier to work with, but it isn’t as durable. Paper cane is the least expensive option, but it isn’t as strong and won’t last as long.
Attaching the Cane
Once you’ve chosen the right cane, it’s time to attach it to the frame. Measure the seat of the chair and add 1 inch to each side for a total of 2 inches. Cut the cane to the appropriate size using scissors. Attach the cane to the frame with spline, working your way around the frame. Secure the cane with wedges and tap them lightly with a hammer until they are flush against the frame.
Finishing Up
Finally, finish the job with a coat of stain or paint. This will help protect the cane and give it a polished look. Allow the stain or paint to dry completely before using the chair.
Conclusion
Recaning a chair is a great way to restore an old piece of furniture. With a few basic supplies and some patience, anyone can do it themselves. Follow the steps outlined in this article and you’ll be well on your way to giving your old chair a new lease on life.