
Introduction
Riding a bike is an enjoyable way to travel, exercise, or just have fun. But for some cyclists, their handlebars may be too low, making it difficult to ride comfortably. Fortunately, raising handlebars on a bicycle is a relatively simple process that can make a world of difference in terms of comfort and performance.
Overview of the Problem
Handlebars on a bicycle are typically one of two types: drop bars or flat bars. Drop bars offer better aerodynamics and a more aggressive riding position, while flat bars provide a more upright riding position. While both types of handlebars have advantages, they also have drawbacks. Drop bars are often uncomfortable for long rides, while flat bars can be too low for some riders.
Benefits of Raising Handlebars
Raising handlebars on a bicycle has several benefits. It can provide a more comfortable and efficient riding position, allowing for better control and less fatigue. It can also help improve posture, as a higher handlebar position helps keep the spine in a more natural position. Finally, raising handlebars can open up new opportunities for mountain biking and other off-road riding styles.
Step-by-Step Guide on How to Raise Handlebars on a Bicycle
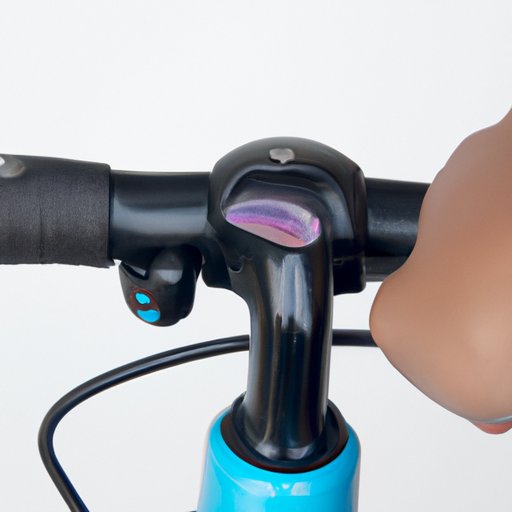
Before attempting to raise handlebars on a bicycle, you should gather the necessary tools and materials. You will need a Phillips screwdriver, a hex key wrench set, pliers, a hacksaw, and a file. You may also need replacement parts such as new handlebars, stem, spacers, and headset bearings.
Instructions for Removing Old Handlebars
The first step in raising handlebars on a bicycle is to remove the existing handlebars. Begin by loosening the stem bolt at the top of the handlebars with a Phillips screwdriver. Once the bolt is loose, unscrew the stem from the steerer tube and remove the handlebars. Be sure to save the spacers and headset bearings for use with the new handlebars.
Inserting New Handlebars
Once the old handlebars have been removed, you can install the new handlebars. Start by inserting the stem into the steerer tube and making sure it is securely tightened. Then, slide the spacers onto the stem and insert the headset bearings. Now, slide the handlebars into the stem and secure them with the stem bolt.
Securing New Handlebars
The final step in raising handlebars on a bicycle is to secure the new handlebars. Use a hex key wrench to tighten the stem bolt at the top of the handlebars. Be sure to check the tightness regularly to ensure your handlebars remain secure.

Comprehensive Tutorial on Raising Handlebars on a Bicycle
Now that you know the basics of how to raise handlebars on a bicycle, let’s look at some tips and tricks for getting the best results.
Different Types of Handlebars
When selecting new handlebars for your bicycle, it’s important to choose the right type. There are several different types of handlebars available, including riser bars, bullhorns, and flat bars. Each type has its own advantages and disadvantages, so it’s important to research all your options before making a decision.
Adjusting Handlebars for Comfort
Once you’ve selected the right type of handlebars, you can begin adjusting them for comfort. Different riders prefer different heights and angles, so it’s important to experiment and find what works best for you. To adjust the height, loosen the stem bolt and move the handlebars up or down until they reach the desired height. To adjust the angle, loosen the stem bolt and rotate the handlebars until they reach the desired angle.
Height and Angle Considerations
When raising handlebars on a bicycle, it’s important to consider both the height and angle. Generally speaking, the handlebars should be level with the saddle, and the height should be adjusted so that your arms are slightly bent when riding. It’s also important to make sure the handlebars are not too high, as this can cause strain on your neck and shoulders.

Tips and Tricks for Raising Handlebars on a Bicycle
In addition to the basic steps outlined above, there are several tips and tricks you can use to get the best results when raising handlebars on a bicycle.
Replacing Parts as Necessary
If your existing handlebars are worn or damaged, it’s a good idea to replace them with new ones. This will ensure your handlebars are secure and won’t slip or break during use.
Using Loctite or Other Adhesives
To ensure the stem bolt stays secure, it’s a good idea to use a threadlocker such as Loctite or another adhesive. This will help keep the bolt from coming loose over time.
Selecting Appropriate Materials
When selecting new handlebars, it’s important to choose materials that are appropriate for your needs. For example, if you plan on doing a lot of off-road riding, you should choose handlebars made from aluminum or carbon fiber.
DIY Instructions for Raising Handlebars on a Bicycle
For those who want to go the extra mile, there are several DIY methods for raising handlebars on a bicycle.
Measuring Handlebar Length
Before cutting any material, it’s important to measure the length of the handlebars. This will ensure that the new handlebars are the right size for your bike.
Cutting and Filing Handlebar Ends
Once you’ve measured the length of the handlebars, you can begin cutting and filing the ends. Use a hacksaw to cut the handlebars to the desired length, then use a file to smooth out any rough edges.
Finishing Touches
Once the handlebars have been cut and filed, you can add any finishing touches. This could include adding grips or bar tape for a more comfortable ride.
A Beginner’s Guide to Raising Handlebars on a Bicycle
If you’re a beginner, there are a few things you should keep in mind when raising handlebars on a bicycle.
Common Mistakes to Avoid
One of the most common mistakes beginners make is not tightening the stem bolt enough. This can lead to the handlebars slipping or even breaking during use. It’s important to make sure the stem bolt is secure before taking your bike for a ride.
Troubleshooting Problems
If you’re having trouble raising handlebars on a bicycle, you may need to troubleshoot the problem. The most common issue is an improperly installed stem bolt, which can be fixed by removing the bolt and re-installing it correctly.
Taking Time to Test Fit
Finally, it’s important to take your time when raising handlebars on a bicycle. Make sure the handlebars are properly positioned and secure before taking your bike for a ride.
Conclusion
In conclusion, raising handlebars on a bicycle is a relatively simple process that can make a world of difference in terms of comfort and performance. By following the steps outlined in this article, you can easily raise handlebars on your bike and enjoy a more comfortable ride.
Summary of Main Points
This article provided a comprehensive guide to raising handlebars on a bicycle. It covered the tools needed, step-by-step instructions, tips and tricks, DIY methods, and beginner’s advice for a successful result.
Encouraging Further Research
Raising handlebars on a bicycle is a complex process that requires careful consideration. If you’re unsure about any part of the process, it’s important to do some additional research before beginning.