
Introduction
Camping is one of the most popular outdoor activities in the world. It’s a great way to enjoy nature and spend quality time with family and friends. But before you can start exploring the outdoors, you need to know how to put up a tent. This article provides a comprehensive guide on how to do just that. We’ll cover everything from gathering the necessary equipment to adding accessories for comfort. By the end of this article, you’ll have all the information you need to pitch your tent like a pro.
Gather the Necessary Equipment
The first step to setting up a tent is to gather the necessary equipment. This includes the tent itself, tent poles, stakes, and any additional accessories you might want. When it comes to tents, there are many different styles and sizes to choose from. You should select a tent based on the number of people who will be sleeping in it and the type of camping trip you’re going on. If you’re camping in cold weather, for example, you might want to get a four-season tent or a winter camping tent.
Tent poles are usually made of aluminum or fiberglass and come in various lengths. Depending on the size and shape of your tent, you may need 2-6 poles. Stakes are also important, as they help secure the tent to the ground. The best stakes are made of steel or aluminum, but plastic stakes can also be used. Finally, if you’re looking for additional comfort, you can bring accessories such as a tarp, a footprint, or a rainfly.
Choose a Suitable Location
Once you’ve gathered the necessary equipment, it’s time to pick a suitable location for your tent. Before you decide on a spot, there are several factors to consider. First, make sure the area is flat and free of debris. You don’t want anything poking through the bottom of your tent while you’re sleeping. Second, look for shelter from the wind and sun. If possible, try to find a spot near a tree or other natural windbreak. Third, check for evidence of wildlife. If you see signs of animals, move elsewhere.
Additionally, you should always check with the park or forest service before setting up camp. Some areas may be closed off due to fire danger or other safety concerns. It’s also important to check for any local regulations regarding campfires, noise levels, and littering. Once you’ve found the perfect spot, it’s time to start setting up the tent.
Unpack and Lay Out the Tent
The next step is to unpack and lay out the tent. Start by spreading out the tent body on the ground. Make sure it’s completely unfolded and all the seams are lined up correctly. Then, attach the fly (if applicable) to the top of the tent. This will provide extra protection from wind and rain. Once the tent body and fly are laid out, insert the poles into their designated slots.
To ensure the tent is set up properly, you may want to practice before you go camping. This will give you an idea of how to orient the poles and which clips to use. It will also help you identify any potential issues with the tent before you’re out in the field.
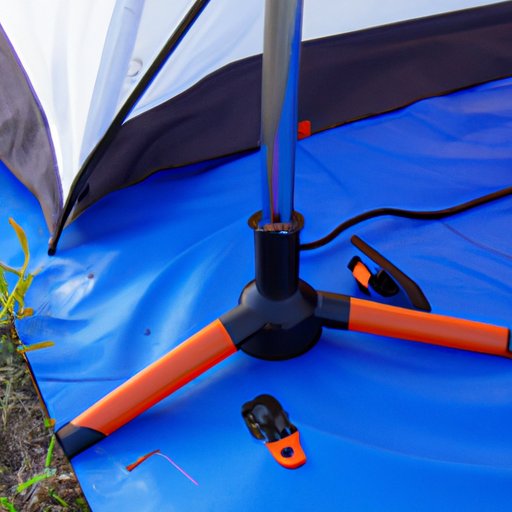
Insert the Tent Poles
The next step is to insert the tent poles. When inserting the poles, make sure they’re oriented correctly. Most tents require the poles to be inserted perpendicular to the ground. Once the poles are in place, secure them with the clips provided. These clips are usually made of plastic or metal and help keep the poles in place.
Depending on the type of tent you have, you may need to use additional clips to secure the poles. For example, some dome tents require the poles to be connected at the top. In this case, you would need to use special clips to connect the poles together. Additionally, most tents come with adjustable straps that can be used to further secure the poles.
Stake Down the Tent
Now that the poles are in place, it’s time to stake down the tent. Stakes are used to secure the tent to the ground and prevent it from blowing away in the wind. Most tents come with their own stakes, but you can also purchase additional ones if needed. When staking down the tent, make sure the stakes are firmly in the ground and the lines are tight. This will help keep the tent secure in high winds.
When staking down the tent, pay attention to the orientation of the stakes. Many tents have specific instructions for where each stake should go. Additionally, you may want to use rocks or other heavy objects to further anchor the tent in place. This will help ensure the tent stays secure throughout the night.
Add Accessories for Comfort
Finally, you can add accessories for comfort. There are a variety of accessories available, such as tarps, footprints, and rainflys. Tarps are great for providing extra protection from the elements. They can be used to create a sheltered area outside the tent or as a groundsheet inside the tent. Footprints are also useful, as they protect the bottom of the tent from wear and tear.
Rainflys are another great accessory for keeping the tent dry. They attach to the outside of the tent and provide extra protection from the rain. Additionally, you can bring along pillows, blankets, and other items to make your tent more comfortable. With these accessories, you can turn your tent into a cozy home away from home.
Conclusion
Setting up a tent doesn’t have to be complicated. With the right equipment and a bit of practice, you can easily learn how to put up a tent. Start by gathering the necessary equipment and finding a suitable location. Then, unpack and lay out the tent, insert the poles, and stake it down. Finally, add accessories for extra comfort. By following these steps, you’ll be able to set up your tent like a pro.